Troubleshooting Tips
Need Help?
If you need technical assistance or more information on a product that is not working as you expected, we recommend heading on over to the SparkFun Technical Assistance page for some initial troubleshooting.
If you can't find what you need there, the SparkFun Forums is a great place to search product forums and ask questions.
Account Registration Required
If this is your first visit to our forum, you'll need to create a Forum Account to post questions.
Upload Issues🔗
If users have issues during the uploading process, they can try to manually force the board into the serial bootloader with the BOOT button. Holding down the BOOT button, while connecting the board to a computer through its USB-C connector or resetting the board will cause the MCU to enter the Firmware Download mode and its serial bootloader. The board will remain in this mode until it power cycles (which happens automatically after uploading new firmware) or the RST button is pressed.
- Hold the BOOT button down.
- Reset the MCU.
- While unpowered, connect the board to a computer through the USB-C connection.
- While powered, press the RST button.
- Release the BOOT button.
- After programming is completed, reboot the MCU.
- Press the RST button.
- Power cycle the board.
BOOT button on the ESP32-WROOM Thing Plus.
COM Port Not Shown🔗
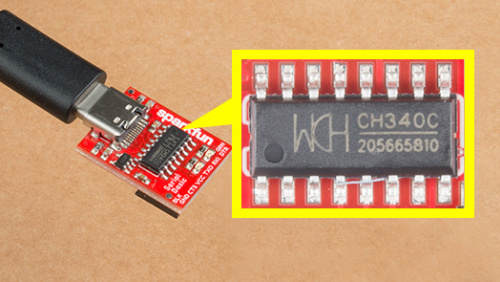
If the board doesn't appear on a COM port, double check the correct driver has been installed. Unlike previous versions of the ESP32 Thing Plus, this variant requires the CH340 driver to be installed. For more information, check out our How to Install CH340 Drivers Tutorial.

How to Install CH340 Drivers
Users can also check their USB cable; some cables are power only. Try testing the cable with a smartphone or tablet to see if it appears as a device on the computer. If the phone/tablet doesn't appear, then the USB cable is power only.
Serial Stream Difficulties🔗
We have noticed that with the ESP32 Arduino core, Serial.available() does not operate instantaneously. This is due to an interrupt triggered by the UART, to empty the FIFO when the RX pin is inactive for two-byte periods:
- At 9600 baud,
hwAvailabletakes [number of bytes received+ 2] x 1 ms = 11 ms before the UART indicates that data was received from:\r\nERROR\r\n. - At 115200 baud,
hwAvailabletakes [number of bytes received+2] x .087 ms = ~1 ms before the UART indicates that data was received from:\r\nERROR\r\n.
For more information, please refer to this chatroom discussion.
µSD Card🔗
Make sure that the µSD card is compatible with the Arduino library being used for it. For example, the default SD Arduino library is only compatible with FAT16 or FAT32 file systems; therefore, the card capacity is limited to 16GB or 32GB and smaller. Another consideration is that the library was also written to only handle short 8.3 names for files.
Qwiic Connector Power🔗
For users having issues with the power to their Qwiic devices, don't forget that GPIO 0 controls the power output from the XC6222 LDO regulator to the Qwiic connector. Users must toggle GPIO 0 high to enable power for the Qwiic connector. In order to conserve battery power or in low-power applications, users will toggle GPIO 0 low, to disable the power to the Qwiic connector.
Note
GPIO 0 is also connected to the BOOT button. Therefore, pressing the BOOT button will momentarily disable power to the Qwiic connector.
Current Consumption🔗
For ultra-low power projects, these are the current consumption of the individual components, as specified in their datasheet:
|
|
