 |
flux sdk
v01.05.00-6-g190c94c
Embedded C++ SDK
|
|
flux sdk
v01.05.00-6-g190c94c
Embedded C++ SDK
|
One of the key features of the Flux Framework is it's simplified access to IoT service providers. This document outlines how an Arduino IoT Device is used by the Flux framework.
The following is covered by this document:
Currently, the Arduino IoT device connection is a single direction - used to post data from the hardware to the Arduino IoT Device. Configuration information from AWS IoT to the framework is currently not implemented.
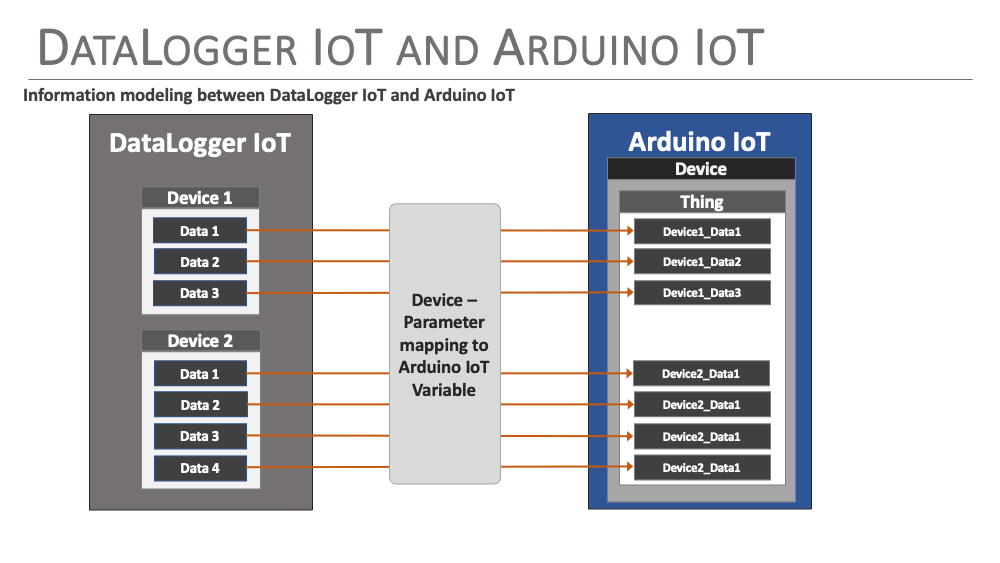
The Arduino IoT Cloud enables connectivity between an IoT/Edge Arduino enabled device and the cloud. The edge device updates data in the Arduino Cloud by updating variables or parameters attached to a cloud device.
In the Arduino Cloud, the edge device is represented by a Device which has a virtual Thing attached/associated with it. The Thing acts as a container for a list of parameters or variables which represent the data values received from the edge device. As values on the edge device update, they are transmitted to the Arduino Cloud.
For a SparkFun Flux (DataLogger Iot for example) device connected to an Arduino IoT device, the output parameters of a device are mapped to variables within the Arduino IoT Devices Thing using a simple pattern of DeviceName_*ParameterName* for the name of the variable in the Arduino IoT Cloud.
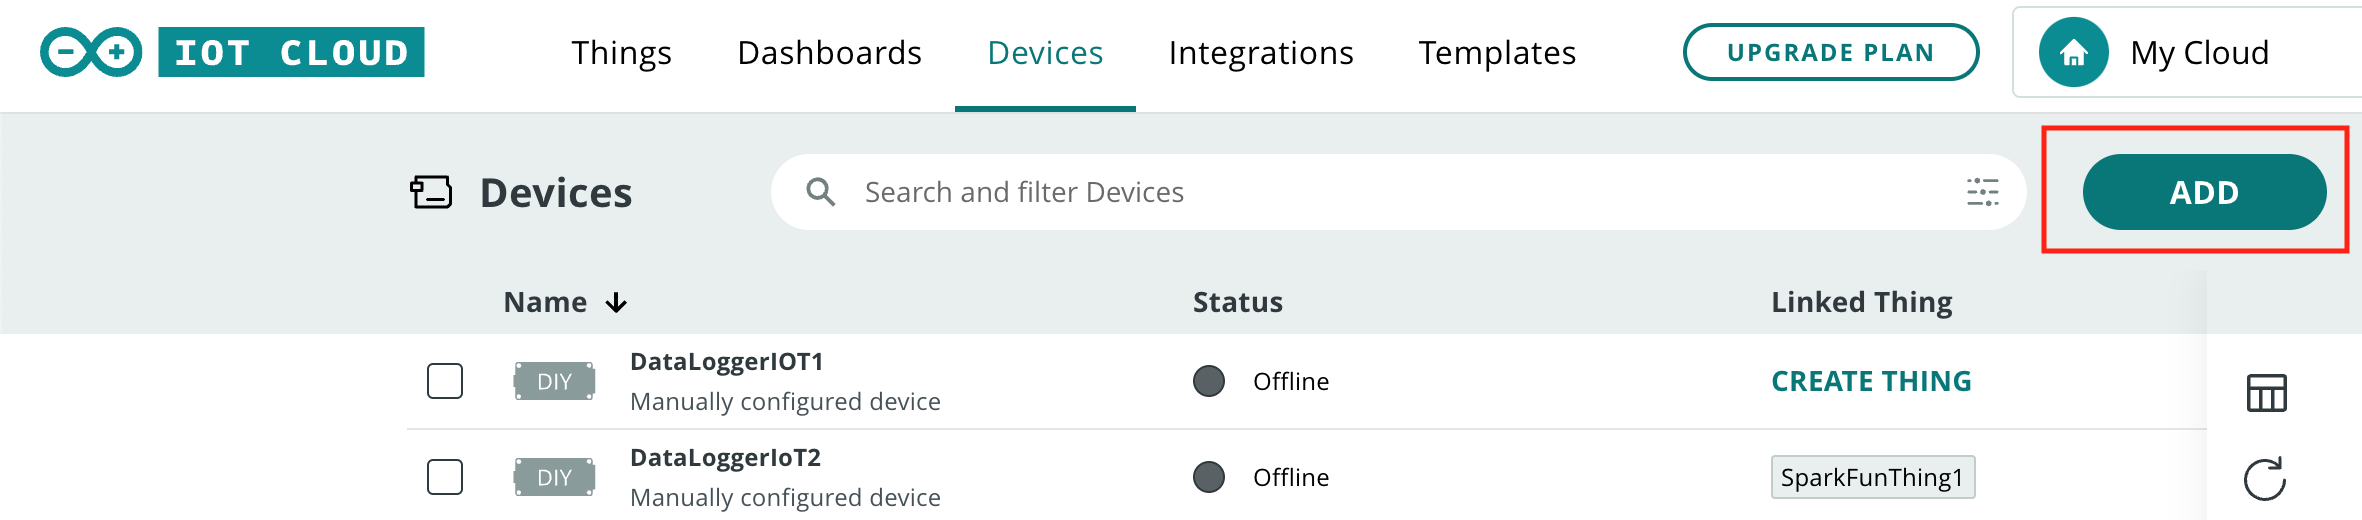
The first step connecting to the Arduino IoT cloud is setting up a device within the cloud. A device is a logical element represents a physical device.
The first step is to login to your Arduino IoT cloud account and navigate to the Devices page on the IoT Cloud. This page lists your currently defined devices.
First select the Add button on the top of the page.
A device type selection dialog is then shown. Since we are connecting a DataLogger IoT board to the system, and not connected a known device, select DIY - Any Device.
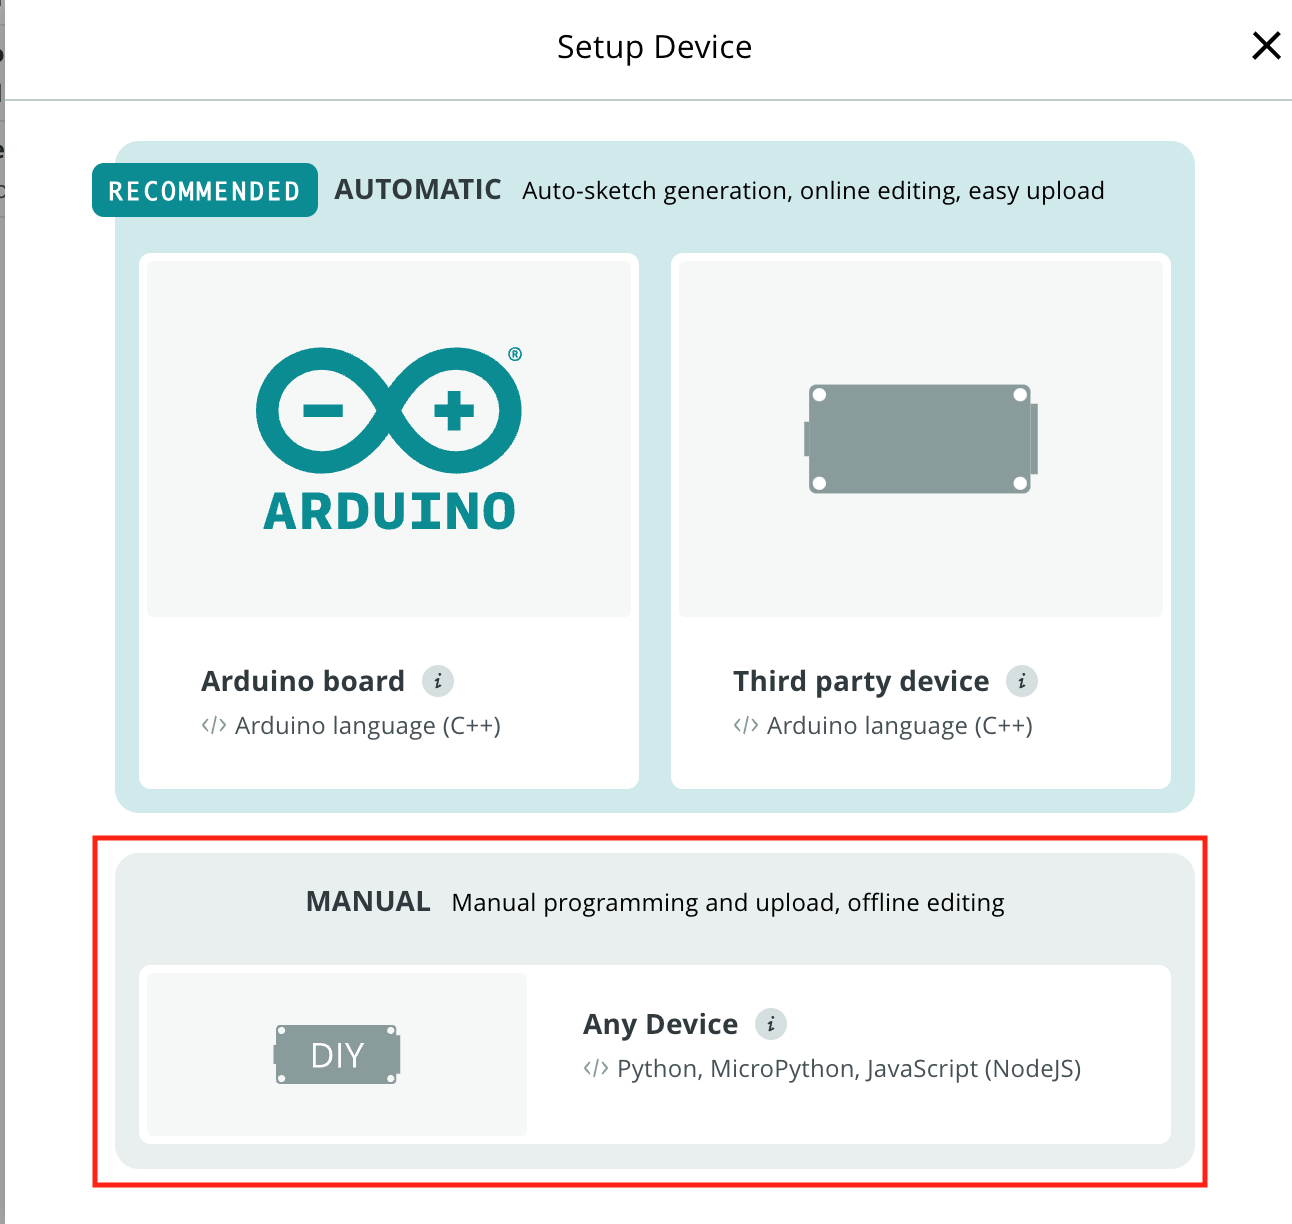
Once selected, another dialog is presented. Just select Continue.
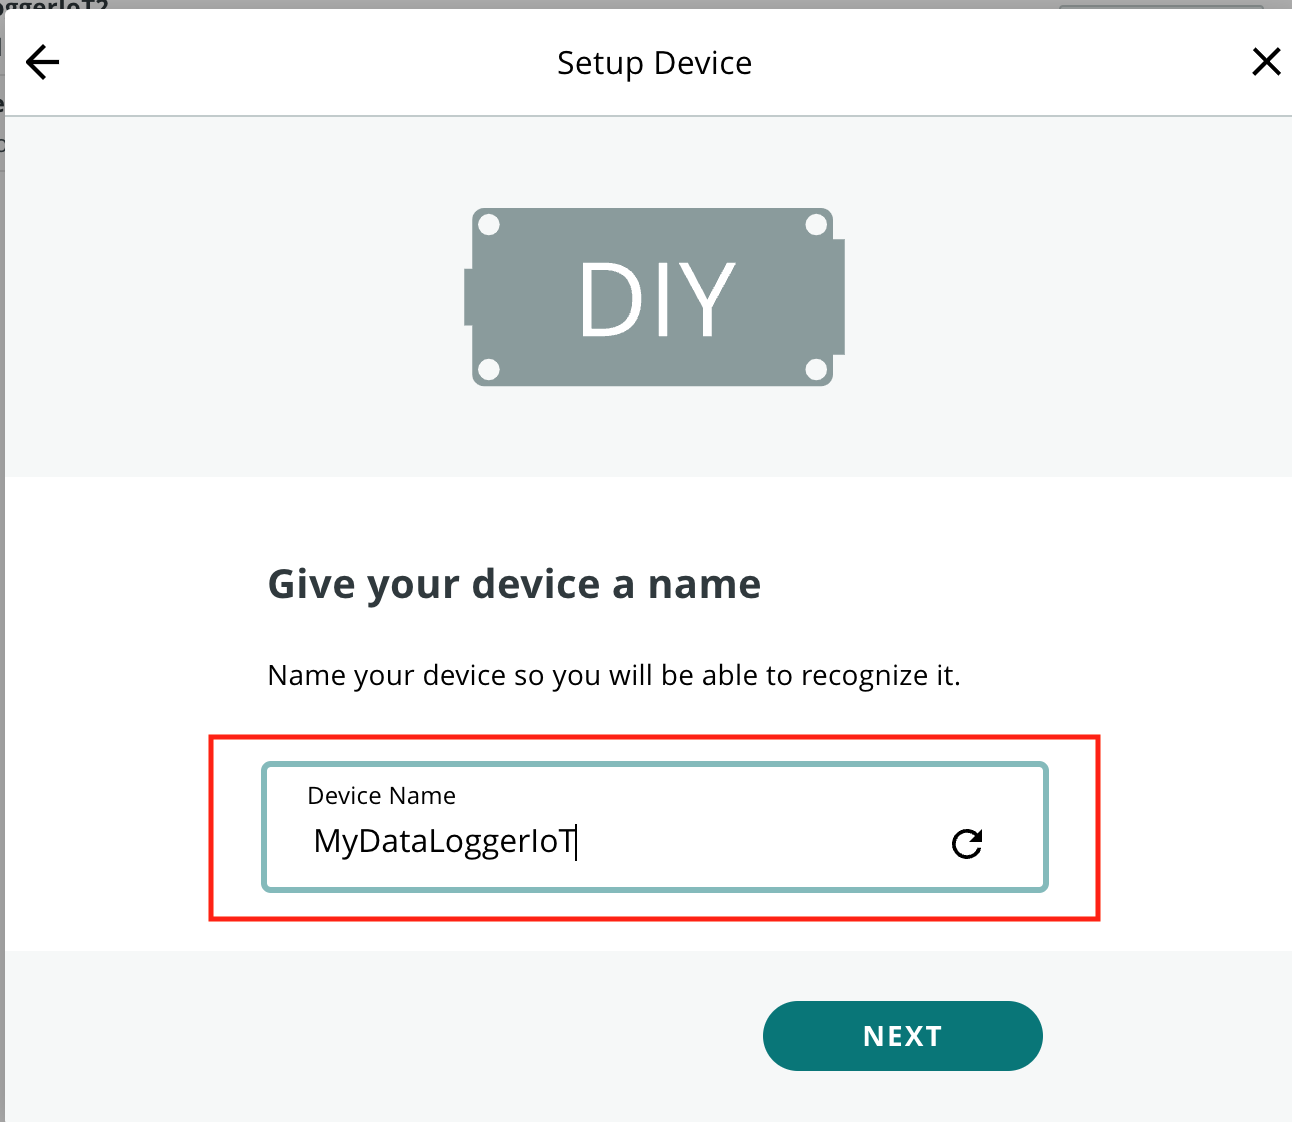
At this point you can provide a name for your device.
The next screen is the critical step of the device creation process. This step is the one time the Device Secret Key is available. The provided Device ID and Device Secret Key values are needed to connect to the Arduino IoT Cloud. Once this step is completed, the Secret Key is no longer available.
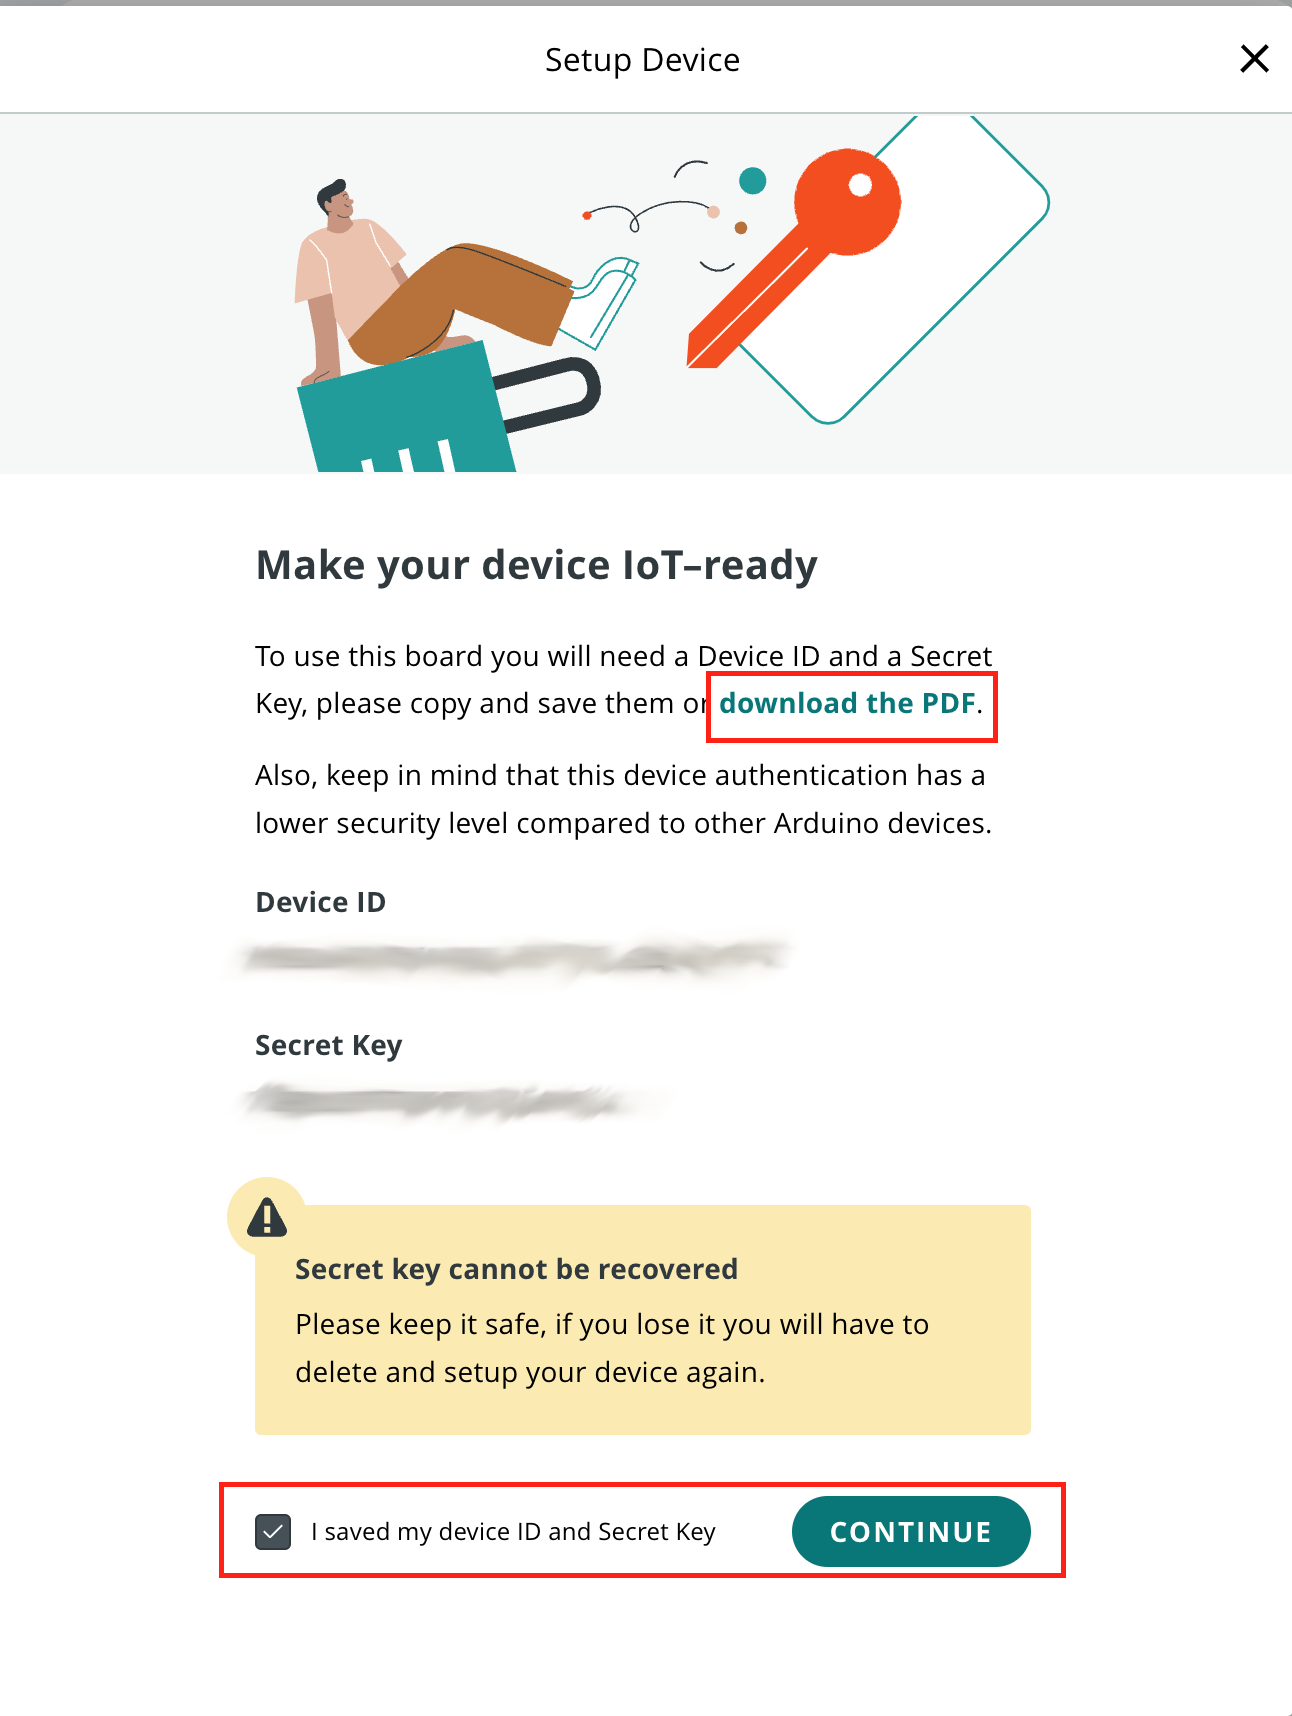
The easiest way to capture these values is by downloading as a PDF file, which is offered on the setup page.
In addition to creating a device, to access the Arduino IoT Cloud, the driver requires a API Key. This allows the Flux Arduino IoT Cloud driver to access the web API of the Arduino Cloud. This API is used to setup the connection to the Arduino Cloud.
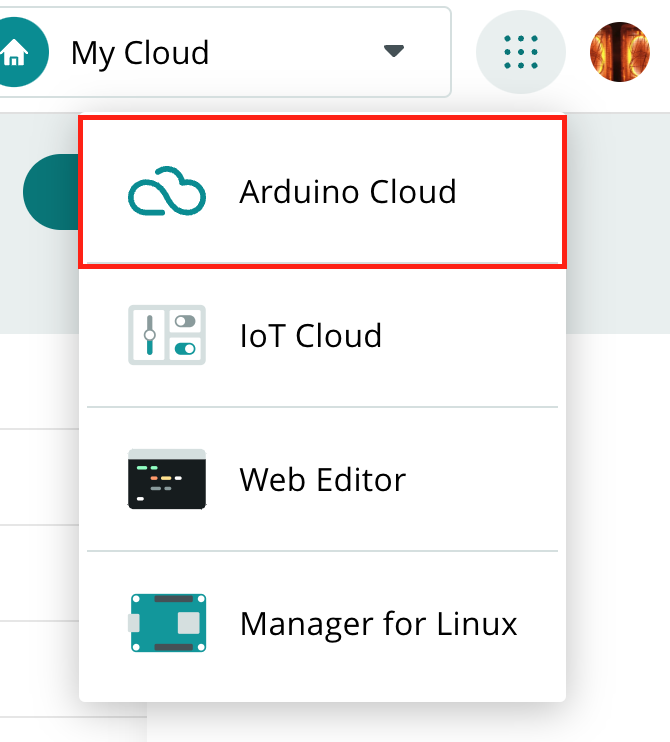
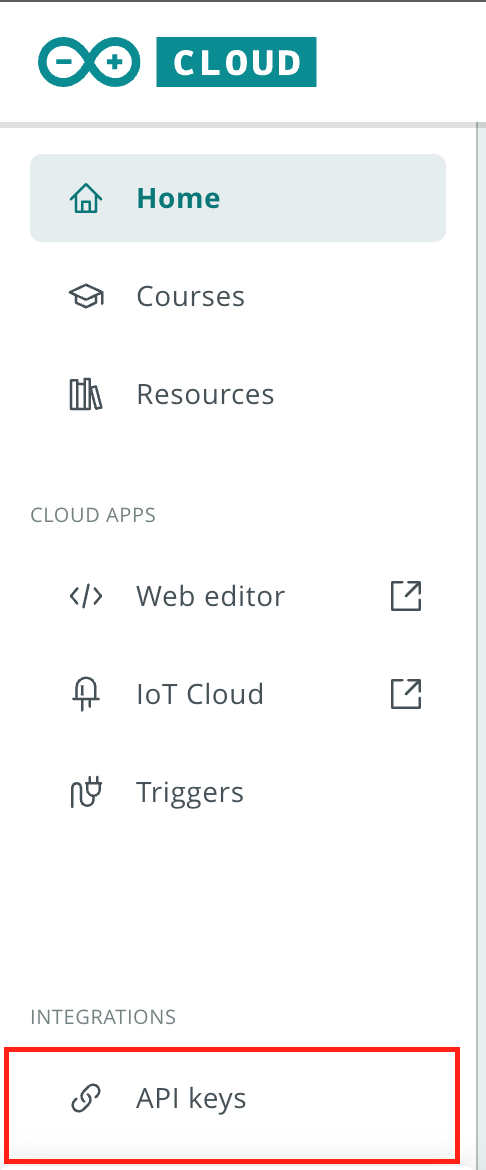
To create an API key, start at the Arduino Cloud home page. From this page, select the API keys menu entry on the left side of the page.
This menu takes you to a list of existing API Keys. From this page, select the CREATE API KEY button, which is on the upper right of the page.

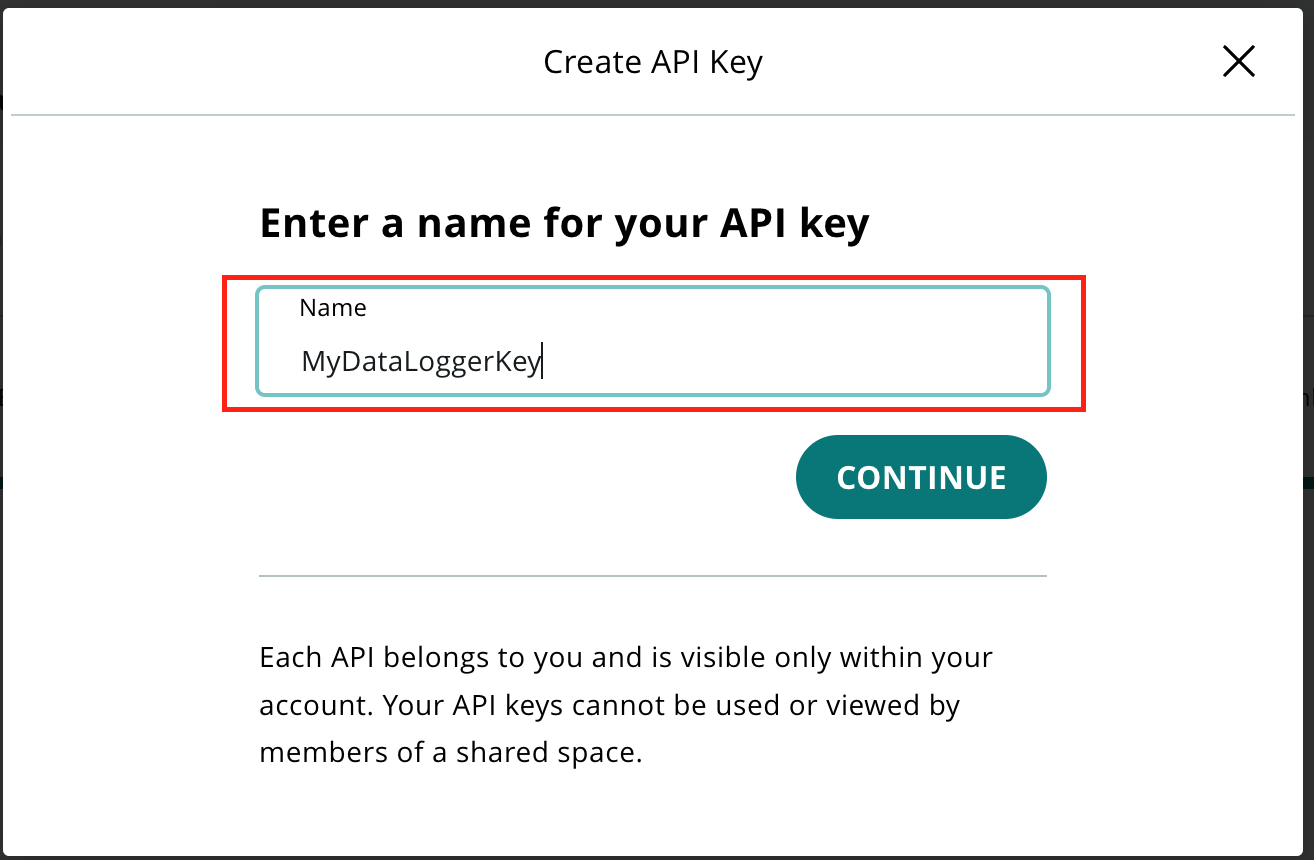
In the presented dialog, enter a name for the API key.
Once the name is entered and CONTINUE selected, a page with the new API key is presented. Like in Device Creation, this page contains a secret that is only available on this page during this process.
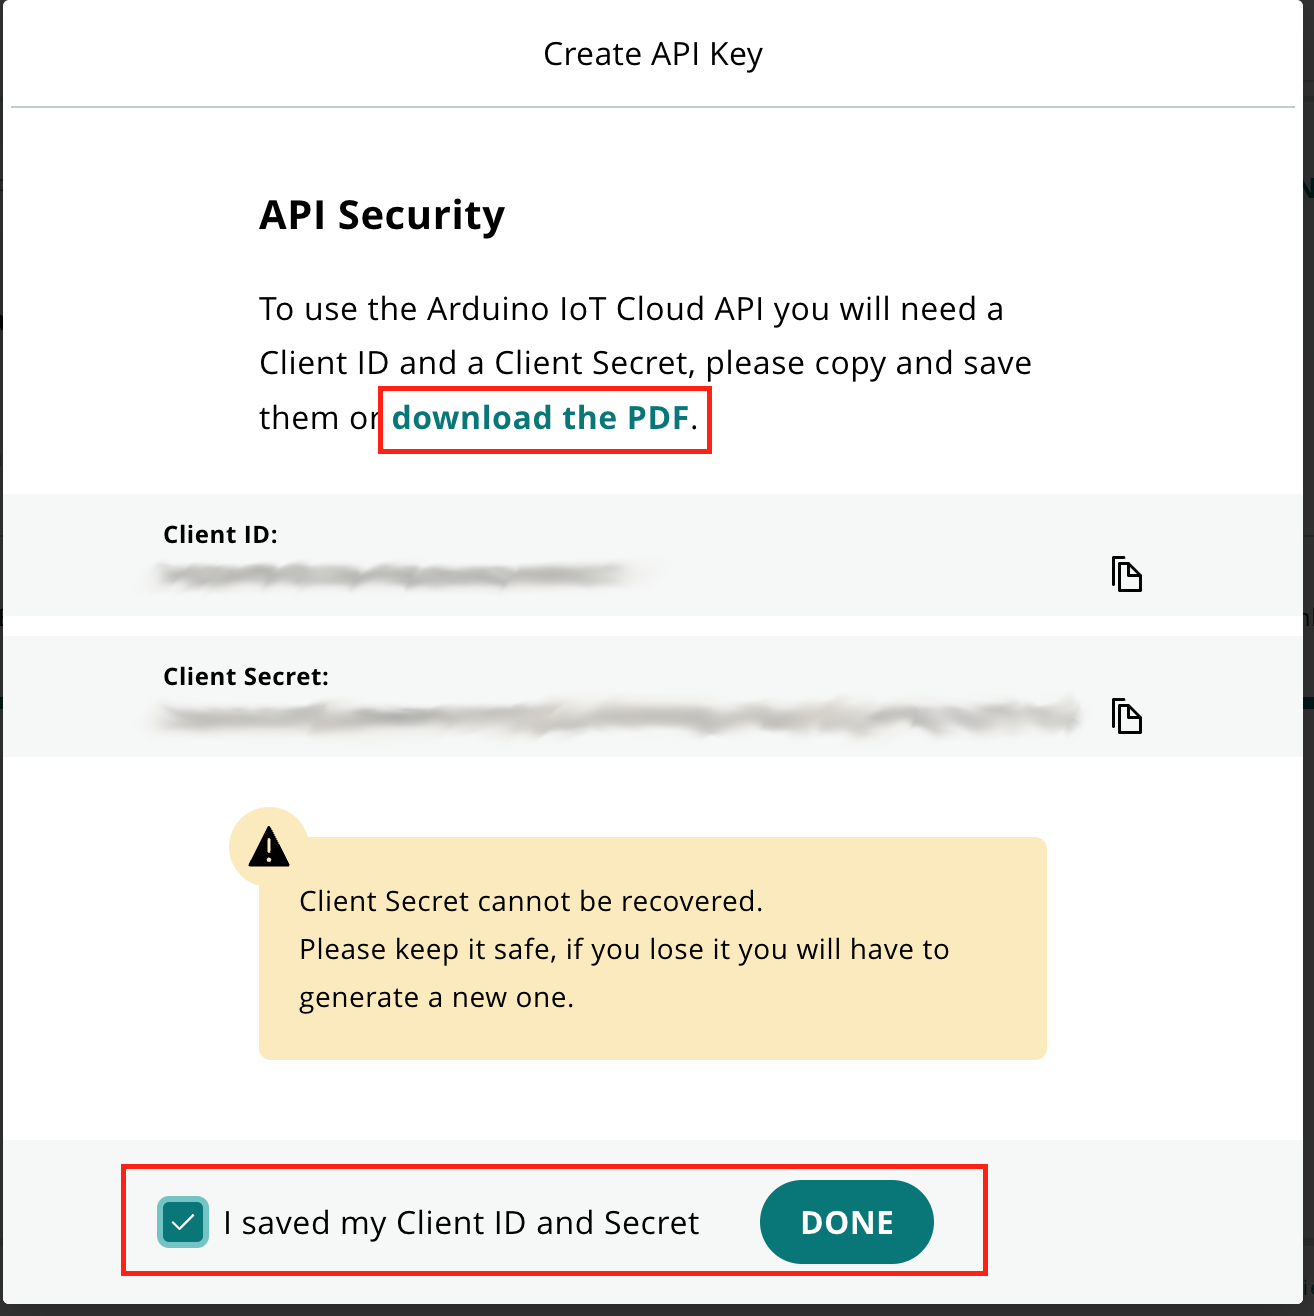
Make note of the Client ID and Client Secret values on this page. The best method to capture these values is to download the PDF file offered on this page.
At this point, the Arduino IoT cloud is setup for connection by the driver.
To add an Arduino IoT device as a destination for the output of a Flux Framework based system, the application being created needs the following:
First - add an Arduino IoT framework to your object
Once the Flux Arduino IoT object is integrated into the application, the specifics for the Arduino IoT Thing must be configured. This includes the following:
These values are used to identify the Arduino IoT device that is connected to. These are obtained via the steps outlined earlier in this document.
These values are used to provide API access by the driver. This access allows for the creation/use of a Thing and Variables within the Arduino IoT Cloud. These are obtained via the steps outlined earlier in this document.
The name of the Arduino Iot Cloud Thing to use. If the Thing doesn't exist on startup, the driver will create the a Thing of this name.
This is the ID of the Thing being used. This value is obtained by the following methods:
The above property values must be set on the Flux Arduino IoT object before use. They can be set in code, like any framework object property, or via a JSON file that is loaded by the system at startup. For the Flux Arduino IoT example outlined in this document, the entries in the settings JSON file are as follows:
Once the Flux-based device is configured and running, updates in Arduino IoT are listed in the Things tab of the Arduino IoT page. Clicking the target Thing provides access to the current variable values
One the first call to the write() method of the Arduino IoT driver, the driver initializes the connect to the cloud. This involves connecting to/creating a Thing and connecting to/creating Variables that map to the data values of the devices connected to the framework. This initialization step takes seconds to complete, but once performed, each data update step progresses quickly.