Introduction
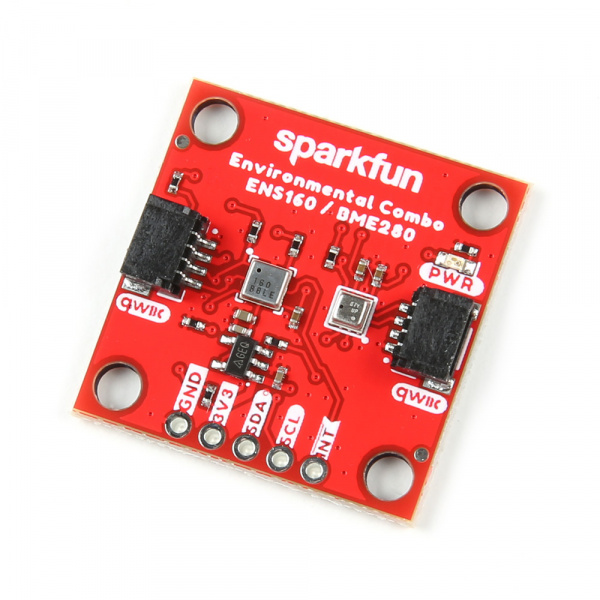
The SparkFun Qwiic Environmental Combo Breakout - ENS160/BME280 takes care of all your atmospheric-quality sensing needs with the popular ENS160 and BME280 ICs. This unique breakout provides a variety of environmental data, including AQI, TVOCs, equivalent CO2 (or eCO2) levels, barometric pressure, humidity, and temperature.
In this tutorial, we'll go over the hardware and how to hookup the sensor to an Arduino. We will also go over the basic Arduino examples to get started!
Required Materials
To follow along with this tutorial, you will need the following materials. You may not need everything though depending on what you have. Add it to your cart, read through the guide, and adjust the cart as necessary.
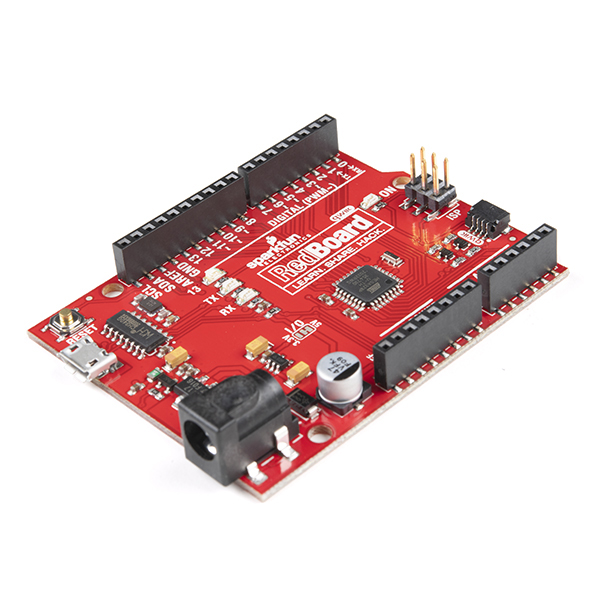
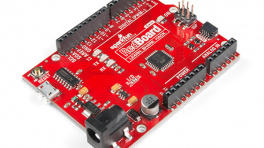
- 1x SparkFun RedBoard Qwiic [DEV-15123]
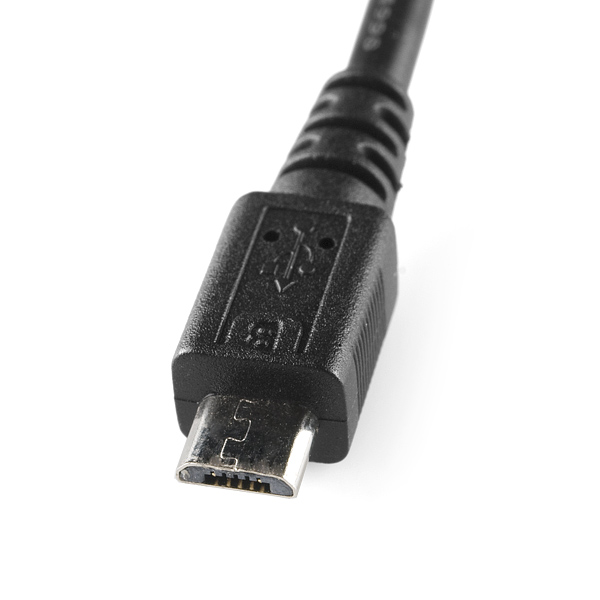
- 1x USB micro-B Cable - 6 Foot [CAB-10215]
- 1x SparkFun Environmental Combo Breakout - ENS160/BME280 (Qwiic) [SEN-22858]
- 1x Qwiic Cable
- Flexible Qwiic Cable - 50mm [PRT-17260], for short distances
- Flexible Qwiic Cable - 500mm [PRT-17257], for those that need to wire the board farther away from your microcontroller

Tools (Optional)
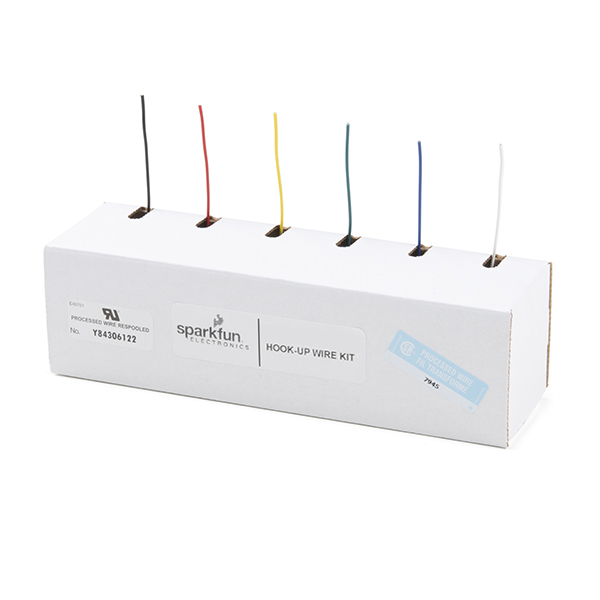
For those that need to solder to the PTHs, you will need to solder two wires between your microcontroller and the breakout board. This requires some assembly and soldering. You may already have a few of these items but if not, the tools and hardware below help with that assembly.
- Hook-Up Wire - Assortment (Stranded, 22 AWG) [PRT-11375]
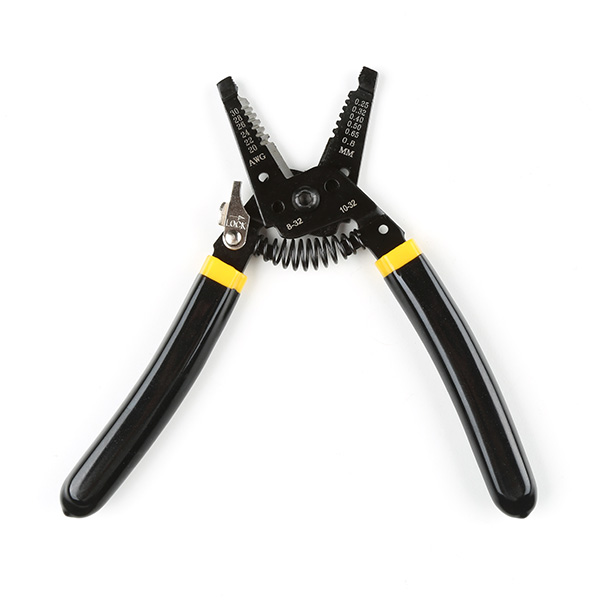
- Wire Stripper - 20-30 AWG Solid (22-32 AWG Stranded) [TOL-22263]
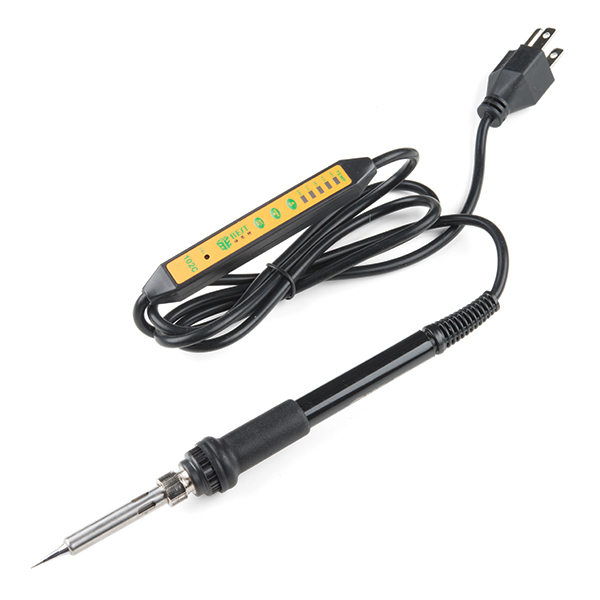
- Soldering Iron [TOL-14456]
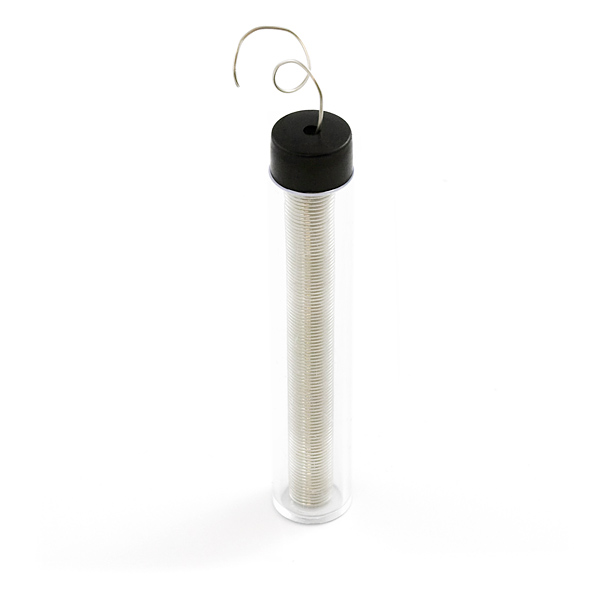
- Solder Lead Free - 15-gram Tube [TOL-9163]
Suggested Reading
If you aren't familiar with the Qwiic Connection System, we recommend reading here for an overview.

If you aren’t familiar with the following concepts, we also recommend checking out a few of these tutorials before continuing.


Hardware Overview
The Environmental Combo Board breaks out the I2C port for the ENS160 and the BME280. The ScioSense's ENS160 is populated on the left side below the label ENS160. The independent hotplate control allows the detection of volatile organic compounds (VOCs) including ethanol, toluene, hydrogen and oxidizing gases with superior sensitivity. The ENS160 supports intelligent algorithms to process raw sensor measurements on-chip. These algorithms calculate CO2-equivalents, TVOC, air quality indices (AQIs) and perform humidity and temperature compensation, as well as baseline management, all on chip. Raw sensor measurements can be read for further customization. Bosch's BME280 is populated on the right side below the label BME280. The BME280 measures three different atmospheric properties: ambient temperature, relative humidity, and barometric pressure. The BME280 can also calculate altitude changes, or absolute altitude if the locally reported barometric pressure is known.
 |
 |
| ENS160 Highlighted | BME280 Highlighted |
Let's look over a few characteristics of the Environmental Combo Breakout - ENS160/BME280 (Qwiic) sensor so we know a bit more about how it behaves. These characteristics were taken from their respective datasheets. For more information, make sure to check out the datasheet that is linked in the Resources section.
- ENS160
- I2C Addresses: 0x53 (Default) or 0x52
- Wide Operating Ranges
- VDD: 1.71 1.98V
- VDDIO: 1.71V to 3.6V
- Temperature: -40°C to +85°C
- Humidity: 5% to 95% (non-condensing)
- IAQ standard compliance for AQI, eCO2, and TVOC
- Air Quality Index - Umweltbundesamt (AQI-UBA)
- Range: 1 to 5
- Resolution: 1
- Equivalent Carbon Dioxide (eCO2)
- Range: 400 to 65,000 ppm
- Resolution: 1 ppm
- Total Volatile Organic Compound (TVOC)
- Range: 0 to 65,000 ppb
- Resolution: 1 ppb
- Air Quality Index - Umweltbundesamt (AQI-UBA)
- Immunity to humidity and ozone
- Superior output stability over the whole temperature and relative humidity operating ranges
- Effective ozone compensation
- Independent sensor heater control for highest VOC selectivity and outstanding background discrimination
- BME280
- VDD: 1.71V to 3.6V
- VDDIO: 1.2V to 3.6V
- I2C Addresses: 0x77 (Default) or 0x76
- Temperature
- Operating Range: -40°C to 85°C
- Full accuracy to ± 0.5°C from -0°C to 65°C
- Resolution 0.01°C
- Humidity
- Operating Range: 0% to 100% RH
- Accurate to ±3% from 20% -80% RH
- Resolution: 0.008%RH
- Pressure
- Operating Range: 30,000 Pa to 110,000Pa
- Absolute Accuracy of ±100Pa
- Relative Accuracy of ±12Pa
- Resolution: 0.18Pa
- Altitude Range
- 0ft to 30,000ft (9.2km)
- Relative accuracy of 3.3ft (1m) at sea level, 6.6 (2m) at 30,000ft
Power
To power the board, you will need 3.3V. You can power the board via either Qwiic connector. For users that need to solder directly to the board and do not have a Qwiic connector populated on the microcontroller, the pins are also broken out on the edge PTH. Voltage is regulated down to 1.8V for the ENS160 with the AP2127K voltage regulator. The logic levels of each sensor is 3.3V.
 |
I2C and Qwiic Connectors
The board includes two Qwiic connectors on each side of the board. For users that need to solder directly to the board, the pins are also broken out on the edge PTH. The I2C data and clock lines are also tied to 2.2kΩ pull-up resistors.
 |
- The default address of the ENS160 is set to 0x53. Its alternative address is 0x52. The default address of the BME280 is set to 0x77. Its alternative address is 0x76. For more information, check out the section about the jumpers.
Note
While both sensors are capable of SPI, we opted to only focus on using the sensors with I2C so only the I2C pins are broken out.
Interrupt Pin
The interrupt pin is also broken out for the ENS160 and it is active when the pin is low.
 |
LED
There is one LED on the board. The LED lights up when the board is powered with 3.3V. There is a jumper on the back if you decide to disable the LED.
 |
Jumpers
There are a few jumper pads available on the bottom of the board. For more information on modifying the jumpers, check out our tutorial on working with jumper pads and PCB traces.
- LED — The LED jumper is closed by default. Cut this trace to disable the power LED that is connected to 3.3V.
- I2C — The I2C jumpers are closed by default. By cutting the traces between the jumper pads, it will disconnect to the 2.2kΩ pull-up resistors for the I2C bus. Most of the time you can leave these alone unless your project requires you to connect the pull-up resistors.
- BME ADR — This is the BME280 address select jumper. It is open by default so the address is
0x77. By closing this jumper, the address changes to0x76. Make sure to also modify your code to adjust for the alternative address. - ENS ADR — This is the ENS160 address select jumper. The center pad is connect to the right pad labeled as
0x53. To use the sensor's alternative address, you will need to cut this jumper and adding a solder blob to between the center pad and the pad located on the left labeled0x52. If the center of the pad is left floating, the address will be undefined. Make sure to also modify your code to adjust for the alternative address.
 |
Board Dimensions
The board is 1.0" x 1.0" (25.4mm x 25.4mm). There are 4x mounting holes by each corner of the board.
 |
Hardware Hookup
Connecting via Qwiic
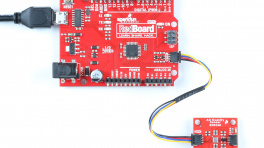
Connecting to the Qwiic Environmental Combo Breakout - ENS160/BME280 is simple. You will just need a microcontroller and a Qwiic cable. In this case, we used an ATmega328P as the microcontroller (we specifically tested the Arduino Libraries with the SparkFun RedBoard Qwiic). Insert one end of the Qwiic cable into the Qwiic Environmental Combo Breakout's Qwiic connector and the other end of the cable to your microcontroller's Qwiic connector. Then insert a USB cable into the RedBoard Qwiic to power and program.
 |
Connecting via PTH I2C and Interrupt Pins
Note
For temporary connections to the PTHs, you could use IC hooks to test out the pins. However, you'll need to solder headers or wires of your choice to the board for a secure connection. You can choose between a combination of header pins and jumper wires, or stripping wire and soldering the wire directly to the board.


For users that are connecting to the PTH I2C and interrupt pins on the edge of the board, you will need to connect the RedBoard Qwiic and sensor like the table listed below. For users that are connecting to a different microcontroller, make sure to connect to its respective pins for the I2C and interrupt pins as they may be defined differently.
| RedBoard Qwiic
(I/O set to 3.3V!) |
Environmental Combo Breakout ENS160/BME280 (Qwiic) |
|---|---|
| 3.3V | 3.3V |
| GND | GND |
| SCL (A5) | SCL |
| SDA (A4) | SDA |
| 2 | INT |
Note that you will also need to also make sure that the logic levels are matched to 3.3V if you are not connecting the Qwiic connector (this connector has built-in logic level circuits on the I
 |
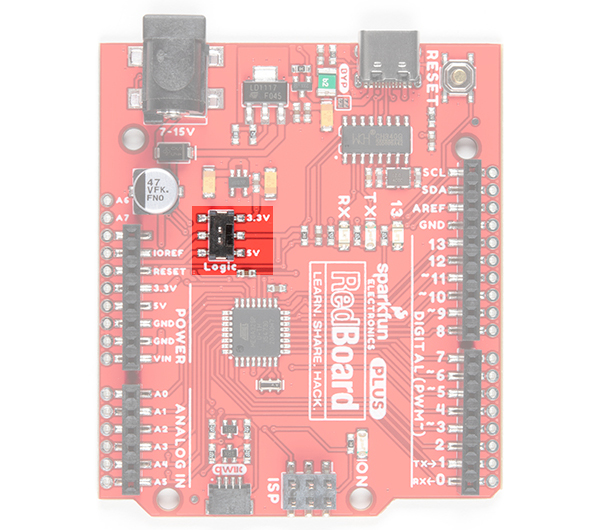
Note
For users using the RedBoard Plus, there is a I/O switch available as opposed to an I/O jumper. You could flip the switch toward the 3.3V side to set the logic level as well.
 |
Installing the Arduino Library
Arduino
Arduino IDE
This example assumes you are using the latest version of the Arduino IDE on your desktop. If this is your first time using Arduino IDE and an library, please review the following tutorials.
USB-to-Serial Drivers
If you've never connected an CH340 device to your computer before, you may need to install drivers for the USB-to-serial converter. Check out our section on "How to Install CH340 Drivers" for help with the installation.
ENS160
SparkFun has written a library to work with the SparkFun Indoor Air Quality Sensor - ENS160 (Qwiic). This library can be used by extension with the Qwiic Environmental Combo Breakout - ENS160/BME280. You can obtain this library through the Arduino Library Manager by searching for "ENS160". Find the one written by SparkFun Electronics and install the latest version. Users who prefer to manually install the library can get it from the GitHub Repositoryor download the .ZIP by clicking the button below:
BME280
SparkFun has written a library to work with the SparkFun Qwiic Atmospheric Sensor - BME280 (Qwiic). This library can be used by extension with the Qwiic Environmental Combo Breakout - ENS160/BME280. You can obtain this library through the Arduino Library Manager by searching for "BME280". Find the one written by SparkFun Electronics and install the latest version. Users who prefer to manually install the library can get it from the GitHub Repository or download the .ZIP by clicking the button below:
Arduino Examples
Now that we have our library installed, we can get started playing around with our examples for each sensor. For the scope of this tutorial, we will combine the basic examples to output the values to a Serial Monitor. Then we will use the BME280 to compensate for the temperature and relative humidity. From there we will be able to build our own custom code to integrate the sensor into a project.
Example 1: ENS160 and BME280 Combined Examples
Below is the combined example to read ENS160 and BME280. Copy and paste the code below in your Arduino IDE.
Example 1: ENS160 and BME280 Combined Examples
1 2 3 4 5 6 7 8 9 10 11 12 13 14 15 16 17 18 19 20 21 22 23 24 25 26 27 28 29 30 31 32 33 34 35 36 37 38 39 40 41 42 43 44 45 46 47 48 49 50 51 52 53 54 55 56 57 58 59 60 61 62 63 64 65 66 67 68 69 70 71 72 73 74 75 76 77 78 79 80 81 82 83 84 85 86 87 88 89 90 91 92 93 94 95 96 97 98 99 100 101 102 103 104 105 106 107 108 109 110 111 112 113 114 115 116 117 118 119 120 | |
Select your board in the Tools menu (in our case Arduino Uno) and the correct Port it enumerated on and click "Upload". After uploading the code, open the Serial Monitor or terminal emulator of your choice with the baud rate set to 115200.
 |
Note
Note that the ENS160 needs some time to calculate values as stated in the datasheet on page 15 and 16 before the measurements are reasonable. Try moving the ensStatus into the loop to monitor the reliability of the ENS160's output.
Initial Start-Up
Initial Start-Up is the time the ENS160 needs to exhibit reasonable air quality readings after its first ever power-on.
The ENS160 sensor raw resistance signals and sensitivities will change upon first power-on. The change in resistance is greatest in the first 48 hours of operation. Therefore, the ENS160 employs a start-up algorithm, allowing eCO2, TVOC and AQI output signals to be used from first power-on after 1 hour of operation.
Initial Warm-Up
Further to “Initial Start-up” the conditioning or “Warm-up” period is the time required to achieve adequate sensor stability before measuring VOCs after idle periods or power-off. Typically, the ENS160 requires 3 minutes of warm-up until reasonable air quality readings can be expected.
Example 2: Combined Basic Example ENS160/BME280 in CSV Format
Below is the same combined code but formatted for CSV. Copy and paste the code below in your Arduino IDE.
Example 2: Combined Basic Example ENS160/BME280 in CSV Format
1 2 3 4 5 6 7 8 9 10 11 12 13 14 15 16 17 18 19 20 21 22 23 24 25 26 27 28 29 30 31 32 33 34 35 36 37 38 39 40 41 42 43 44 45 46 47 48 49 50 51 52 53 54 55 56 57 58 59 60 61 62 63 64 65 66 67 68 69 70 71 72 73 74 75 76 77 78 79 80 81 82 83 84 85 86 87 88 89 90 91 92 93 94 95 96 97 98 99 100 101 102 103 104 105 106 107 108 109 | |
Select your board in the Tools menu (in our case Arduino Uno) and the correct Port it enumerated on and click "Upload". After uploading the code, open the Serial Monitor or terminal emulator of your choice with the baud rate set to 115200.
 |
Example 3: BME280 Temperature and Relative Humidity Compensation
Note
This example is actually in the ENS160 Arduino Library! It is listed as example 4 even though in this tutorial we are referring to it as "example 3."
The example code below uses the BME280 for temperature and relative humidity compensation when reading values from the ENS160. Copy and paste the code below in your Arduino IDE.
Example 3: BME280 Temperature and Relative Humidity Compensation
1 2 3 4 5 6 7 8 9 10 11 12 13 14 15 16 17 18 19 20 21 22 23 24 25 26 27 28 29 30 31 32 33 34 35 36 37 38 39 40 41 42 43 44 45 46 47 48 49 50 51 52 53 54 55 56 57 58 59 60 61 62 63 64 65 66 67 68 69 70 71 72 73 74 75 76 77 78 79 80 81 82 83 84 85 86 87 88 89 90 91 92 93 94 95 96 97 98 99 100 101 102 103 104 105 106 107 108 109 110 111 112 113 114 115 116 117 118 119 120 121 122 123 124 125 126 127 128 129 | |
Select your board in the Tools menu (in our case Arduino Uno) and the correct Port it enumerated on and click "Upload". After uploading the code, open the Serial Monitor or terminal emulator of your choice with the baud rate set to 115200.
 |
More Examples!!!
Make sure to check the Arduino Libraries that you installed on your computer for more examples with the ENS160 and BME280! Remember, the SPI port is not broken out on the Environmental Combo Breakout - ENS160/BME280 so those examples will not apply for this specific board.
GitHub SparkFun > SparkFun_BME280_Arduino_Library > Examples
Troubleshooting
General Troubleshooting Help
Note
Not working as expected and need help?
If you need technical assistance and more information on a product that is not working as you expected, we recommend heading on over to the SparkFun Technical Assistance page for some initial troubleshooting.
If you don't find what you need there, the SparkFun Forums are a great place to find and ask for help. If this is your first visit, you'll need to create a Forum Account to search product forums and post questions.
Resources
Now that you've successfully got your SparkFun Environmental Combo Breakout - ENS160/BME280 (Qwiic) up and running, it's time to incorporate it into your own project! For more information, check out the resources below:
- Schematic (PDF)
- Eagle Files (ZIP)
- Board Dimensions (PNG)
- Datasheet (PDF)
- ENS160 White Paper (PDF)
- Arduino Libraries
- Fritzing Part
- SFE Product Showcase