Required Materials
To follow along with this tutorial, you will need the following materials. You may not need everything though depending on what you have. Add it to your cart, read through the guide, and adjust the cart as necessary.

Suggested Reading
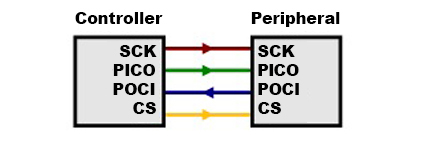
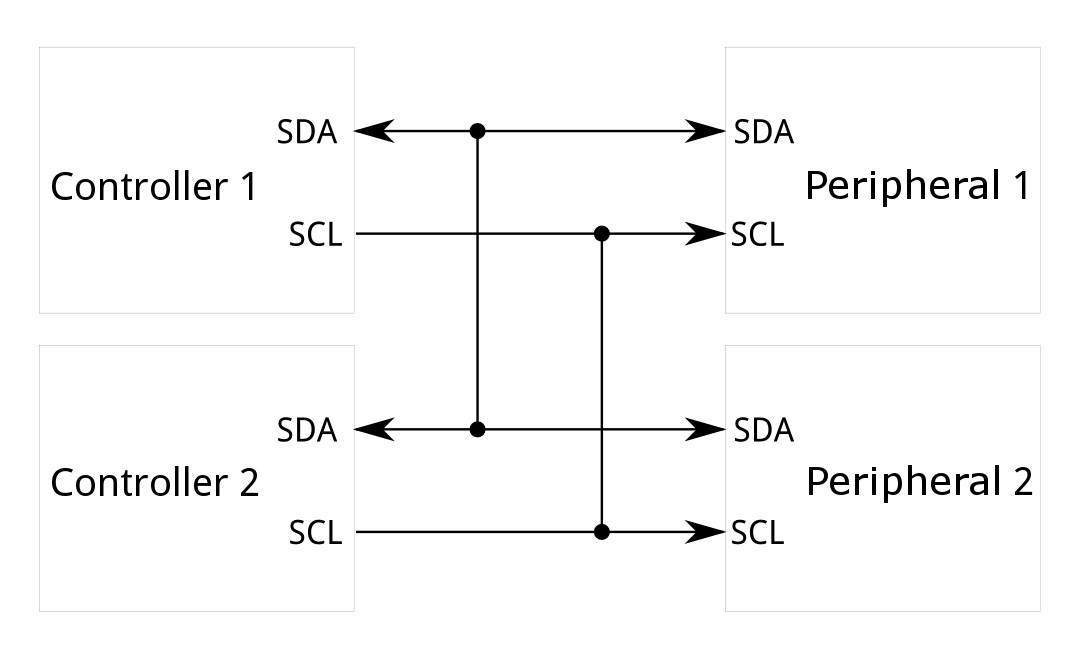
This board is part of the Qwiic connect system. We recommend familiarizing yourself with the Logic Levels and I2C tutorials. Click on the banner to learn more about Qwiic products.
Below are a few tutorials that may help users familiarize themselves with various aspects of the board.


Hardware Overview
OLED
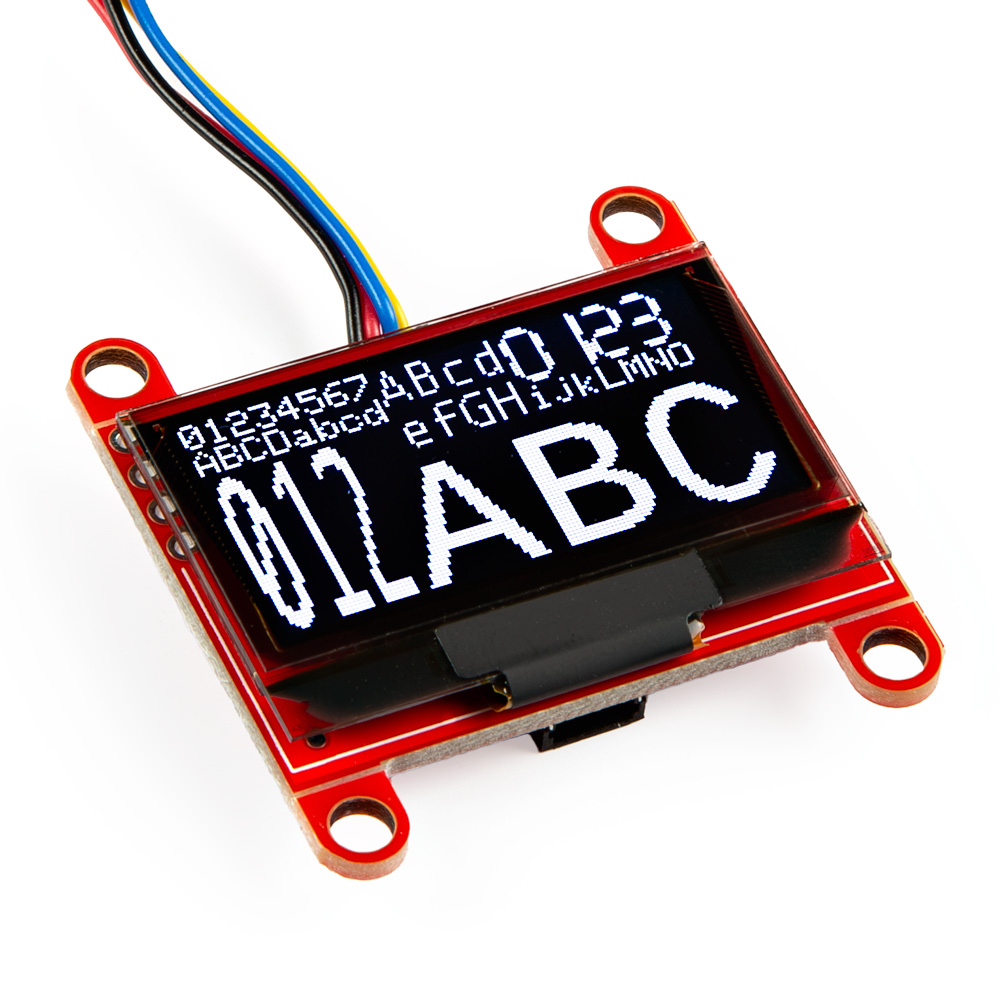
The OLED screen has a pixel resolution of 128 x 64, a panel size of 34.5 x 23.0 x 1.4 (mm), and an active area of 29.42 x 14.7 (mm). The driver chip is the SSD1306. More information can be found in the datasheet.

OLED Screen
Power
Ideally, power is supplied by the Qwiic connector, but the 3V3 and GND pins have been broken out to plated through holes on the side of the board (along with the Clock and Data Lines). Input voltage should not exceed 3.3V, as there is no voltage regulation on this breakout.

Power Options
Qwiic connectors
The board includes Qwiic connectors that provide power and I2C connectivity simultaneously.
For users that need to solder directly to the board, the pins are also broken out on the edge PTH. The I2C data and clock lines are also tied to 2.2kΩ pull-up resistors.

Qwiic connectors
Jumpers
Never modified a jumper before?
Check out our Jumper Pads and PCB Traces tutorial for a quick introduction!

Address Jumper
The SparkFun Qwiic OLED 1.3in board has a default I2C address of 0x3D, but by soldering the address jumper on the back of the board, you can select 0x3C.

Address Jumper
I2C Jumper
Like our other Qwiic boards, the SparkFun Qwiic OLED 1.3in comes equipped with pull-up resistors on the clock and data pins. If you are daisy-chaining multiple Qwiic devices, you will want to cut this jumper; if multiple sensors are connected to the bus with the pull-up resistors enabled, the parallel equivalent resistance will create too strong of a pull-up for the bus to operate correctly. As a general rule of thumb, disable all but one pair of pull-up resistors if multiple devices are connected to the bus. To disable the pull up resistors, use an X-acto knife to cut the joint between the jumper pads highlighted below.

I2C Jumper
Board Dimensions
The board dimensions are illustrated in the drawing below; the listed measurements are in inches.

SparkFun Qwiic OLED 1.3in Board Dimensions
Need more measurements?
For more information about the board's dimensions, users can download the Eagle files for the 1" x 1" board, or the Eagle files for the Mini board. These files can be opened in Eagle and additional measurements can be made with the dimensions tool.
Eagle - Free Download!
Eagle is a CAD program for electronics that is free to use for hobbyists and students. However, it does require an account registration to utilize the software.
 Dimensions Tool
This video from Autodesk demonstrates how to utilize the dimensions tool in Eagle, to include additional measurements:
Hardware Assembly
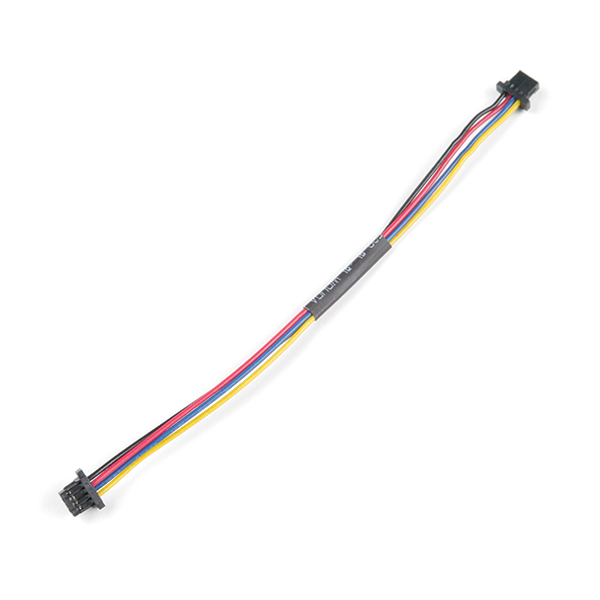
SparkFun's Qwiic system makes components plug and play. Simply plug one end of your Qwiic cable into the Qwiic connector on your OLED screen and the other end of the Qwiic cable into the controller board (here we're using the RedBoard Qwiic). Now connect your controller board to the computer and voila. You're ready to rock.

SparkFun Qwiic OLED connected to the SparkFun Qwiic RedBoard
Software Setup and Programming
Arduino
Arduino IDE
This example assumes you are using the latest version of the Arduino IDE on your desktop. If this is your first time using Arduino IDE and an library, please review the following tutorials.
SparkFun has leveraged our existing OLED library to work with the SparkFun Qwiic OLED 1.3 board. If you haven't already worked with our OLED boards, you can obtain this library through the Arduino Library Manager by searching for "Qwiic OLED" and installing the latest version. If you prefer downloading libraries manually, you can grab them from the GitHub Repository.
Arduino Example
The Arduino Library for the SparkFun OLED boards comes with a slew of examples to get you going. Here we'll just run through a basic "the gang's all here" display.
Note
This example is pretty specific to the 1.3" OLED board. It requires the entirety of the pixels and would need to be heavily modified to be used by any of our other OLED boards.
Example: Display all the things
Example Arduino Code
    #include <Wire.h>

    #include <SparkFun_Qwiic_OLED.h> //http://librarymanager/All#SparkFun_Qwiic_OLED
    Qwiic1in3OLED myOLED; // 128x64

    // Fonts
    #include <res/qw_fnt_5x7.h>
    #include <res/qw_fnt_8x16.h>
    #include <res/qw_fnt_31x48.h>
    #include <res/qw_fnt_7segment.h>
    #include <res/qw_fnt_largenum.h>

    void setup()
    {
    Wire.begin();

    myOLED.begin();

    myOLED.erase();

    myOLED.setFont(QW_FONT_5X7);
    myOLED.text(0,0,"01234567");

    myOLED.setFont(QW_FONT_5X7);
    myOLED.text(0,8,"ABCDabcd");

    myOLED.setFont(QW_FONT_8X16);
    myOLED.text(48,0,"ABcd");

    myOLED.setFont(QW_FONT_8X16);
    myOLED.text(48,13,"efGH");

    myOLED.setFont(QW_FONT_7SEGMENT);
    myOLED.text(80,0,"0123");

    myOLED.setFont(QW_FONT_5X7);
    myOLED.text(80,17,"ijkLMNO");

    myOLED.setFont(QW_FONT_LARGENUM);
    myOLED.text(0,16,"012");

    myOLED.setFont(QW_FONT_31X48);
    myOLED.text(36,27,"ABC");

    myOLED.display();
    }

    void loop()
    {
    }
Make sure you've selected the correct board and port in the Tools menu and then hit the upload button. You should see something similar to the following.

OLED Screen
Resources:
For more resources related to the SparkFun Qwiic OLED 1.3in, check out the links listed here: