CodeLess
AT Commands
To help users get started with the CodeLess™ AT commands for the DA14531MOD Bluetooth module, we have provided an SerialPassthrough example in our unofficial Arduino library. Once programmed on the RA6M5 Thing Plus, the example allows users to directly interface with the DA14531MOD's UART port through the board's USB connection using a serial terminal. Thereby, enabling users to experiment with the CodeLess AT commands and develop their own BLE connectivity solution. Users can find this sketch in the File > Examples > SparkFun Renesas Codeless BLE > SerialPassthrough drop-down menu.
SerialPassthrough.ino
/*
  SerialPassthrough sketch

  Some boards have a USB serial port that operates independently from the
  hardware serial port(s) attached their Digital pins. This means that the
  "serial passthrough" which is possible with the Arduino UNO (commonly used
  to interact with devices/shields that require configuration via serial AT
  commands) will not operate in a similar manner.

  This sketch allows users to emulate the serial passthrough behaviour. (i.e.
  Any text typed in the IDE Serial monitor will be written to the serial port
  oof the Digital pins, and vice-versa.)

  created 23 May 2016
  by Erik Nyquist

  https://www.arduino.cc/en/Tutorial/BuiltInExamples/SerialPassthrough


  This sketch has been modified for the SparkFun Ting Plus - RA6M5. "Serial"
  refers to the USB Serial port attached to the Serial Monitor, and "Serial2"
  refers to the hardware serial port attached to pins D31 and D32; for the
  DA14531MOD Bluetooth module. This sketch will emulate Serial passthrough
  for those two Serial ports on the bSparkFun Ting Plus - RA6M5. The default
  communication settings for the DA14531MOD are:

  BaudRate : 57600
  DataBits : 8
  StopBits : 1
  Parity : None
  Flow Control : None
  Transmit Text: Append CR

  Modified 18 March 2024
  by SparkFun Electronics
  author: Wes F

*/

void setup() {
  Serial.begin(57600);
  Serial2.begin(57600);
}

void loop() {
  if (Serial.available()) {        // If anything comes in Serial (USB),
    Serial2.write(Serial.read());  // read it and send it out Serial1 (pins 0 & 1)
  }

  if (Serial2.available()) {       // If anything comes in Serial1 (pins 0 & 1)
    Serial.write(Serial2.read());  // read it and send it out Serial (USB)
  }
}
Serial Monitor
Users should configure the serial port with a baud rate at 57600 bps and enable the carriage return on the transmissions.
Demo - BLE Solution
While an Arduino library isn't necessary to utilize the CodeLess™ AT commands for the DA14531MOD Bluetooth module, we have created an unofficial Arduino library to help users get started. Once the library is installed in the Arduino IDE, users will find several example sketches listed in the File > Examples > SparkFun Renesas Codeless BLE drop-down menu. We recommend users check out the following examples that demonstrate a basic BLE connectivity solution:
codelessBLE_peripheral.inocodelessBLE_central.ino
In order to operate the codelessBLE_peripheral.ino and codelessBLE_central.ino examples, users will need two RA6M5 Thing Plus boards, Qwiic OLED Display, Qwiic BME280 sensor, and some Qwiic cables.
Required Hardware
-
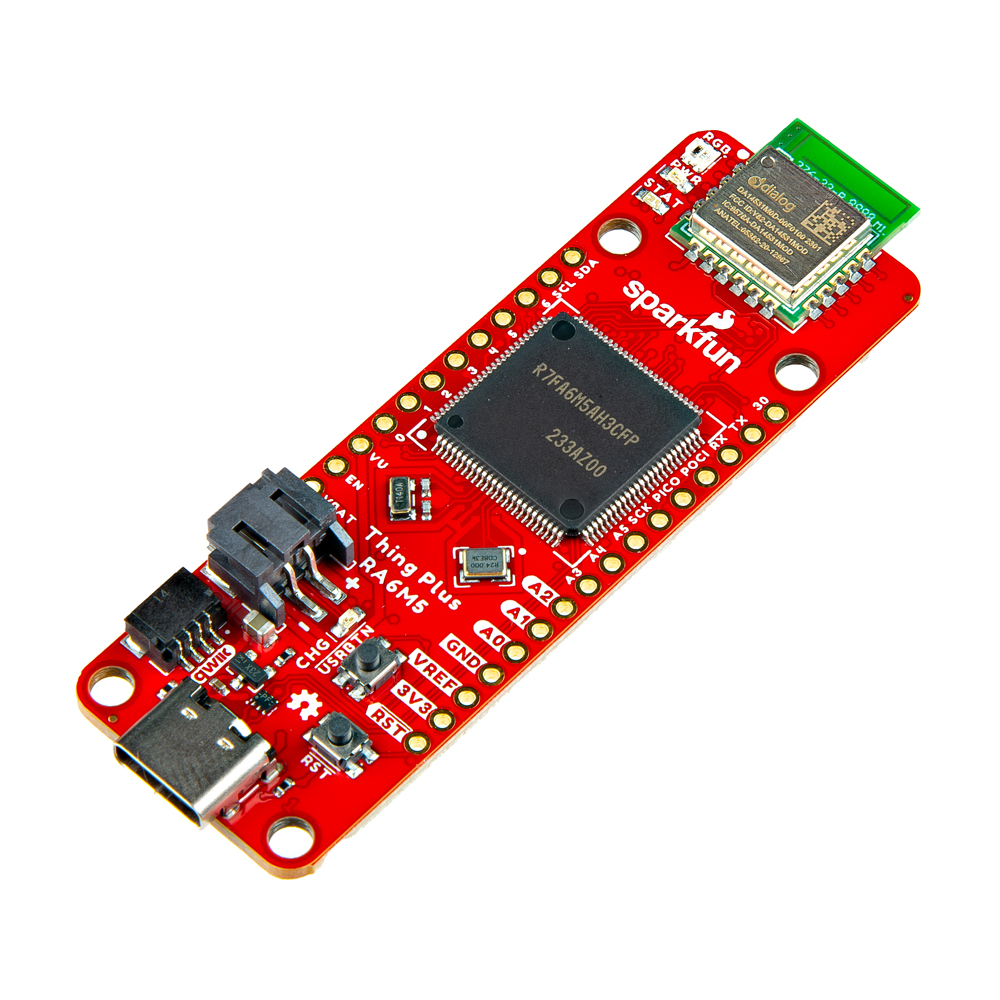
RA6M5 Thing Plus
WRL-24243 -
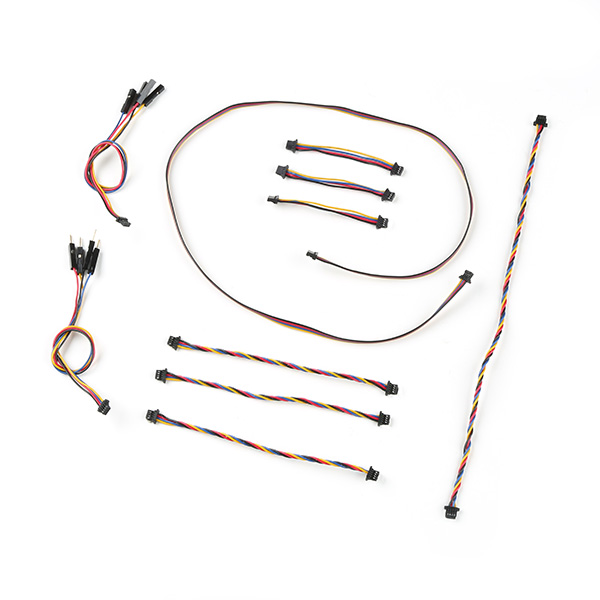
SparkFun Qwiic Cable Kit
KIT-15081 -
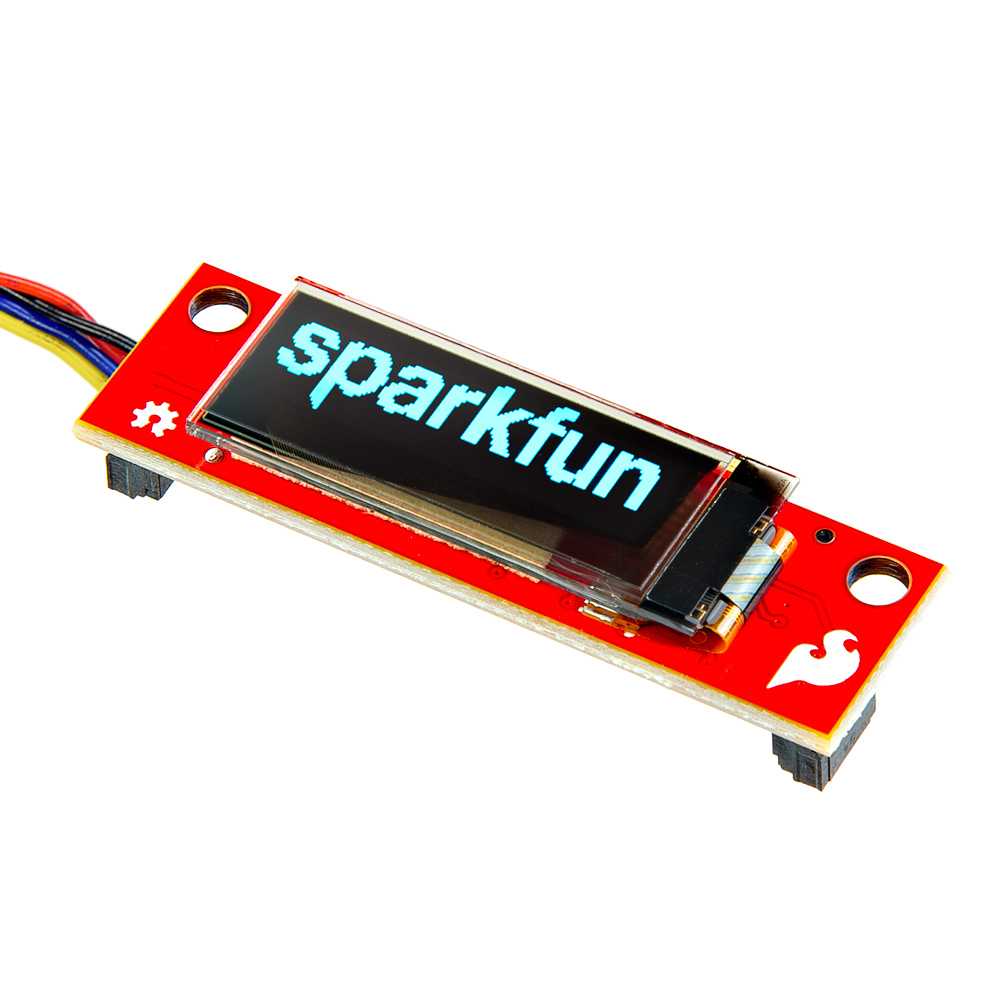
SparkFun Qwiic OLED Display (0.91 in., 128x32)
LCD-24606 -
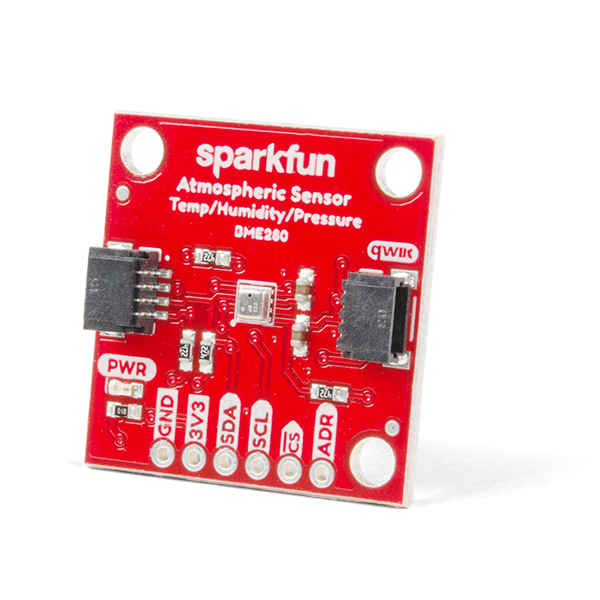
SparkFun Atmospheric Sensor Breakout - BME280 (Qwiic)
SEN-15440
This sketch requires a Qwiic BME280 sensor, connected by a Qwiic cable, to be connected the RA6M5 Thing Plus. The sketch demonstrates a basic BLE solution, by transmitting data from the BME280 to another BLE device. Users can find this sketch in the File > Examples > SparkFun Renesas Codeless BLE > codelessBLE_peripheral drop-down menu.
Install Arduino Library
For this example, the SparkFun BME280 Arduino Library will need to be installed. In the Arduino IDE, users can install it by searching for SparkFun BME280 Arduino Library, in the Library Manager:
SparkFun BME280 Arduino Library
codelessBLE_peripheral.ino
/**
 * @file codelessBLE_peripheral.ino
 * @brief This file contains the code for a BLE peripheral device that
 * communicates with a BME280 sensor.
 *
 * The code sets up a BLE peripheral device using the CodelessBLEPeripheral
 * class and establishes a connection with the onboard BLE coprocessor. It
 * also initializes a BME280 sensor and reads temperature, humidity, and
 * pressure values from it. The sensor data is then sent to the connected BLE
 * central device periodically.
 *
 * The code handles the connection and disconnection events from the BLE device
 * and prints the received data to the Serial monitor.
 *
 * This code is intended to be used with the SparkFun Thing Plus - RA6M5
 * development board.
 */
#include <codelessBLEPeripheral.h>
#include <Wire.h>
#include "SparkFunBME280.h"

CodelessPeripheralDevice myBLEPeripheral;
BME280 myBME280;

bool bleConnected = false;
bool reset_loop = false;
uint32_t loop_start_time = 0;
String printstring = "";

void setup()
{
    pinMode(LED_BUILTIN, OUTPUT);
    digitalWrite(LED_BUILTIN, HIGH);

    Serial.begin(57600);
    // while(!Serial){delay(100);}; // Uncomment during testing and needing a serial connection.
    Serial.println("Begin BLE Peripheral Demo.");

    #if defined(CODELESS_DBG)
    Serial.println("CODELESS_DBG defined.");
    #endif

    Wire.begin();

    if(!myBME280.beginI2C())
    {
        Serial.println("Sensor didn't respond. Check wiring!");
        while(1);
    }

    Serial.println("Connected to BME280.");

    myBLEPeripheral.begin();
    while(!Serial2){delay(100);};
    Serial.println("Connected to BLE coprocessor.");

    Serial.println("Running default setup routine.");
    myBLEPeripheral.setupDefault();

    Serial.print("Peripheral Device Address: ");
    Serial.print(myBLEPeripheral.sendCommand("AT+BDADDR"));

    Serial.println("Setup complete.");
    digitalWrite(LED_BUILTIN, LOW);

    loop_start_time = millis();
}

void loop()
{
    if((loop_start_time - millis()) > 100) // If it's been more than 100ms
    {
        reset_loop = true;
        if(bleConnected)
        {
            digitalWrite(LED_BUILTIN, HIGH);
            printstring = "|"+String(myBME280.readTempC())+","+String(myBME280.readFloatHumidity())+","+String(myBME280.readFloatPressure());
            Serial.print(myBLEPeripheral.sendCommand(printstring));
            digitalWrite(LED_BUILTIN, LOW);
        }

        if (myBLEPeripheral.available()) {       // If anything comes in Serial2 (BLE device)
            String localstring = myBLEPeripheral.readOutput();
            if(!bleConnected)
            {
                if(localstring.endsWith("+CONNECTED\r\n"))
                {
                    #ifdef CODELESS_DBG
                    Serial.println("[DBG] - outloop - Got connected output.");
                    #endif
                    bleConnected = true;
                }
            }

            if(bleConnected)
            {
                if(localstring.endsWith("+DISCONNECTED\r\n"))
                {
                    #ifdef CODELESS_DBG
                    Serial.println("[DBG] - outloop - Got disconnected output.");
                    #endif
                    bleConnected = false;
                }
            }
            Serial.print(localstring);
        }
        if(reset_loop && bleConnected)
        {
            reset_loop = false;
            #ifdef CODELESS_DBG
            Serial.println();
            Serial.println("Resetting loop");
            #endif
            loop_start_time = millis();
        }
    }
}
BME688 Replacement
Users can also modify this example to utilize the Qwiic BME688 sensor that is mentioned in some of the other examples. For more details on utilizing the BME68x breakout board, please refer to our hookup guide for the sensor.
-
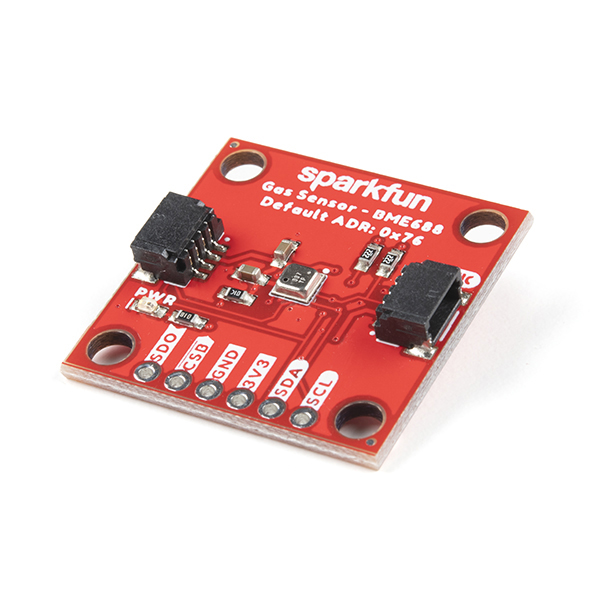
SparkFun Environmental Sensor - BME688 (Qwiic)
SEN-19096 -

Flexible Qwiic Cable - 50mm
PRT-17260
Install Arduino Library
Users will need to install the Bosch BME68x Arduino library for the sensor. In the Arduino IDE, users can install it by searching for BME68x Sensor Library, in the Library Manager:
BME68x Sensor Library
Modifications
-
Link the BME68x Arduino library:
#include "SparkFunBME280.h"#include "bme68xLibrary.h" -
Create an instance of the
Bme68xclass:BME280 myBME280;Bme68x bme; -
Initialize and configure the sensor in the
setup():if(!myBME280.beginI2C()) { Serial.println("Sensor didn't respond. Check wiring!"); while(1); } Serial.println("Connected to BME280.");bme.begin(BME68X_I2C_ADDR_LOW, Wire); if(bme.checkStatus()) { if (bme.checkStatus() == BME68X_ERROR) { Serial.println("Sensor error:" + bme.statusString()); return; } else if (bme.checkStatus() == BME68X_WARNING) { Serial.println("Sensor Warning:" + bme.statusString()); } } /* Set the default configuration for temperature, pressure and humidity */ bme.setTPH(); /* Configure the sensor to forced mode */ bme.setOpMode(BME68X_FORCED_MODE); -
Update the
loop()to retrieve data from the BME688if((loop_start_time - millis()) > 100) // If it's been more than 100ms { reset_loop = true; if(bleConnected) { digitalWrite(LED_BUILTIN, HIGH); printstring = "|"+String(myBME280.readTempC())+","+String(myBME280.readFloatHumidity())+","+String(myBME280.readFloatPressure()); Serial.println(myBLEPeripheral.sendCommand(printstring)); digitalWrite(LED_BUILTIN, LOW); }bme68xData data; if((loop_start_time - millis()) > 100) // If it's been more than 100ms { reset_loop = true; if(bleConnected) { digitalWrite(LED_BUILTIN, HIGH); delayMicroseconds(bme.getMeasDur()); // Wait for measurement data /* Retrieve data from BME688 sensor*/ if (bme.fetchData()) { bme.getData(data); printstring = "|"+String(data.temperature)+","+String(data.humidity)+","+String(data.pressure); } Serial.print(myBLEPeripheral.sendCommand(printstring)); digitalWrite(LED_BUILTIN, LOW); }
This sketch requires a Qwiic OLED Display to be connected the RA6M5 Thing Plus, by a Qwiic cable. The sketch receives data transmitted from a RA6M5 Thing Plus, programmed with the codelessBLE_peripheral.ino sketch, and displays that data on the OLED display. Users can find this sketch in the File > Examples > SparkFun Renesas Codeless BLE > codelessBLE_central drop-down menu.
codelessBLE_central.ino
/**
 * @file codelessBLE_central.ino
 * @brief This file contains the code for a BLE central device that connects to
 * a peripheral device and displays sensor data on an OLED display.
 *
 * The code sets up a BLE central device using the CodelessBLECentral class. It
 * establishes a connection with a specific peripheral device, then receives
 * and displays the data on an OLED display using the SparkFun_Qwiic_OLED
 * library.
 *
 * The RA6M5 processor communicates to the BLE coprocessor over a serial
 * connection. It sends commands to the peripheral device and receives
 * responses, which are then displayed on the serial monitor. The sensor data
 * received from the peripheral device is parsed and displayed on the OLED
 * display.
 *
 * This code is intended to be used with the SparkFun Thing Plus - RA6M5
 * development board.
 */

#include <codelessBLECentral.h>
#include <Wire.h>
#include <SparkFun_Qwiic_OLED.h> // https://librarymanager/All#SparkFun_Qwiic_OLED
#include <res/qw_fnt_5x7.h>

CodelessCentralDevice myBLECentral;
QwiicNarrowOLED myOLED;

String peripheralAddress = "48:23:35:34:74:D3"; // Hardware specific, change to your peripheral's address.
String localstring = "";
String printstring_temp = "";
String printstring_hum = "";
String printstring_press = "";

void setup()
{
    pinMode(LED_BUILTIN, OUTPUT);
    digitalWrite(LED_BUILTIN, HIGH);
    Serial.begin(DEFAULT_CODELESS_BAUD_RATE);
    // while(!Serial){delay(100);}; // Uncomment during testing and needing a serial connection.
    Serial.println("Begin BLE Central Demo.");

    #if defined(CODELESS_DBG)
    Serial.println("CODELESS_DBG defined.");
    #endif

    Wire.begin();
    if(myOLED.begin() == false)
    {
        Serial.println("Unable to communicate with display. Freezing...");
        while(1);
    }

    Serial.println("Connected to display.");
    myOLED.setFont(QW_FONT_5X7);

    myOLED.erase();

    String hello = "Codeless BLE Demo";

    int x0 = (myOLED.getWidth() - myOLED.getStringWidth(hello)) / 2;
    int y0 = (myOLED.getHeight() - myOLED.getStringHeight("a")) / 2;
    myOLED.text(x0, y0, hello);
    myOLED.display();

    myBLECentral.begin();
    while(!Serial2){delay(100);};
    Serial.println("Connected to BLE coprocessor.");

    Serial.println("Running default setup routine.");
    myBLECentral.setupDefault();

    Serial.print("Central device address: ");
    Serial.print(myBLECentral.sendCommand("AT+BDADDR"));

    myBLECentral.connectToPeripheral(peripheralAddress);

    Serial.println("Setup complete.");
    digitalWrite(LED_BUILTIN, LOW);

    hello = "Wait for conn...";
    x0 = (myOLED.getWidth() - myOLED.getStringWidth(hello)) / 2;
    y0 = (myOLED.getHeight() - myOLED.getStringHeight("a")) / 2;
    myOLED.erase();
    myOLED.text(x0, y0, hello);
    myOLED.display();
}

void loop()
{
    if (Serial.available()) {        // If anything comes in Serial (USB),
        Serial.print(myBLECentral.sendCommand(Serial.readString()));  // read, then command BLE, write response back to Serial.
    }

    if (myBLECentral.available()) {       // If anything comes in Serial2 (BLE device)
        localstring = myBLECentral.readOutput();
        localstring.trim(); // remove leading and trailing \r \n whitespace.
        int16_t index = localstring.indexOf("|");

        if(index > -1)
        {
            #ifdef CODELESS_DBG
            Serial.print("[DBG] - loop - readOutput - String contains | at index ");
            Serial.print(index);
            Serial.println(".");
            #endif
            localstring+="\r";
            localstring.remove(index,1);
            String temp = localstring.substring(0,localstring.indexOf(","));
            String hum = localstring.substring(localstring.indexOf(",")+1, localstring.indexOf(",", localstring.indexOf(",")+1));
            String press = localstring.substring(localstring.lastIndexOf(",")+1);
            Serial.print("T: ");
            Serial.print(temp);
            Serial.print(" H: ");
            Serial.print(hum);
            Serial.print(" P: ");
            Serial.println(press);

            printstring_temp = "T: "+temp+" dC";
            int ytemp = (myOLED.getHeight()/3) - myOLED.getStringHeight(printstring_temp);
            printstring_hum = "H: "+hum+" %RH";
            int yhum = (myOLED.getHeight() / 3 * 2) - myOLED.getStringHeight(printstring_hum);
            printstring_press = "P: "+press+" Pa";
            int ypress = myOLED.getHeight() - myOLED.getStringHeight(printstring_press);

            myOLED.erase();
            myOLED.text(3, ytemp, printstring_temp);
            myOLED.display();
            myOLED.text(3, yhum, printstring_hum);
            myOLED.display();
            myOLED.text(3, ypress, printstring_press);
            myOLED.display();
        }
        else
        {
            Serial.println(localstring);
        }
    }
}