-
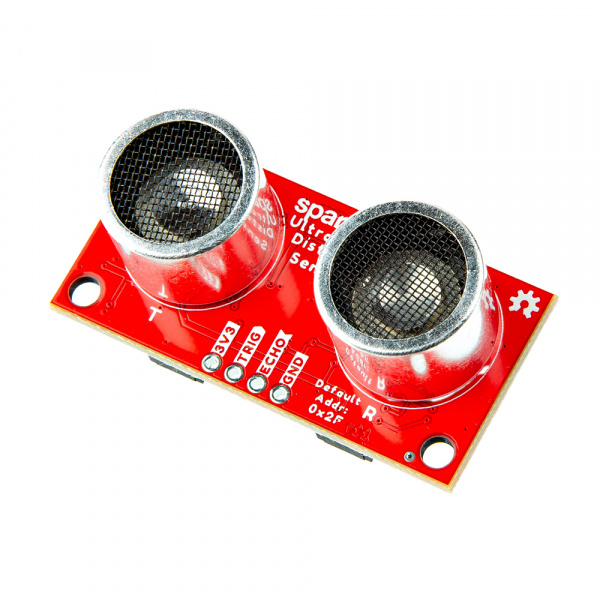
SparkFun Ultrasonic Distance Sensor - TCT40 (Qwiic)
SKU: SEN-24805
-
The SparkFun Qwiic Ultrasonic Distance Sensor, a user-friendly upgrade to the popular HC-SR04 sensor, offers non-contact distance measurement from 2cm to 400cm with an accuracy of 3mm. This sensor is designed to seamlessly integrate with the Qwiic ecosystem for I2C communication, making it a breeze to add to your existing projects and daisy-chain with other Qwiic components.
With its wide range of applications, the SparkFun Qwiic Ultrasonic Distance Sensor is a versatile tool for robotics projects, obstacle avoidance systems, and any application that requires accurate distance measurement without physical contact. Its adaptability makes it a valuable addition to your toolkit.
Purchase from SparkFun
Required Materials
To follow along with this tutorial, you will need the following materials. You may not need everything though depending on what you have. Add it to your cart, read through the guide, and adjust the cart as necessary.
SparkFun Ultrasonic
SEN-24805
|
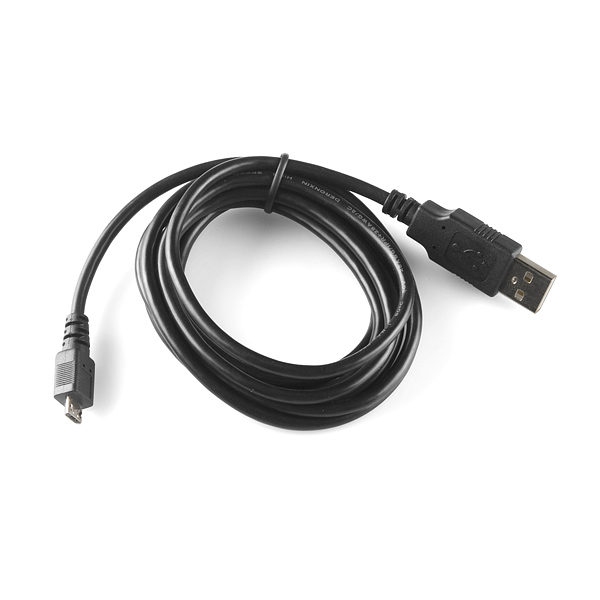 USB micro-B Cable - 6 FootCAB-10215 |
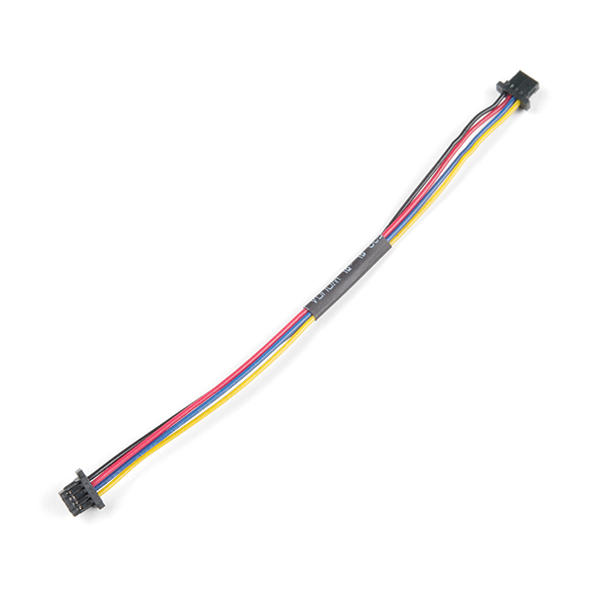
Qwiic Cable - 100mmPRT-14427 |
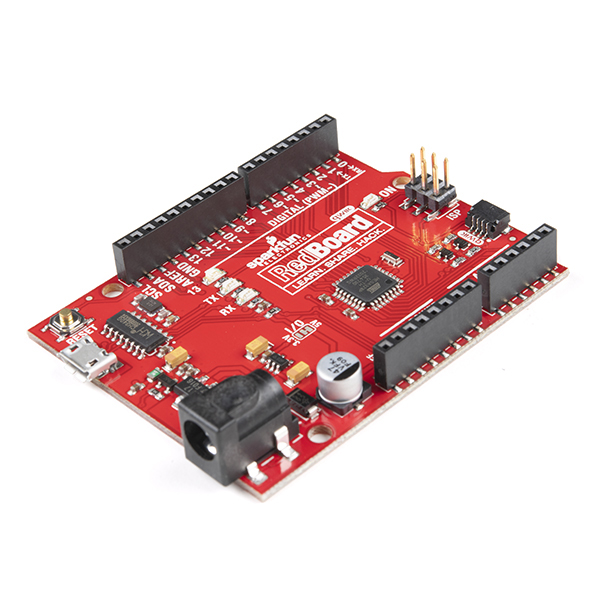
SparkFun RedBoard QwiicDEV-15123 |
Suggested Reading
Below are a few tutorials that may help users familiarize themselves with various aspects of the board.

The SparkFun Ultrasonic Distance Sensor - TCT40 (Qwiic) takes advantage of the Qwiic connect system. We recommend familiarizing yourself with the Logic Levels and I2C tutorials. Click on the banner above to learn more about Qwiic products.
Hardware Overview
Overall Features:
- Operating Voltage 3.3V
- Detecting Angle: 80 degrees
- Sensor range: 2cm to 400cm
- MCU on board: STM8L051F3
- 7 bit Unshifted Address: 0x2F
- Dimensions: 1.75" x 0.85"
STM8L051F3 MCU
The 8-bit ultra-low power STM8 MCU Core provides increased processing power (up to 16 MIPS at 16 MHz) while maintaining the advantages of a CISC architecture with improved code density, a 24-bit linear addressing space and an optimized architecture for low power operations. It also features embedded data EEPROM and low power, low-voltage, single-supply program Flash memory. The device incorporates an extensive range of enhanced I/Os and peripherals, a 12-bit ADC, a real-time clock, two 16-bit timers, one 8-bit timer, as well as standard communication interfaces such as an SPI, an I2C interface, and one USART. For more information, refer to the datasheet.

STM8L051F3 MCU
TCT40-16R/T
The TCT40-16R and TCT40-16T are an analog ultrasonic receiver and transmitter featuring a distance range from 2cm to 400cm meters and a beam angle of 80°. We've attached an RS232 transceiver to the transmitter to boost the signal being sent out, and the receiver goes through an LMV324 op-amp to clean up the signal coming in for optimum detection. For more information, refer to the translated datasheet here.

TCT40-16R/T
Qwiic connectors
Our Qwiic Ecosystem makes sensors pretty much plug and play. There are two Qwiic connectors on the side of the Qwiic Distance Sensor board to provide power and I2C connectivity simultaneously. The default I2C address is 0x2F. The updateAddress() function allows you to change the I2C address to any address from 0x08 to 0x7F. More information on our Qwiic Ecosystem can be found here.

Qwiic connectors
Power
Ideally, power will be supplied via the Qwiic connectors on either side of the board. Alternatively, power can be supplied through the pins along the bottom side of the board labeled 3V3 and GND. The input voltage range should be between 1.8-3.6V.

Power Pins
Trigger and Echo Pins
The Trigger and Echo pins are available as plated through holes to manually calculate the distance using the Ultrasonic Distance Sensor. To use, pull TRIG HIGH and then LOW, wait for the ECHO pin to go HIGH and then take the time in between to calculate the distance to the object. For more information on how this works, check out Example 3 in the Arduino Library.

Trigger and Echo Pins
Testpoint Pads
We've provided a number of open pads on the back of the board:
I2C Pads
Should you wish to avoid using the Qwiic connectors, you can use these two pads (along with the power PTH pins) to still take advantage of the I2C communication protocols.

I2C Testpoint Pads
Single Wire Interface Module (SWIM)
SWIM, INT, and NRST are all part of the "Single Wire Interface Module (SWIM)" used for programming the onboard STM8 microcontroller and for most users, can be effectively ignored. For those who wish to dive into the deep end and tweak the firmware, these pads are available. Requirements include ST Visual Develop (the ST Progamming Software bundled with Visual Develop), a COSMIC compiler license, and a USB to SWIM adapter.

SWIM Testpoint Pads
ADDR_RST
ADDR_RST resets the address to 0x2F.

ADDR_RST Testpoint Pad
Jumpers
Never modified a jumper before?
Check out our Jumper Pads and PCB Traces tutorial for a quick introduction!

LED Jumper
If you are concerned about power consumption, need to run dark, or you just don't like LEDs, cut the traces here to disconnect the Power LED from, you guessed it, power.

LED Jumper
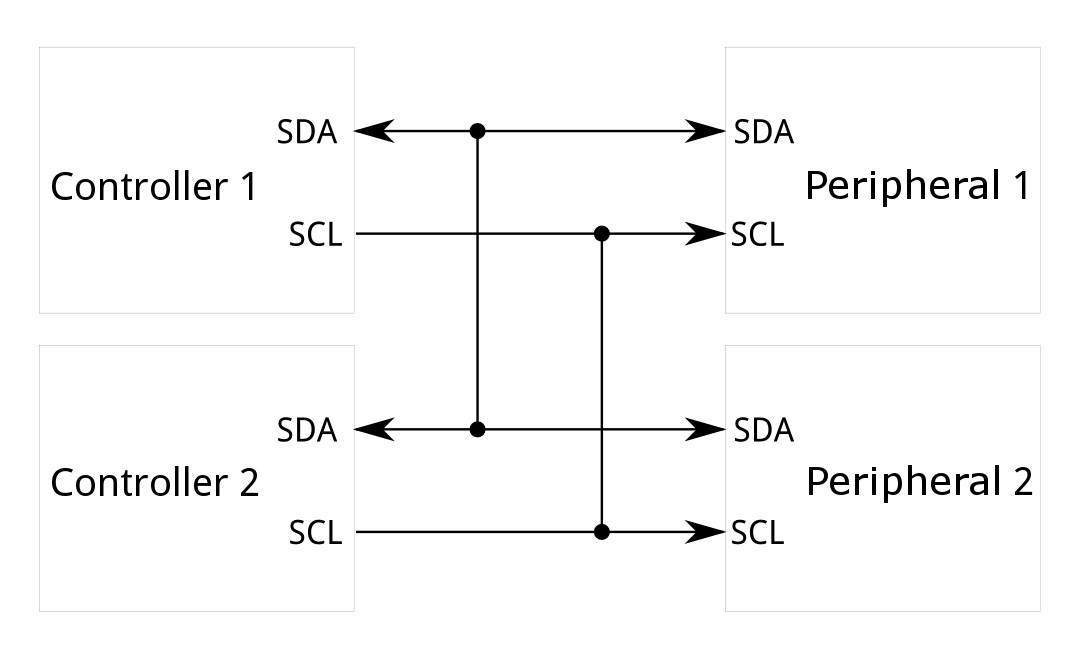
I2C
The Qwiic Ultrasonic Distance Sensor has built-in 2.2k pull-up resistors on the SDA and SCL lines. These are needed for normal I2C communication. The I2C jumper has two small traces connecting the pull-ups to 3.3V. For general use you can leave this jumper unmodified. If you have many (over 7) devices on the I2C bus, each with their own pull up resistors, then you may want to cut the I2C jumpers to disconnect the 2.2k resistors on each Qwiic board.

I2C jumper
Board Dimensions
The board dimensions are illustrated in the drawing below; the listed measurements are in inches.

SparkFun Ultrasonic Sensor Board Dimensions
Need more measurements?
For more information about the board's dimensions, users can download the Eagle files. These files can be opened in Eagle and additional measurements can be made with the dimensions tool.
Eagle - Free Download!
Eagle is a CAD program for electronics that is free to use for hobbyists and students. However, it does require an account registration to utilize the software.
 Dimensions Tool
This video from Autodesk demonstrates how to utilize the dimensions tool in Eagle, to include additional measurements:
Hardware Assembly
Using the Qwiic system, assembling the hardware is simple. Connect the RedBoard to one of the Ultrasonic Distance Sensor Qwiic ports using your Qwiic cables. Then connect the RedBoard to your computer via the MicroUSB cable and voila! You're ready to rock!

Ultrasonic Distance Sensor Connected to Programming
If you don't want to use the Qwiic system, there are Plated Through Holes on the side of the board that you can solder headers to.
New to soldering?
If you have never soldered before or need a quick refresher, check out our How to Solder: Through-Hole Soldering guide.
-

How to Solder: Through-Hole Soldering
Software Setup
Attention
If this is your first time using Arduino, please review our tutorial on installing the Arduino IDE. If you have not previously installed an Arduino library, please check out our installation guide.
SparkFun has written a library to work with the SparkFun Ultrasonic Distance Sensor Qwiic Board. You can obtain this library by clicking on the button below, or by downloading it from the GitHub Repository.
Arduino Example
Now that we've installed the Arduino library, it's time to upload our first sketch to make sure everything is working properly.
Example 1
This first example just does some basic measurements. To find Example 1, go to File > Examples > SparkFun Qwiic Ultrasonic Arduino Library > Example1_BasicReadings:

Finding Example 1
Alternatively, you can expand the link below and copy and paste the code into a shiny new Arduino sketch:
Example 1 Arduino Code
/* SparkFun Ulrasonic Distance Sensor - Example 1 Basic Distance Sensing
 *
 * Product:
 *  *  SparkFun Qwiic Ultrasonic Distance Sensor - HC-SR04 (SEN-1XXXX)
 *  *  https://www.sparkfun.com/1XXXX
 *
 * Written By: Elias Santistevan
 * Date: 06/2024
 *
 * SPDX-License-Identifier: MIT
 *
 * Copyright (c) 2024 SparkFun Electronics
 */

#include "SparkFun_Qwiic_Ultrasonic_Arduino_Library.h"

// Create an ultrasonic sensor object
QwiicUltrasonic myUltrasonic;

// Here we set the device address. Note that an older version of the Qwiic
// Ultrasonic firmware used a default address of 0x00. If yours uses 0x00,
// you'll need to change the address below. It is also recommended to run
// Example 2 to change the address to the new default.
uint8_t deviceAddress = kQwiicUltrasonicDefaultAddress; // 0x2F
// uint8_t deviceAddress = 0x00;

void setup()
{
  // Start serial
  Serial.begin(115200);
  Serial.println("Ultrasonic Distance Sensor Example 1 - Basic Readings");

  Wire.begin();

  // Attempt to begin the sensor
  while (myUltrasonic.begin(deviceAddress) == false)
  {
    Serial.println("Ultrasonic sensor not connected, check your wiring and I2C address!");
    delay(2000);
  }

  Serial.println("Ultrasonic sensor connected!");
}

void loop()
{
  uint16_t distance = 0;
  myUltrasonic.triggerAndRead(distance);

  // Print measurement
  Serial.print("Distance (mm): ");
  Serial.println(distance);

  //Serial.println("Distance (cm): ");
  //Serial.print((distance / 10.0), 2);

  //Serial.println("Distace (in): ");
  //Serial.print((distance / 25.4), 2);

  // Wait a bit
  delay(250);
}
Make sure you've selected the correct board and port in the Tools menu and then hit the upload button. Once the code has finished uploading, go ahead and open a Serial Monitor. You should see something similar to the following.

Example 1 Output
Note the output change when the mouse is moved closer to the sensor.
Example 2
Let's add in an LCD screen to display our measurements. For this example you will need another Qwiic Cable and the SparkFun Qwiic OLED Display (0.91 in., 128x32).
To display the sensor readings on the connected Qwiic OLED, we will need to install the SparkFun Qwiic OLED library. You can install this library to automatically in the Arduino IDE's Library Manager by searching for "SparkFun Qwiic OLED". Or you can manually download it from the GitHub repository.
To find Example 2, go to File > Examples > SparkFun Qwiic Ultrasonic Arduino Library > Example2_OLED_Distance:

Finding Example 2
Alternatively, you can expand the link below and copy and paste the code into a shiny new Arduino sketch:
Example 2 Arduino Code
/* SparkFun Ulrasonic Distance Sensor - Example 2 Basic Distance Sensing on an OLED Display
 *
 * Products:
 *  *  SparkFun Qwiic Ultrasonic Distance Sensor - HC-SR04 (SEN-1XXXX)
 *  *  https://www.sparkfun.com/1XXXX
 *  *  SparkFun Qwiic Narrow OLED Display (LCD-1XXXX)
 *  *  https://www.sparkfun.com/1XXXX
 *
 * Link to OLED library: https://github.com/sparkfun/SparkFun_Qwiic_OLED_Arduino_Library
 *
 * Written By: Elias Santistevan
 * Date: 06/2024
 *
 * SPDX-License-Identifier: MIT
 *
 * Copyright (c) 2024 SparkFun Electronics
 */

#include "SparkFun_Qwiic_OLED.h"
// For the narrow LED, I prefer the slightly larger font included in the OLED library.
// This is completely optional and can be deleted or commented out. By default the font
// is slightly smaller.
#include "res/qw_fnt_8x16.h"
#include "SparkFun_Qwiic_Ultrasonic_Arduino_Library.h"

// Create an ultrasonic sensor object
QwiicUltrasonic myUltrasonic;
// Creat an OLED object
QwiicNarrowOLED myOLED;

char distanceBuff[4] = {};
String distanceStr = "";
int centerX;
int centerY;

// Here we set the device address. Note that an older version of the Qwiic
// Ultrasonic firmware used a default address of 0x00. If yours uses 0x00,
// you'll need to change the address below. It is also recommended to run
// Example 2 to change the address to the new default.
uint8_t deviceAddress = kQwiicUltrasonicDefaultAddress; // 0x2F
// uint8_t deviceAddress = 0x00;

void setup()
{

  Serial.begin(115200); // Default config settings
  Serial.println("Ultrasonic Distance Sensor - Example 4 - Distance on an OLED Display");
  Wire.begin();

  while (myOLED.begin() == false) {
    Serial.println("OLED sensor not connected, check your wiring and I2C address!");
    delay(1000);
  }
  while(myUltrasonic.begin(deviceAddress) == false)
  {
    Serial.println("Ultrasonic sensor not connected, check your wiring and I2C address!");
    delay(1000);
  }

  String hello = "Hello, Ultrasonic!";

  // This is good for the narrow OLED screen. You can also just remove this
  // and it will default to a slightly smaller font.
  myOLED.setFont(QW_FONT_8X16);

  // This will center the text onto the screen.
  int x0 = (myOLED.getWidth() - myOLED.getStringWidth(hello)) / 2;
  int y0 = (myOLED.getHeight() - myOLED.getStringHeight(hello)) / 2;

  myOLED.text(x0, y0, hello);

  // There's nothing on the screen yet - Now send the graphics to the device
  myOLED.display();
  delay(2000);
}

void loop()
{
  uint16_t distance = 0;
  myUltrasonic.triggerAndRead(distance);

  // Convert distance, which is an integer, to char so that we can print it.
  snprintf(distanceBuff, 6, "%d", distance);

  // Put the distance in a string so that we can also print "mm".
  distanceStr = distanceBuff;
  distanceStr += "mm";

  myOLED.erase();
  centerX = (myOLED.getWidth() - myOLED.getStringWidth(distanceStr)) / 2;
  centerY = (myOLED.getHeight() - myOLED.getStringHeight(distanceStr)) / 2;
  myOLED.text(centerX, centerY, distanceStr);
  myOLED.display();

  delay(250);
}
We have code, now let's hookup the hardware! The Qwiic system makes this example quite literally plug and play. Use Qwiic cables to make your hardware setup look like this:

Example 2 Hardware Hookup
Make sure you've selected the correct board and port in the Tools menu and then hit the upload button. Once the code has finished uploading, you should see something similar to the following.

Run away!
Try moving an object (like your hand or a dinosaur) closer to the sensor - notice the output of the OLED shows you how close the object is! Grr. Rawr!
Going Further
There are more examples in the Arduino Library that allow you to change the I2C address or use the Trigger and Echo Pins. Feel free to check them out!
Troubleshooting Tips
Note
Not working as expected and need help?
If you need technical assistance and more information on a product that is not working as you expected, we recommend heading on over to the SparkFun Technical Assistance page for some initial troubleshooting.
If you don't find what you need there, the SparkFun Forums are a great place to find and ask for help. If this is your first visit, you'll need to create a Forum Account to search product forums and post questions.
Resources:
For more resources related to the SparkFun Ultrasonic Distance Sensor - TCT40 (Qwiic), check out the links listed here:
- Product Page
- Schematic (PDF)
- Eagle Files (ZIP)
- Board Dimensions (PDF)
- Component Documentation
- STM8L051F3 MCU Datasheet (PDF)
- TCT40-16R/T Datasheet (PDF)
- RS232 transceiver Datasheet (PDF)
- Arduino Library GitHub Repository
- GitHub Hardware Respository