Firmware Update
From time to time, SparkFun will release new firmware for the BlueSMiRF v2 product line to add and improve functionality. For most users, firmware can be upgraded over a 2.4GHz WiFi network using the OTA method. Users can also update the firmware manually using a Command Line Interface (CLI)
Over-The-Air (OTA)
Once the AT-WiFiSSID and AT-WiFiPassword settings have been entered for your local WiFi network, the ATC command can be issued to check for new firmware. If new firmware is available, send the ATU command to begin an update.
Serial Interface
Because it's much easier to use, we recommend the OTA firmware update process. If that fails for some reason, the following CLI method can be used.
Bootloader Mode
Hold the PAIR button while powering the BlueSMiRF v2. This will cause the ESP32 to enter bootloader mode. Once the BlueSMiRF v2 is in bootloader mode, the STATUS LED will be dimly lit and the CONNECT LED will be off.
We recommend using a breadboard or jumper wires to connect the BlueSMiRF to a USB-to-Serial adapter. At a minimum, you will need to connect the UART pins, power, and ground as stated in the hardware assembly. Remember, the TX and RX connections must be crossed over.
| USB-to-Serial Converter Pinout |
Intermediate Wire Connection | BlueSMiRF v2 Pinout |
|
|---|---|---|---|
| DTR | RTS | ||
| RXI | RXI | ||
| TXO | TXO | ||
| 3V3 | VCC | ||
| CTS | CTS | ||
| GND | GND | ||
Note
To automatically trigger the reset of the ESP32, users can connect the DTR pin from the USB-to-Serial converter to the RST reset pin on the BlueSMiRF.
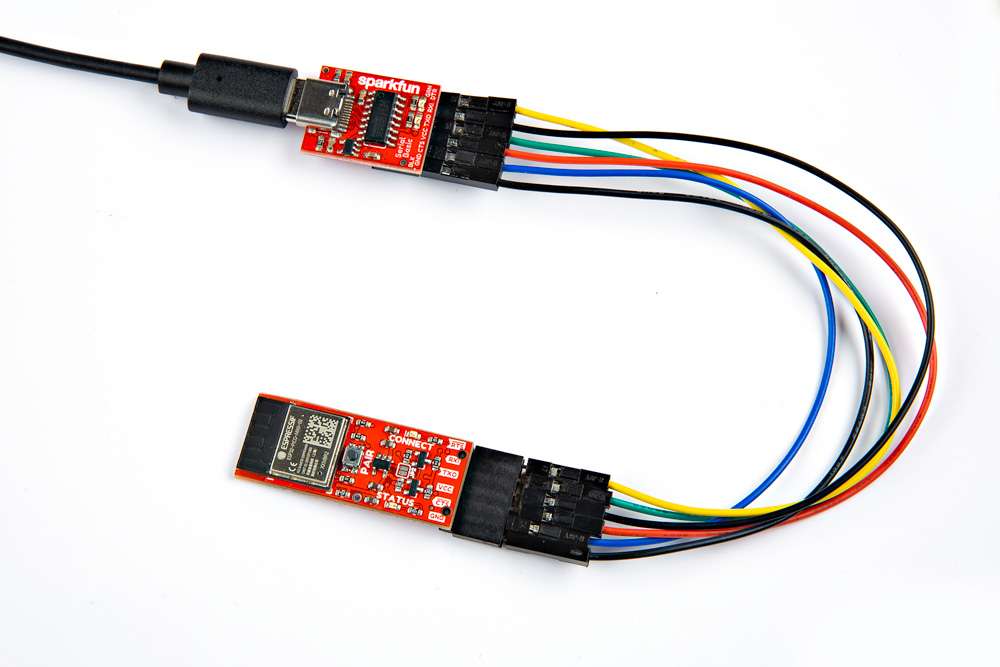
USB-to-Serial Converter (CH340) to BlueSMiRF v2 Header with an Additional Stackable Header
Windows
Identify the COM port the USB-to-Serial device enumerated at. The easiest way to do this is to open the Device Manager under the Ports (COM & LPT) tree:
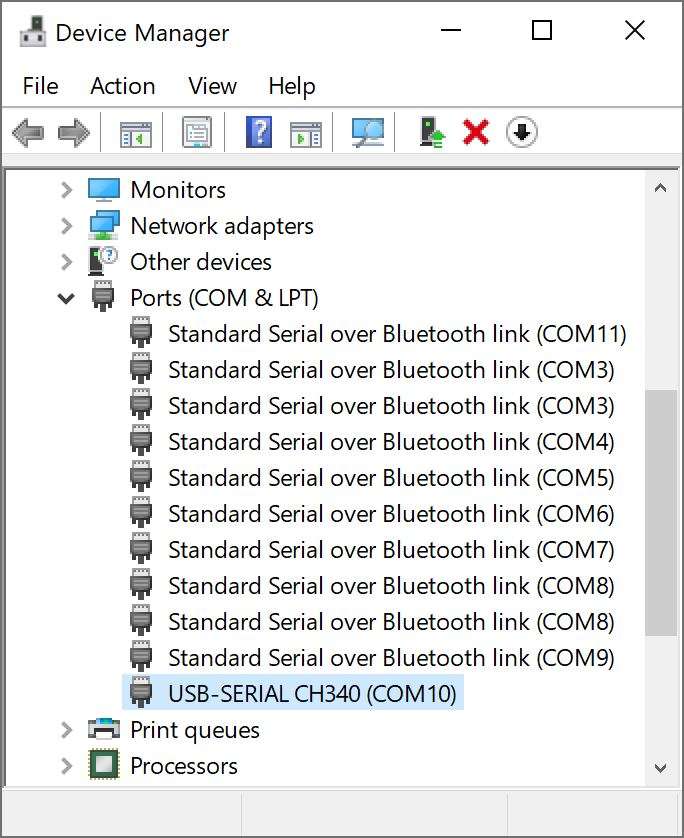
CH340 is on COM10 as shown in Device Manager
If the COM port is not showing, be sure the unit is turned On. If an unknown device is appearing, you’ll need to install drivers for your USB-to-serial device (we'll assume that you are using the CH340).
Once the correct COM port is identified, head to the GitHub repo for the BlueSMiRF v2 binaries and download all the contents. Unzip the contents in a known directory and copy the path.
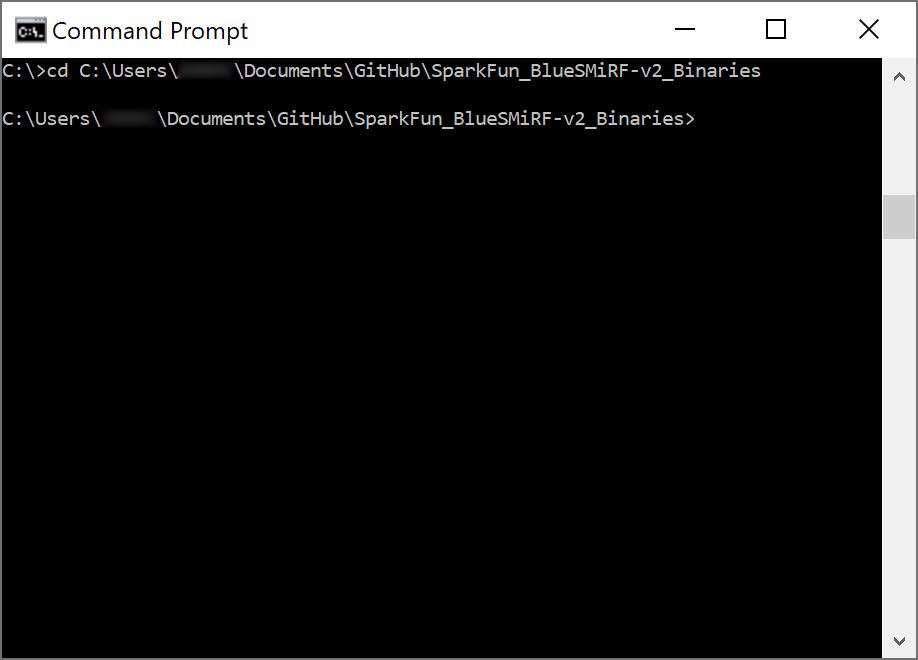
Open a command prompt (Win + R then type cmd). Head to the directory where you unzipped the folder. You'll need to use the cd commmand, paste the path where you unzipped the folder, and hit the Enter key.
Change Path to BlueSmiRF Binaries Folder
You'll then need to run the 'batch_program.bat' along with the binary file name and COM port. Enter the following command below, where COM4 should be replaced by the COM port you identified earlier and BlueSMiRF_Firmware_v1_0.bin is the firmware that you are updating to. Make sure to send an additional key to run the batch file.
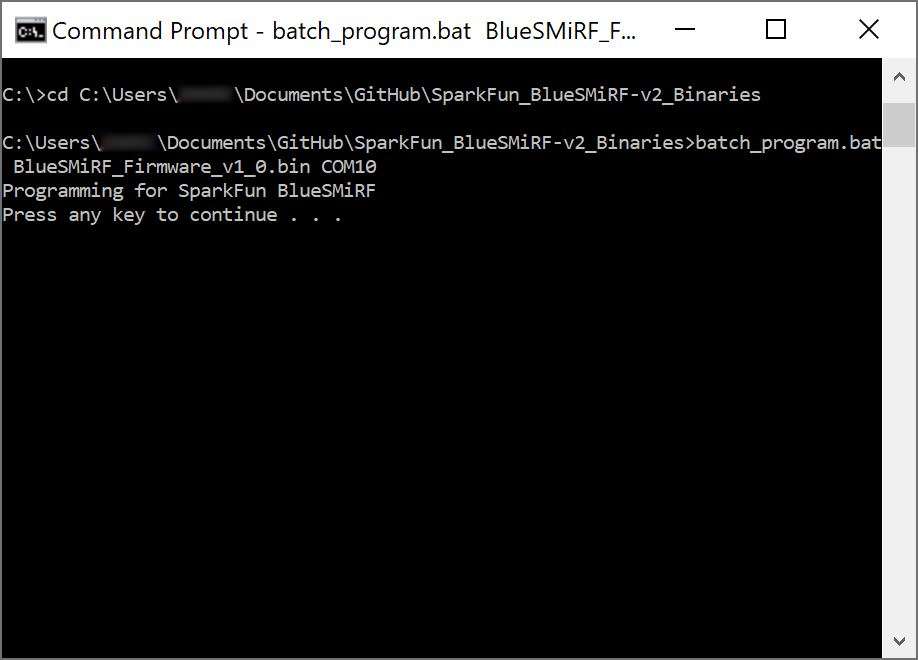
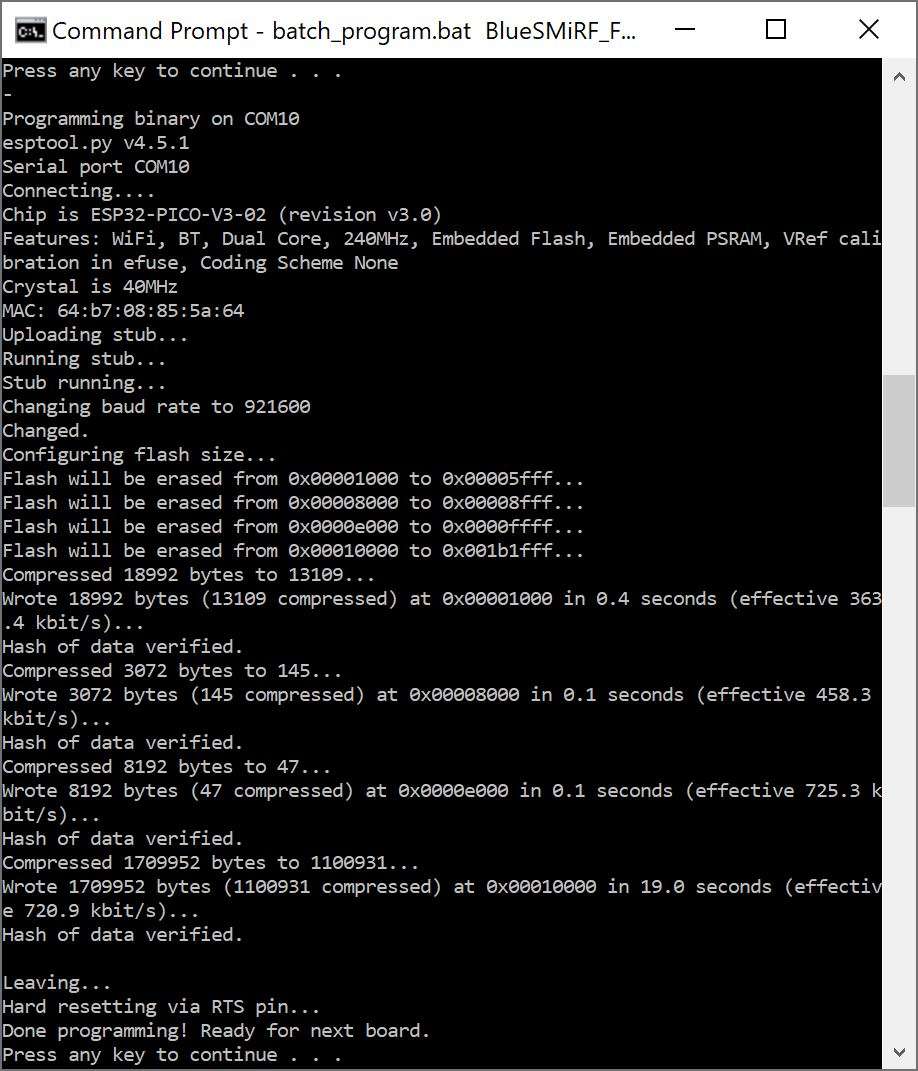
batch_program.bat running esptool
After about 20 seconds, you should see the following message: Done programming! Ready for next board.
Successfully Programmed BlueSMiRF v2 - ESP32
The batch file runs the following commands, where COM4 is replaced with the COM port that the BlueSMiRF product enumerated at and BlueSMiRF_Firmware_vx_x.bin is the firmware you would like to load.
esptool.exe --chip esp32 --port COM4 --baud 921600 --before default_reset --after hard_reset write_flash -z --flash_mode dio --flash_freq 80m --flash_size 8MB 0x1000 bins/bootloader.bin 0x8000 bins/partitions.bin 0xe000 bins/boot_app0.bin 0x10000 BlueSMiRF_Firmware_v1_0.bin
Note
Some users have reported the 921600 baud rate does not work. Decrease this to 115200 as needed.
Tip
Finished programming the ESP32? Type Ctrl + C , Y , and Enter to exit the batch file. You can also close the window.
Upon completion, the BlueSMiRF v2 must be power cycled to exit bootloader mode. Once power cycled, the BlueSMiRF will start running the new firmware.
Note
We recommend disconnecting the USB cable from the USB-to-Serial Converter or your computer's COM port.
macOS / Linux
Get esptool.py. Connect a USB A to C cable from your computer to the USB-to-Serial. Now identify the COM port the USB-to-serial device enumerated at.
If the COM port is not showing, be sure the unit is turned On. If an unknown device is appearing, you’ll need to install drivers for your USB-to-serial device (we'll assume that you are using the CH340).
Once the correct COM port is identified, head to the GitHub repo for the BlueSMiRF v2 binaries and download all the contents. Unzip the contents in a known directory and copy the path.
Open a Terminal window and run the following command, where /dev/ttyUSB0 is replaced with the port that the USB-to-Serial board enumerated at and BlueSMiRF_Firmware_vx_x.bin is the firmware you would like to load.
py esptool.py --chip esp32 --port /dev/ttyUSB0 --baud 921600 --before default_reset --after hard_reset write_flash -z --flash_mode dio --flash_freq 80m --flash_size 8MB 0x1000 bins/bootloader.bin 0x8000 bins/partitions.bin 0xe000 bins/boot_app0.bin 0x10000 BlueSMiRF_Firmware_vx_x.bin
Note
Some users have reported the 921600 baud rate does not work. Decrease this to 115200 as needed.
Tip
Finished programming the ESP32? Type Ctrl + C , Y , and Enter to exit the batch file. You can also close the window.
Upon completion, the BlueSMiRF must be power cycled to exit bootloader mode. Once power cycled, the BlueSMiRF will start running the new firmware.
Note
We recommend disconnecting the USB cable from the USB-to-Serial Converter or your computer's COM port.