Arduino Examples
Now that we have the AS7331 Arduino library installed, let's take a closer look at a couple of the examples included in it.
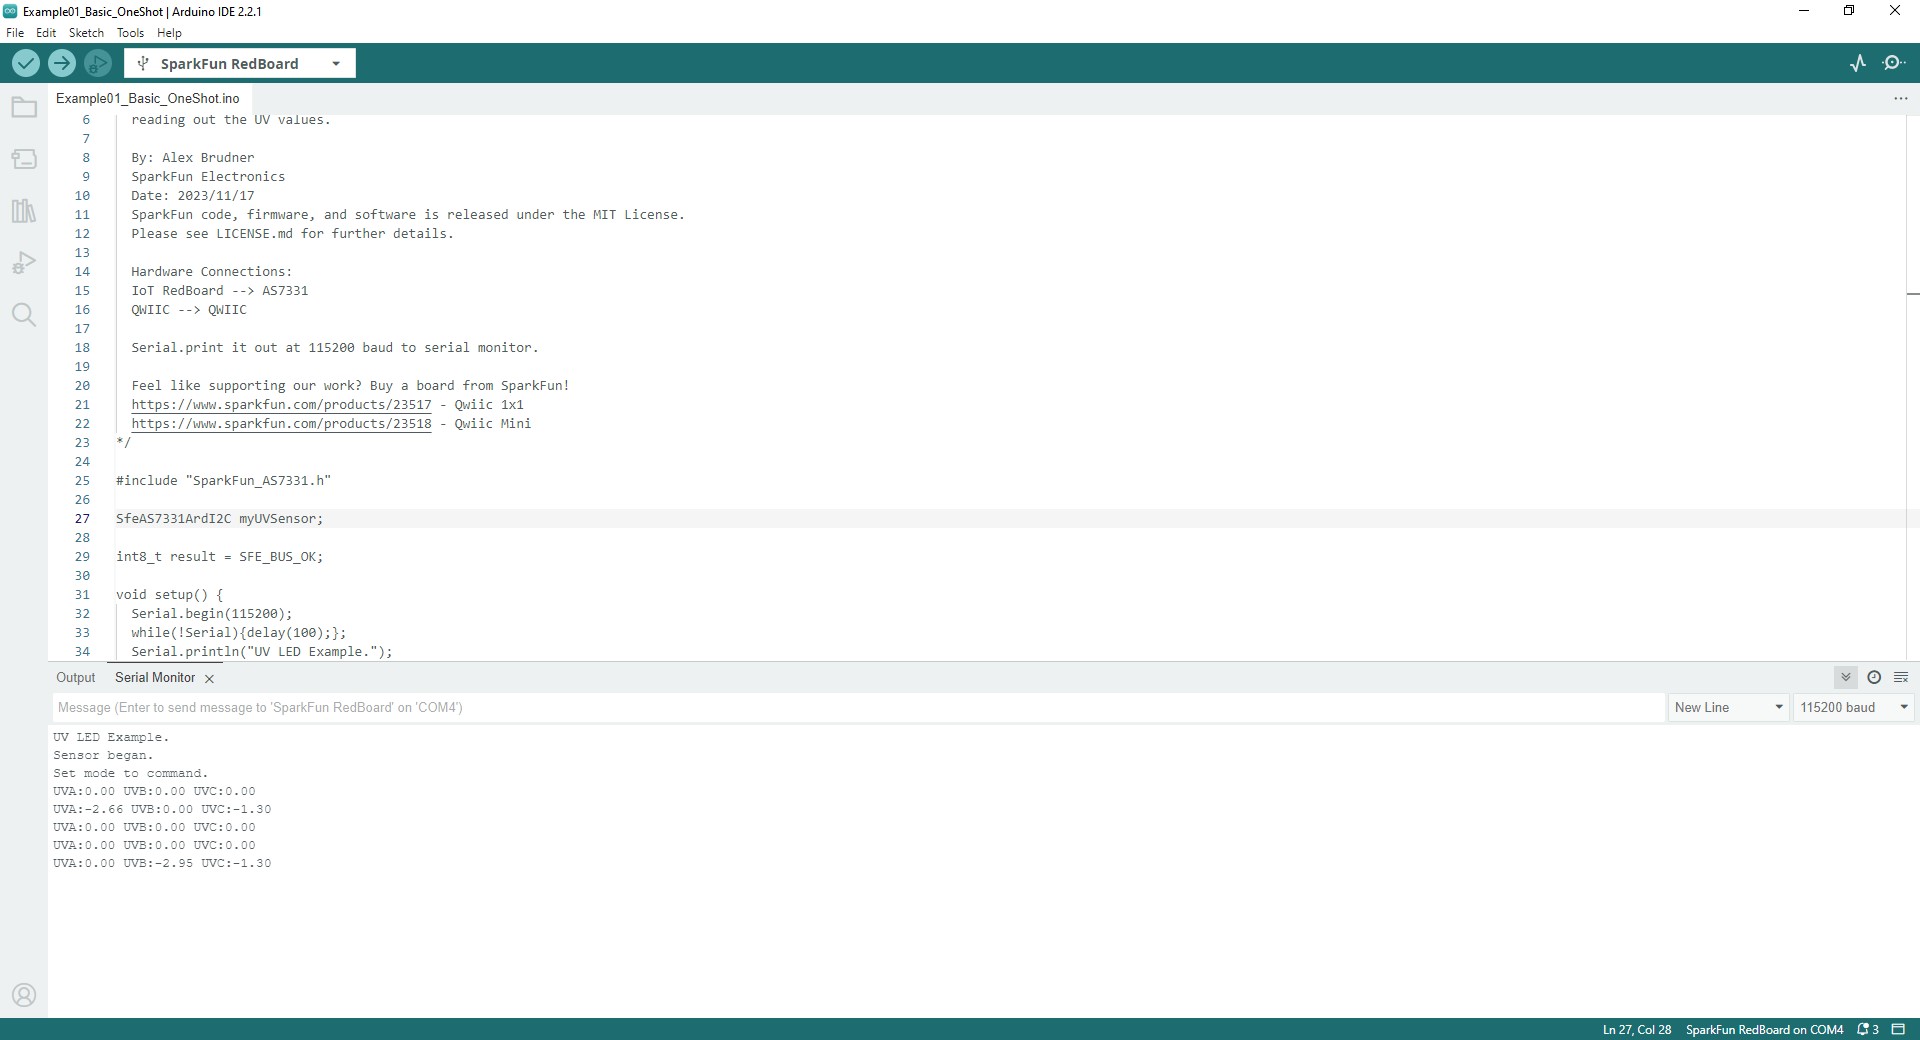
Example 1 - Basic One-Shot
The first example demonstrates the basics of configuring the AS7331, initializing it on the I2C bus to operate in command (one-shot) mode and printing out measured data over serial. This helps conserve power as the sensor powers on for a single measurement and conversion and then powers back down to sleep mode. Open the example in Arduino by navigating to File > Examples > SparkFun AS7331 Arduino Library > Example01_Basic_OneShot or you can copy the code below into a blank sketch. Select your Board and Port and click the "Upload" button.
Example 1 - Basic One Shot
 /*
   Using the AMS AS7331 Spectral UV Sensor in Command/One Shot (CMD) Mode.

   This example shows how operate the AS7331 in the default CMD mode. The start
   command is sent, then delays until the conversion time has passed before
   reading out the UV values.

   By: Alex Brudner
   SparkFun Electronics
   Date: 2023/11/17
   SparkFun code, firmware, and software is released under the MIT License.
     Please see LICENSE.md for further details.

   Hardware Connections:
   IoT RedBoard --> AS7331
   QWIIC --> QWIIC

   Serial.print it out at 115200 baud to serial monitor.

   Feel like supporting our work? Buy a board from SparkFun!
   https://www.sparkfun.com/products/23517 - Qwiic 1x1
   https://www.sparkfun.com/products/23518 - Qwiic Mini
 */

 #include <Arduino.h>
 #include <SparkFun_AS7331.h>
 #include <Wire.h>

 SfeAS7331ArdI2C myUVSensor;

 void setup()
 {
     Serial.begin(115200);
     while (!Serial)
     {
         delay(100);
     };
     Serial.println("AS7331 UV A/B/C Command (One-shot) mode Example.");

     Wire.begin();

     // Initialize sensor and run default setup.
     if (myUVSensor.begin() == false)
     {
         Serial.println("Sensor failed to begin. Please check your wiring!");
         Serial.println("Halting...");
         while (1)
             ;
     }

     Serial.println("Sensor began.");

     // Set measurement mode and change device operating mode to measure.
     if (myUVSensor.prepareMeasurement(MEAS_MODE_CMD) == false)
     {
         Serial.println("Sensor did not get set properly.");
         Serial.println("Halting...");
         while (1)
             ;
     }

     Serial.println("Set mode to command.");
 }

 void loop()
 {

     // Send a start measurement command.
     if (ksfTkErrOk != myUVSensor.setStartState(true))
         Serial.println("Error starting reading!");

     // Wait for a bit longer than the conversion time.
     delay(2 + myUVSensor.getConversionTimeMillis());

     // Read UV values.
     if (ksfTkErrOk != myUVSensor.readAllUV())
         Serial.println("Error reading UV.");

     Serial.print("UVA:");
     Serial.print(myUVSensor.getUVA());
     Serial.print(" UVB:");
     Serial.print(myUVSensor.getUVB());
     Serial.print(" UVC:");
     Serial.println(myUVSensor.getUVC());

     delay(2000);
 }
Once the code finishes uploading, open the serial monitor with the baud set to 115200 and you should see the initialization success messages and then UV data begin to print out every 2 seconds like the screenshot below shows:
Code to Note
The myUVSensor.begin function sets the AS7331 to operate in Command Mode (One Shot) by default. Switching to other modes requires calling the myUVSensor.startMeasurement(MEAS_MODE_CONT). The other examples in the library demonstrate how to switch to the other three operating modes.
Example 2 - Continuous Mode
Example 2 demonstrates how to change from the default settings to have the AS7331 operate in Continuous Mode. This example requires some additional assembly to connect the INT pin to an interrupt-capable pin on your microcontroller. The example defaults to use D26 so adjust this line if you change which pin is used for the interrupt:
Open the example in Arduino by navigating to File > Examples > SparkFun AS7331 Arduino Library > Example01_Basic_OneShot or you can copy the code below into a blank sketch. Select your Board and Port and click the "Upload" button.
Example 2 - CONT Mode
 /*
   Using the AMS AS7331 Spectral UV Sensor in Continuous (CONT) Mode.

   This example shows how operate the AS7331 in CONT mode. The break time
   register sets the delay between measurements so that the processor can read
   out the results without interfering with the ADC.

   By: Alex Brudner
   SparkFun Electronics
   Date: 2023/11/27
   SparkFun code, firmware, and software is released under the MIT License.
     Please see LICENSE.md for further details.

   Hardware Connections:
   IoT RedBoard --> AS7331
   QWIIC --> QWIIC
   26  --> INT

   Serial.print it out at 115200 baud to serial monitor.

   Feel like supporting our work? Buy a board from SparkFun!
   https://www.sparkfun.com/products/23517 - Qwiic 1x1
   https://www.sparkfun.com/products/23518 - Qwiic Mini
 */

 #include <Arduino.h>
 #include <SparkFun_AS7331.h>
 #include <Wire.h>

 SfeAS7331ArdI2C myUVSensor;

 const uint8_t interruptPin = 26;
 volatile bool newDataReady = false;

 void setup()
 {
     Serial.begin(115200);
     while (!Serial)
     {
         delay(100);
     };
     Serial.println("AS7331 UV A/B/C Continuous mode example.");

     Wire.begin();

     // Configure Interrupt.
     pinMode(interruptPin, INPUT);
     attachInterrupt(digitalPinToInterrupt(interruptPin), dataReadyInterrupt, RISING);

     // Initialize sensor and run default setup.
     if (myUVSensor.begin() == false)
     {
         Serial.println("Sensor failed to begin. Please check your wiring!");
         Serial.println("Halting...");
         while (1)
             ;
     }

     Serial.println("Sensor began.");

     // Set the delay between measurements so that the processor can read out the
     // results without interfering with the ADC.
     // Set break time to 900us (112 * 8us) to account for the time it takes to poll data.
     if (ksfTkErrOk != myUVSensor.setBreakTime(112))
     {
         Serial.println("Sensor did not set break time properly.");
         Serial.println("Halting...");
         while (1)
             ;
     }

     // Set measurement mode and change device operating mode to measure.
     if (myUVSensor.prepareMeasurement(MEAS_MODE_CONT) == false)
     {
         Serial.println("Sensor did not get set properly.");
         Serial.println("Spinning...");
         while (1)
             ;
     }

     Serial.println("Set mode to continuous. Starting measurement...");

     // Begin measurement.
     if (ksfTkErrOk != myUVSensor.setStartState(true))
         Serial.println("Error starting reading!");
 }

 void loop()
 {

     // If an interrupt has been generated...
     if (newDataReady)
     {
         newDataReady = false;

         if (ksfTkErrOk != myUVSensor.readAllUV())
             Serial.println("Error reading UV.");

         Serial.print("UVA:");
         Serial.print(myUVSensor.getUVA());
         Serial.print(" UVB:");
         Serial.print(myUVSensor.getUVB());
         Serial.print(" UVC:");
         Serial.println(myUVSensor.getUVC());
     }
 }

 void dataReadyInterrupt()
 {
     newDataReady = true;
 }
After uploading, open the serial monitor with the baud set to 115200 and you should see the initialization messages print out followed by a continuous flow of UV data.
Code to Note
As mentioned above, the myUVSensor.begin function sets the AS7331 to operate in Command Mode so after initializing the sensor the code sets the AS7331 to operate in Continuous Mode: