Installation & Setup
Arduino IDE
Tip
For first-time users, who have never programmed before and are looking to use the Arduino IDE, we recommend beginning with the SparkFun Inventor's Kit (SIK), which includes a simple board like the Arduino Uno or SparkFun RedBoard and is designed to help users get started programming with the Arduino IDE.
Most users may already be familiar with the Arduino IDE and its use. However, for those of you who have never heard the name Arduino before, feel free to check out the Arduino website. To get started with using the Arduino IDE, check out our tutorials below:
What is an Arduino? |
Installing Arduino IDE |
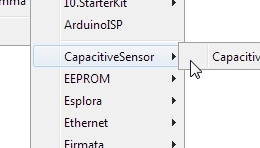
Installing an Arduino Library |
Installing Board Definitions in the Arduino IDE |
Need help setting up the RedBoard Plus?
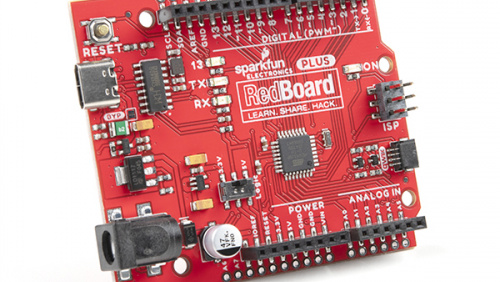
RedBoard Plus
The following instructions should help users get started with the RedBoard Plus. For more information about the board, please check out our hookup guide below:
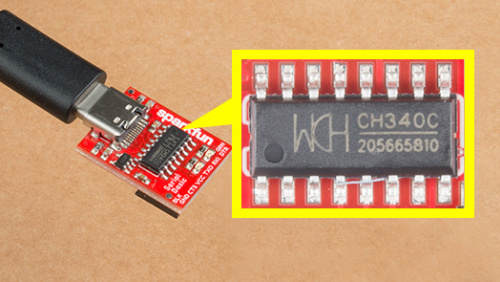
CH340 Driver
Users will need to install the appropriate driver for their computer to recognize the serial-to-UART chip on their board/adapter. Most of the latest operating systems will recognize the CH340C chip on the board and automatically install the required driver.
To manually install the CH340 driver on their computer, users can download it from the WCH website. For more information, check out our How to Install CH340 Drivers Tutorial.
Arduino IDE
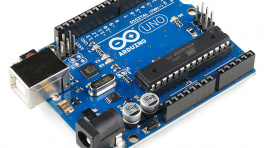
When selecting a board to program in the Arduino IDE, users should select the Arduino Uno from the Tools drop-down menu (_i.e. Tools > Board > Arduino AVR Boards > Arduino Uno).

Arduino IDE 2.x.x - Alternative Method
In the newest version of the Arduino IDE 2.x.x, users can also select their board (green) and port (blue) from the Select Board & Port dropdown menu (yellow).

USB Host Library
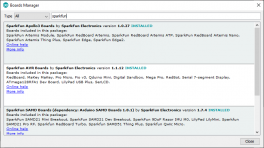
The USB Host Library Rev. 2.0 can be installed from the library manager in the Arduino IDE.

USB Host Library in the library manager of the Arduino IDE.
Info
For more details about the library, check out the online documentation.
Arduino IDE (v1.x.x)
In the Arduino IDE v1.x.x, the library manager will have the following appearance for the USB Host Shield library:

Alternative Libraries
Users are welcome to try other libraries for the MAX3421E, such as the ones listed below. However, our technical support team will only provide assistance with the USB Host Library Rev. 2.0 recommended in this hookup guide.
Supported Boards
For a detailed and up-to-date list of boards supported by this library, check out the README.md of the GitHub repository:
- All official Arduino AVR boards (Uno, Duemilanove, Mega, Mega 2560, Mega ADK, Leonardo etc.)
- Arduino Due
- Teensy (Teensy++ 1.0, Teensy 2.0, Teensy++ 2.0, Teensy 3.x, Teensy LC and Teensy 4.x)
- For the Teensy 3.x, install this SPI library and add
#include <spi4teensy3.h>to the*.inosketch file.
- For the Teensy 3.x, install this SPI library and add
- STM32F4
- Take a look at the following example code.
- ESP8266 is supported using the ESP8266 Arduino core
- Uses pins
15and5forCSandINT, respectively. GPIO6-GPIO11andGPIO16are NOT usable.
- Uses pins
- ESP32 is supported using the arduino-esp32
GPIO5:CSGPIO17:INTGPIO18:SCKGPIO19:POCIGPIO23:PICO
I/O Pin Modifications
The SPI pins used by this library are dictated by SPI library for the Arduino core being utilized and cannot be changed easily. It is recommended that the default pins of the SPI library be utilized.
However, the USB Host Library also declares its CS and INT pins. These pins can be reconfigured in the library by modifying the UsbCore.h file:
For instance, if a user wanted to reconfigure the CS pin to D7 and the INT pin to D2 of the RedBoard Plus (or any other Arduino Uno/ATmega328P based board), line 58 should read:
Tip
The information above is an example of a pin modification. However, it is not required for the general use of the shield and the examples in this guide. For more information, please refer to the instructions in the README.md of the GitHub repository.
Other Boards
For other boards, users will need to modify the lines based on the microcontroller type. For example, with the SparkFun IoT RedBoard users would need to modify line 52.