Connecting and Sending Output to an HTTP Server
One of the key features of the DataLogger IoT is it's simplified access to IoT service providers and servers. This document outlines how output from a DataLogger IoT device is sent to an HTTP server.
The following is covered by this document:
- Overview of the HTTP connection
- How a user configures and uses the HTTP connection
- Use examples
General Operation
HTTP connectivity allows data generated by the DataLogger IoT to be sent to an HTTP server. An HTTP endpoint is provided to the HTTP action within the DataLogger IoT, and when data is output, a JSON representation of the data is published to the endpoint via an HTTP POST operation. The body of the POST operation contains the a JSON document that encapsulates the sent DataLogger IoT data.

Data Structure
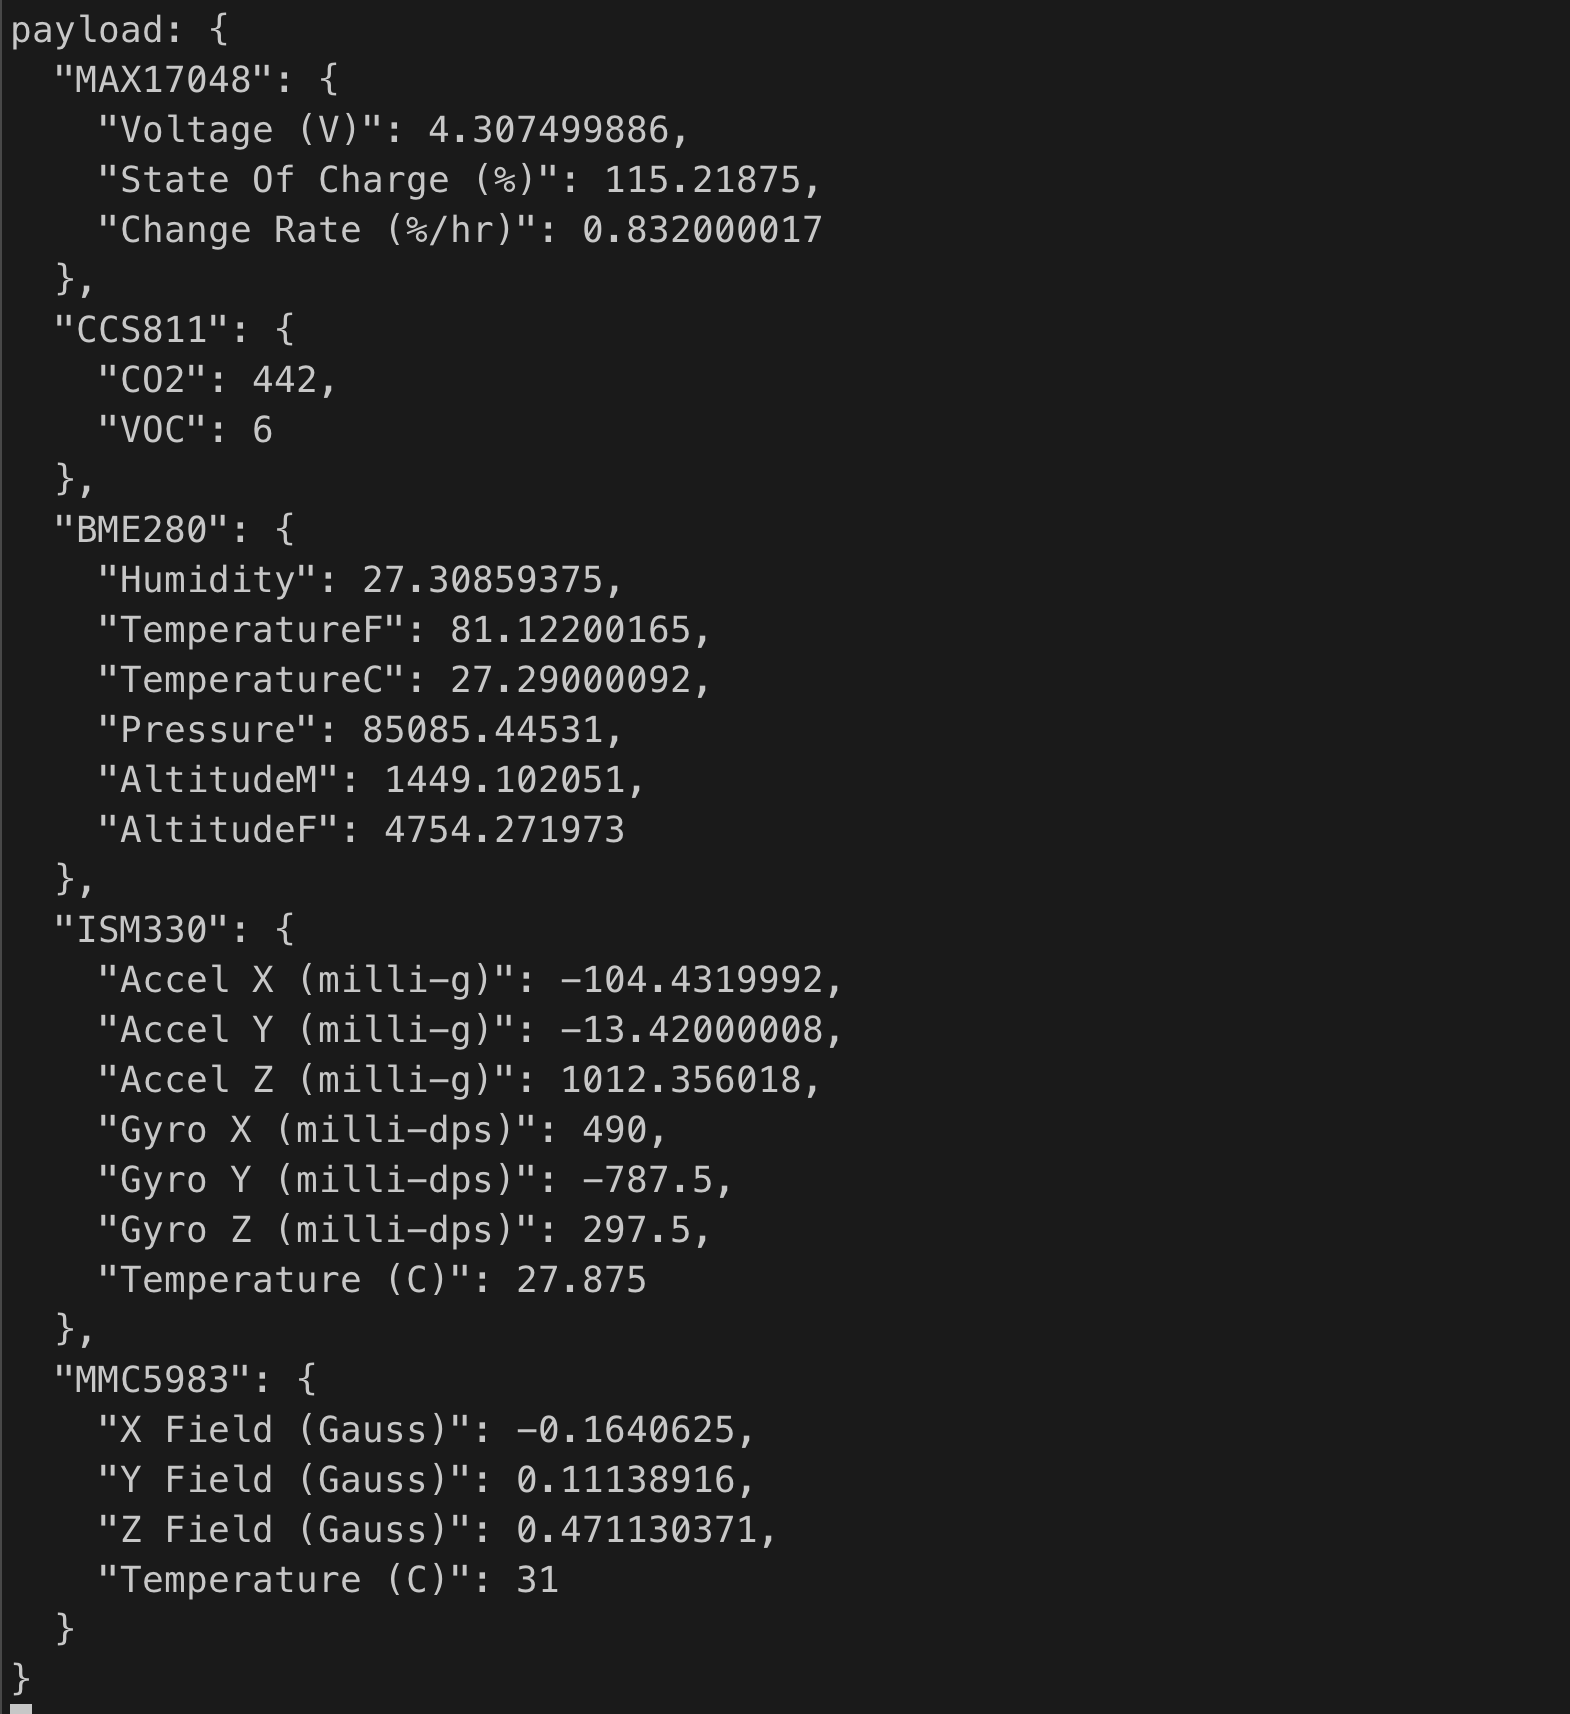
Data is sent to the HTTP server as a JSON object, which contains a collection of sub-object. Each sub-object represents a data source in the sensor, and contains the current readings from that source.
The following is an example of the data posted - note, this representation was "pretty printed" for readability.
{
  "MAX17048": {
    "Voltage (V)": 4.304999828,
    "State Of Charge (%)": 115.0625,
    "Change Rate (%/hr)": 0
  },
  "CCS811": {
    "CO2": 620,
    "VOC": 33
  },
  "BME280": {
    "Humidity": 25.03613281,
    "TemperatureF": 79.64599609,
    "TemperatureC": 26.46999931,
    "Pressure": 85280.23438,
    "AltitudeM": 1430.44104,
    "AltitudeF": 4693.04834
  },
  "ISM330": {
    "Accel X (milli-g)": -53.31399918,
    "Accel Y (milli-g)": -34.03800201,
    "Accel Z (milli-g)": 1017.236023,
    "Gyro X (milli-dps)": 542.5,
    "Gyro Y (milli-dps)": -1120,
    "Gyro Z (milli-dps)": 262.5,
    "Temperature (C)": 26
  },
  "MMC5983": {
    "X Field (Gauss)": -0.200622559,
    "Y Field (Gauss)": 0.076416016,
    "Z Field (Gauss)": 0.447570801,
    "Temperature (C)": 29
  }
}
HTTP Connection Setup
To connect to an HTTP server endpoint, the following information is needed:
- The URL of the endpoint
- The SSL certificate for the target server, if the connection is secure (HTTPS)
These values are set using the standard DataLogger methods - the interactive menu system, or a JSON file.
Menu System
For users that are interested in using the menu system, you will need to open a Serial Terminal, connect to the COM port that your DataLogger enumerated to, and set it to 115200 baud. In this case, we connected to COM13. Press any key to enter the Main Menu. Type 1 to enter the Settings menu. Then type 14 to enter the HTTP IoT Menu. When the menu system for the HTTP IoT connection is presented, you will need to configure the property values as listed in the JSON file. Saving the values through the menu system will save the credentials to the ESP32's persistent memory. The following options are displayed:

The options are:
- Enable/Disable the connection
- Set the URL for the endpoint
- Set the name of the CA Cert file for a secure connection (HTTP)
To set the HTTP URL/endpoint - select two (2) in the menu, and enter the URL. For this example, we'll enter: http://mysparkfunexample.com:8091 .

In the above example, the URL/HTTP Endpoint is on a server called mysparkfunexample.com, on port 8091. Once set, the system will post data to this URL.
If the endpoint is a secure ssl (HTTPS) connection, the certificate for the server is required. Because of the size of the certificates, the value is provided as a file that is loaded into the system by the attached SD card.
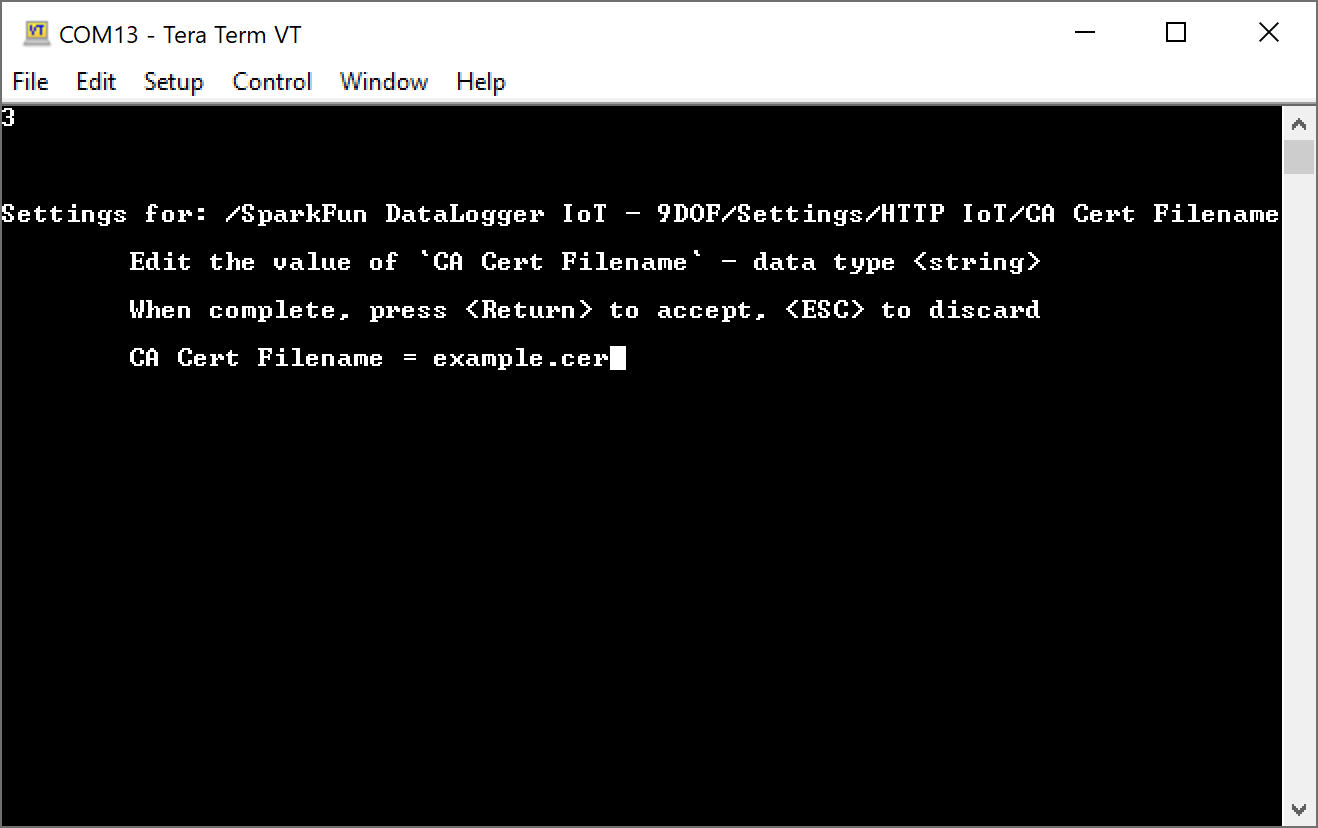
The above example show providing a certificate filename of example.cer.
Once all these values are set, the system will post data to the specified HTTP endpoint, following the JSON information structure noted earlier in this document.
JSON File Entries
If a JSON file is being used as an option to import settings into the DataLogger IoT, the following entries are used for the HTTP IoT connection:
Where:
Enabled- Set totrueto enable the connection.URL- Set to the URL for the connection.CA Cert Filename- Set to the cert filename on the SD card if being used.
If the JSON file is saved in the microSD card, you can load the credentials to the DataLogger IoT.
Tip
To load the values by the system at startup using a JSON file and microSD card, you will need to configure the Save Settings. This JSON file will be created with the "Save to Fallback" option. Make sure to enable the HTTP IoT as well.
Example - Connecting to a HTTP Server
In this example, a simple HTTP Server is creating using Node JS, and the HTTP connection in the DataLogger IoT is used to post data to this server. The received data is output to the console from there server.
The Server
The following javascript/node code creates a HTTP server on port 8090, and outputs received data to the console.
var http = require('http');

// Setup the endpoint server
var myServer = http.createServer(function (req, res) {

  // Initialize our body string
  var body="";

  // on data callback, append chunk to our body string
  req.on('data', function(chunk){
    body += chunk;
  });

  // On end callback, output the body to the console
  req.on('end', function(){
    // parse json string, then stringify it back for 'pretty printing'
    console.log("payload: " + JSON.stringify(JSON.parse(body),null,2));
  });

  // send a reply
  res.writeHead(200, {'Content-Type': 'text/plain'});
  res.end('n');
  // Just listen on our port
}).listen(8090);
The setup and use of node js is system dependant is beyond the scope of this document. However, Node JS is easily installed with your systems package manager (brew on macOS, Linux distribution package manager (apt, yum, ...etc), on Windows, the WSL is recommended).
Once Node is setup, the above server is run via the following command (assuming the implementation is in a file called simple_http.js):
As data is sent by the DataLogger IoT, the following is output to the console from the server:
Obtaining a Sites Security Certificate
Accessing a sites SSL/Secure Certificate is done via a web browser. The method for each browser is different. The following example uses Edge, which is similar to the operation in Chrome.
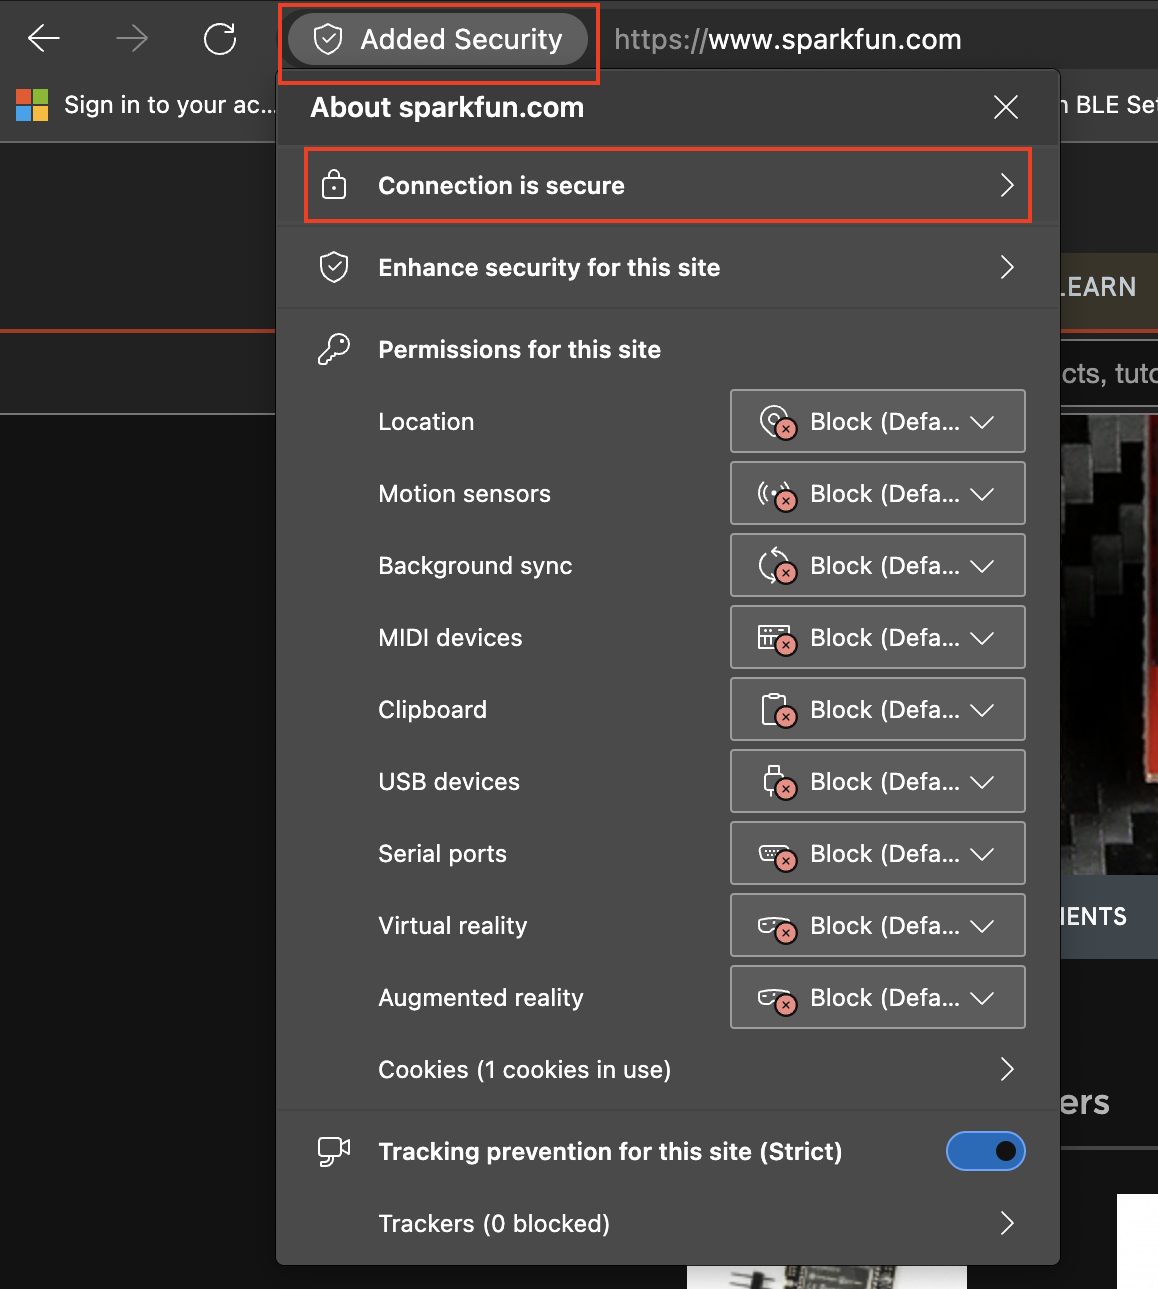
First, browse to the desired site/server. Click the Secure/Security area/button next to the URL to bring up the security detail page. On this page, select the Connection is secure menu option
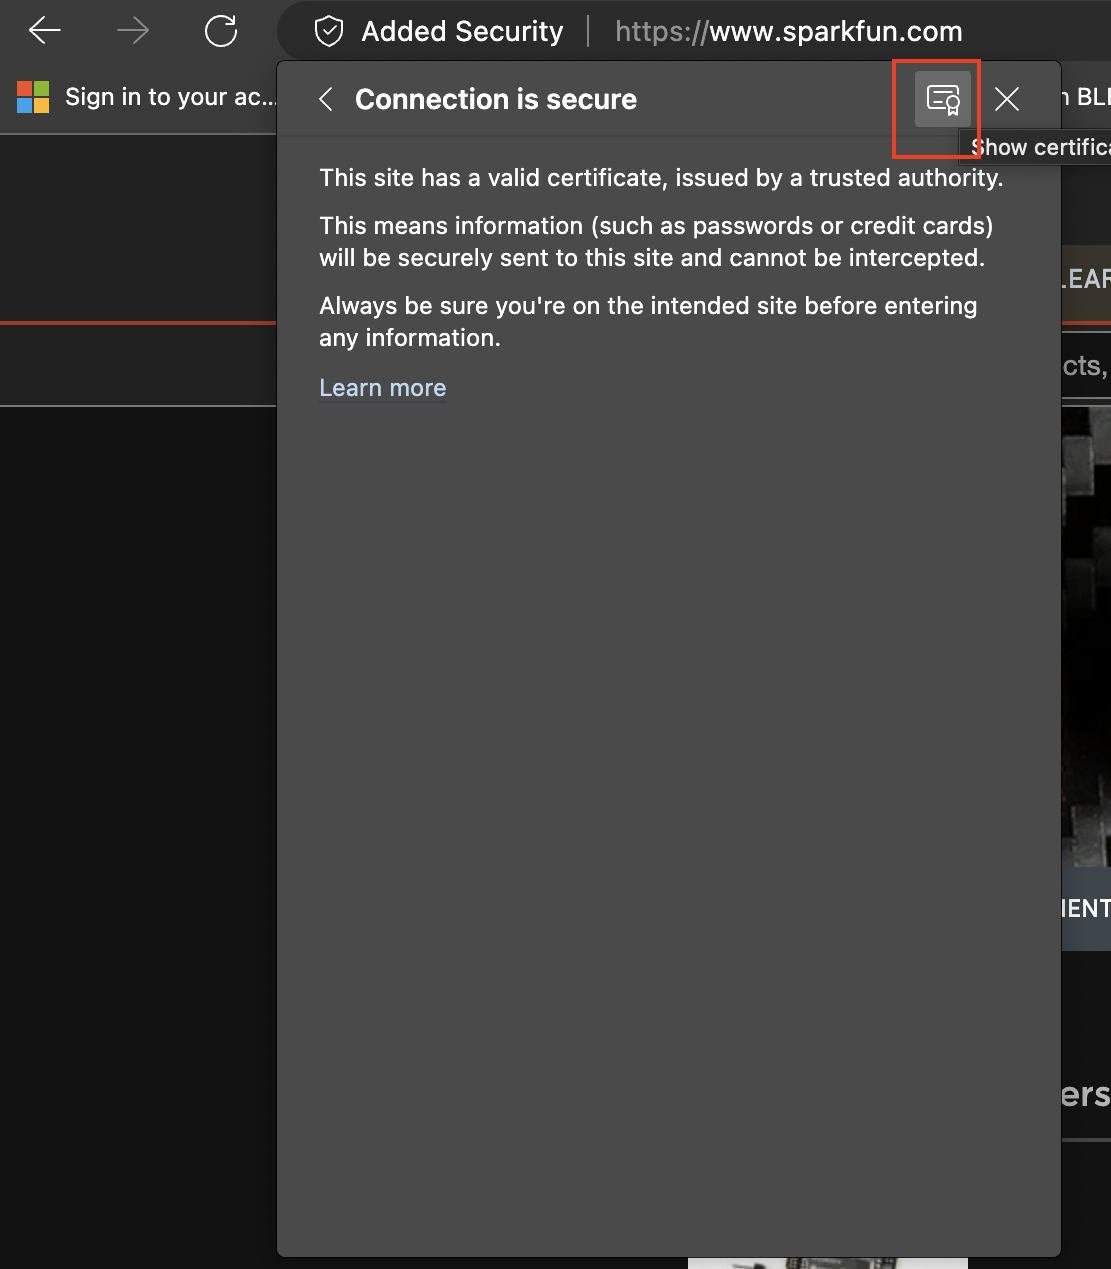
Next, on the page shown, select the certificate button on the upper right of the dialog.
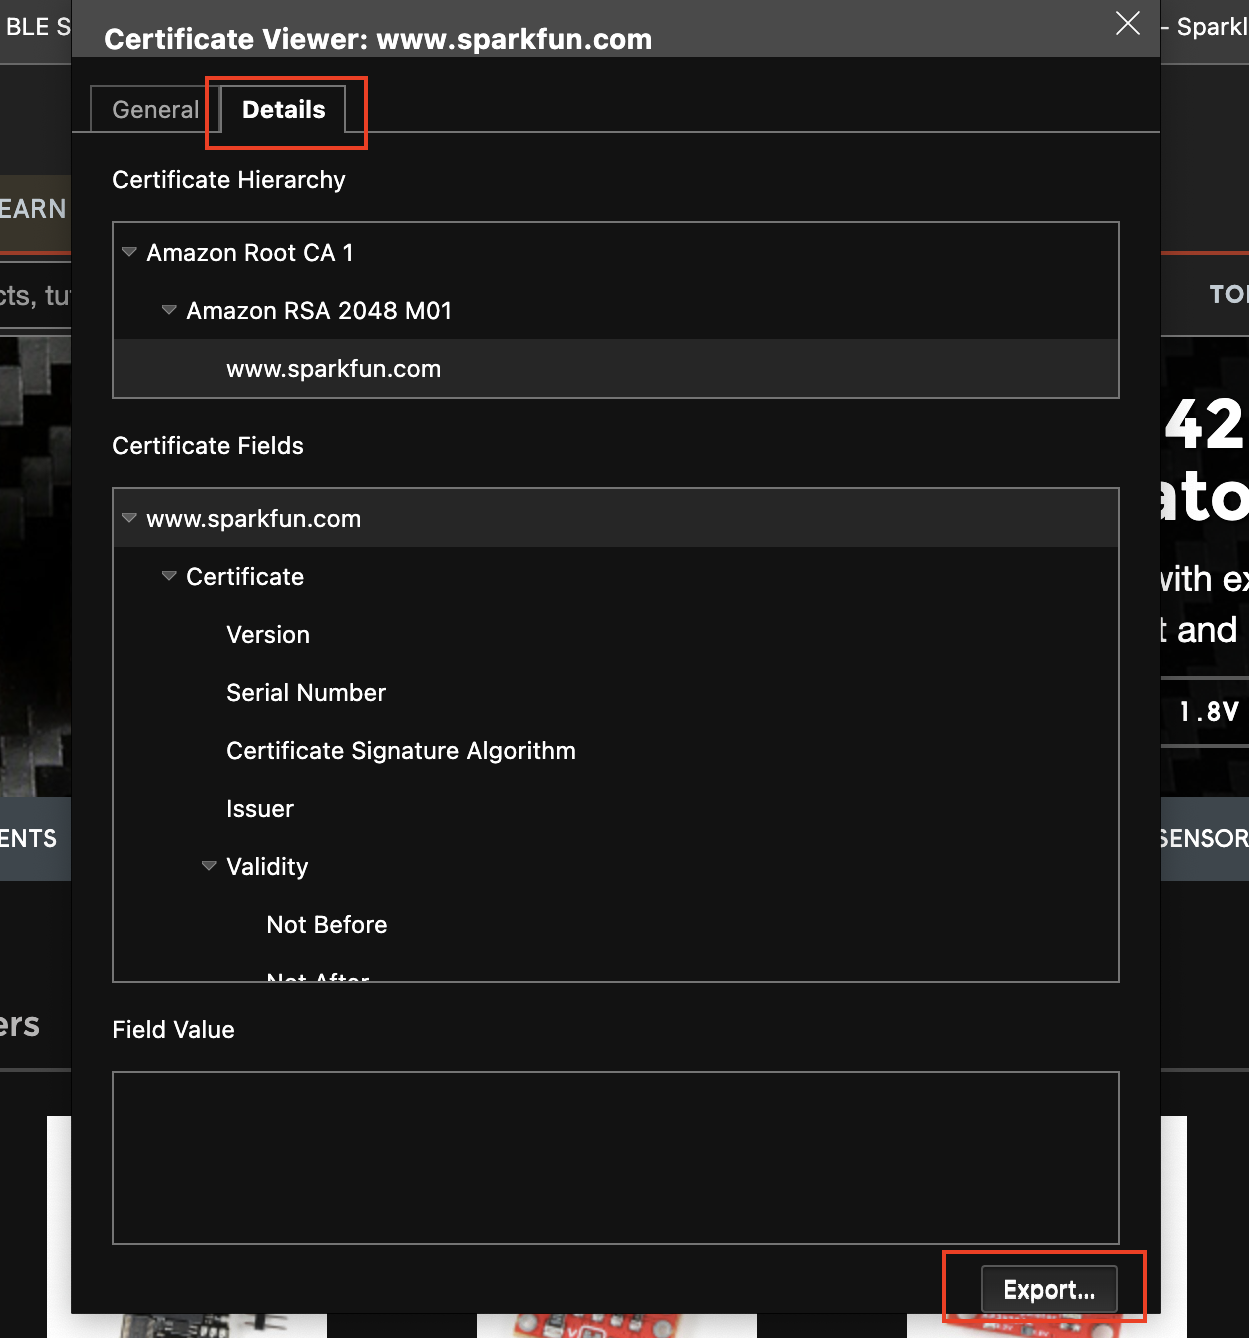
When you select this button, the certificate details dialog is displayed. On this page, select the Details tab, and select the Export... button on the lower right of the dialog. This will save the sites SSL/Security certificate to a location you specify.
Once saved, place this file on the SD card your system/DataLogger is using, and set the filename in the HTTP connection menu or settings JSON file.