Arduino Examples
Now that we've installed the espressif boards package in Arduino, it's time to upload our first sketch to make sure everything is working properly.
Example 1 - Blink
This basic example makes sure the board package installed correctly and the board accepts programming properly to blink the blue IO10 LED on the board every second. Open the example in Arduino by navigating to File > Examples > Basics > 01-Blink.
You will need to define LED_BUILTIN as 10 like so:

Code changes for LED_BUILTIN
Make sure you have the board and port selected like so:
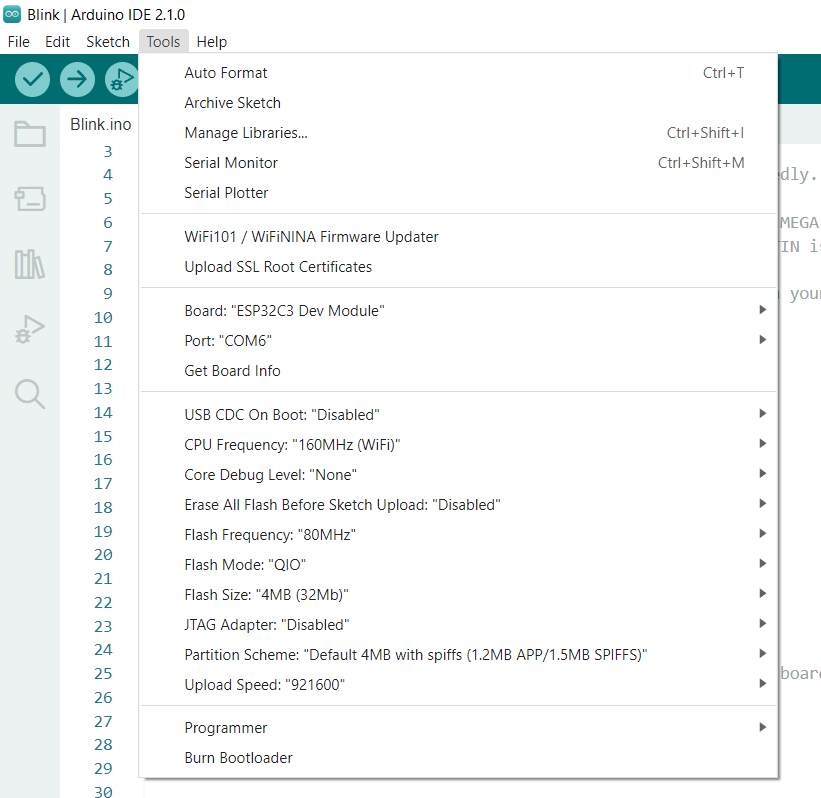
Board and Port selected
Uploading Code
Before uploading, you'll need to put the board into the serial bootloader with the BOOT button. Holding down the BOOT button, while connecting the board to a computer through its USB-C connector or resetting the board will cause the MCU to enter the Firmware Download mode and its serial bootloader. The board will remain in this mode until it power cycles (happens automatically after uploading new firmware) or the RST button is pressed.
- Hold the BOOT button down.
- Reset the MCU.
- While unpowered, connect the board to a computer with through the USB-C connection.
- While powered, press the RST button.
- Release the BOOT button.
- After programming is completed, reboot the MCU.
- Press the RST button.
- Power cycle the board.
Once the board is in the serial bootloader, you can upload code through the Arduino interface. Once your code is uploaded, you will need to hit the RST button to get your sketch running.
blink blink blink