Arduino Examples
Example 1 - Continuous Mode
The first example demonstrates how to initialize the sensor over I2C to measure CO2 data in Continuous Mode and print it out over serial. Open the example by navigating to File > Examples > XENSIV PAS CO2 > continuous-mode. After opening the example, select your Board and Port (in our case, SparkFun RedBoard IoT), and click "Upload". Open the serial terminal with the baud set to 9600 and you should see the same as the screenshot below:
Example 2 - Boost Regulator Early Notification
The second example follows the assembly step in the Hardware Assembly section tying the PAS CO2's INT pin to the boost regulator's EN pin to control power for the regulator during measurements. This is a custom example we wrote so you'll need to get it from the GitHub Repository or by copying the code below into a blank sketch:
Early Measurement Example
 /*
  *  Name: Example01_EarlyMeasurementStartInterrupt
  *
  *  By: SparkFun Electronics, based on code from Infineon
  *
  *  SPDX-License-Identifier: MIT
  *
  *
  *  Description:
  *  This example is based on the early notification example from Infineon's
  *  `arduino-pas-co2-sensor` library. The biggest deviation is to make it
  *  specific to the ESP32 Thing Plus C. This example interfaces the interrupt
  *  pin of the ESP32 Thing Plus C for readout synch and ties the INT pin to the
  *  EN pin on the Qwiic PASCO2V01 board.
  *
  *  Please see examples/XENSIV PAS CO2/early-notification for more details.
  *
  *  Feel like supporting open source hardware?
  *  Buy a board from SparkFun!
  *  SparkFun Photoacoustic Spectroscopy CO2 Sensor - PASCO2V01 (Qwiic) (SEN-22956) https://www.sparkfun.com/products/22956
  *  SparkFun IoT RedBoard - ESP32 Development Board (WRL-19177) https://www.sparkfun.com/products/19177
  *
  *  Hardware connections:
  *  Connect the qwiic connector between the ESP32 Thing Plus C and the Qwiic PASCO2V01.
  *  Need a qwiic cable? Get one here: https://www.sparkfun.com/products/17260
  *  Using a breadboard, connect a jumper between the INT and EN pins, then
  *    connect it to pin 12 on the ESP32 Thing Plus C.
  *
  */

 #include <Arduino.h>
 #include <pas-co2-ino.hpp> // http://librarymanager/All#XENSIV_PAS_CO2

 uint8_t intPin = 13; // ESP32 Thing Plus C pin, change for your hardware.

 #define I2C_FREQ_HZ 400000
 #define PERIODIC_MEAS_INTERVAL_IN_SECONDS 10
 #define EARLY_NOTIFICATION_ENABLED true

 PASCO2Ino myCO2Sensor(&Wire, intPin);

 int16_t co2ppm;
 Error_t err;

 /*
  * ISR will be called when the sensor is about start performing a measurement
  * and when it's completed. This will allow the main loop to read the
  * measurement when one is ready.
  */
 volatile bool measurementReady = false;
 void isr (void *) {
   if (digitalRead(intPin) == LOW)
     measurementReady = true;
   else
     measurementReady = false;
 }

 void setup() {
   Serial.begin(115200);

   // Wait for serial to open.
   while(!Serial) {
     delay(100);
   }

   // Start I2C.
   Wire.begin();
   Wire.setClock(I2C_FREQ_HZ);

   // Initialize the sensor.
   err = myCO2Sensor.begin();
   if(XENSIV_PASCO2_OK != err) {
     Serial.print("Initialization error: ");
     Serial.println(err);
   }

   // Start measurement every 10s, no alarm set, pass in the ISR, and enable early notification.
   err = myCO2Sensor.startMeasure(PERIODIC_MEAS_INTERVAL_IN_SECONDS, 0, isr, EARLY_NOTIFICATION_ENABLED);
   if(XENSIV_PASCO2_OK != err){
     Serial.print("Start measurement error: ");
     Serial.println(err);
   }

   Serial.println("Sensor setup complete and measurement started successfully.");

 }

 void loop() {
   if (measurementReady) {

     // Clear flag
     measurementReady = false;

     Serial.println("Measurement ready.");

     err = myCO2Sensor.getCO2(co2ppm);
     if(XENSIV_PASCO2_OK != err){
       Serial.print("CO2 measure error: ");
       Serial.println(err);
     }

     Serial.print("CO2 PPM value: ");
     Serial.println(co2ppm);
   }

 }
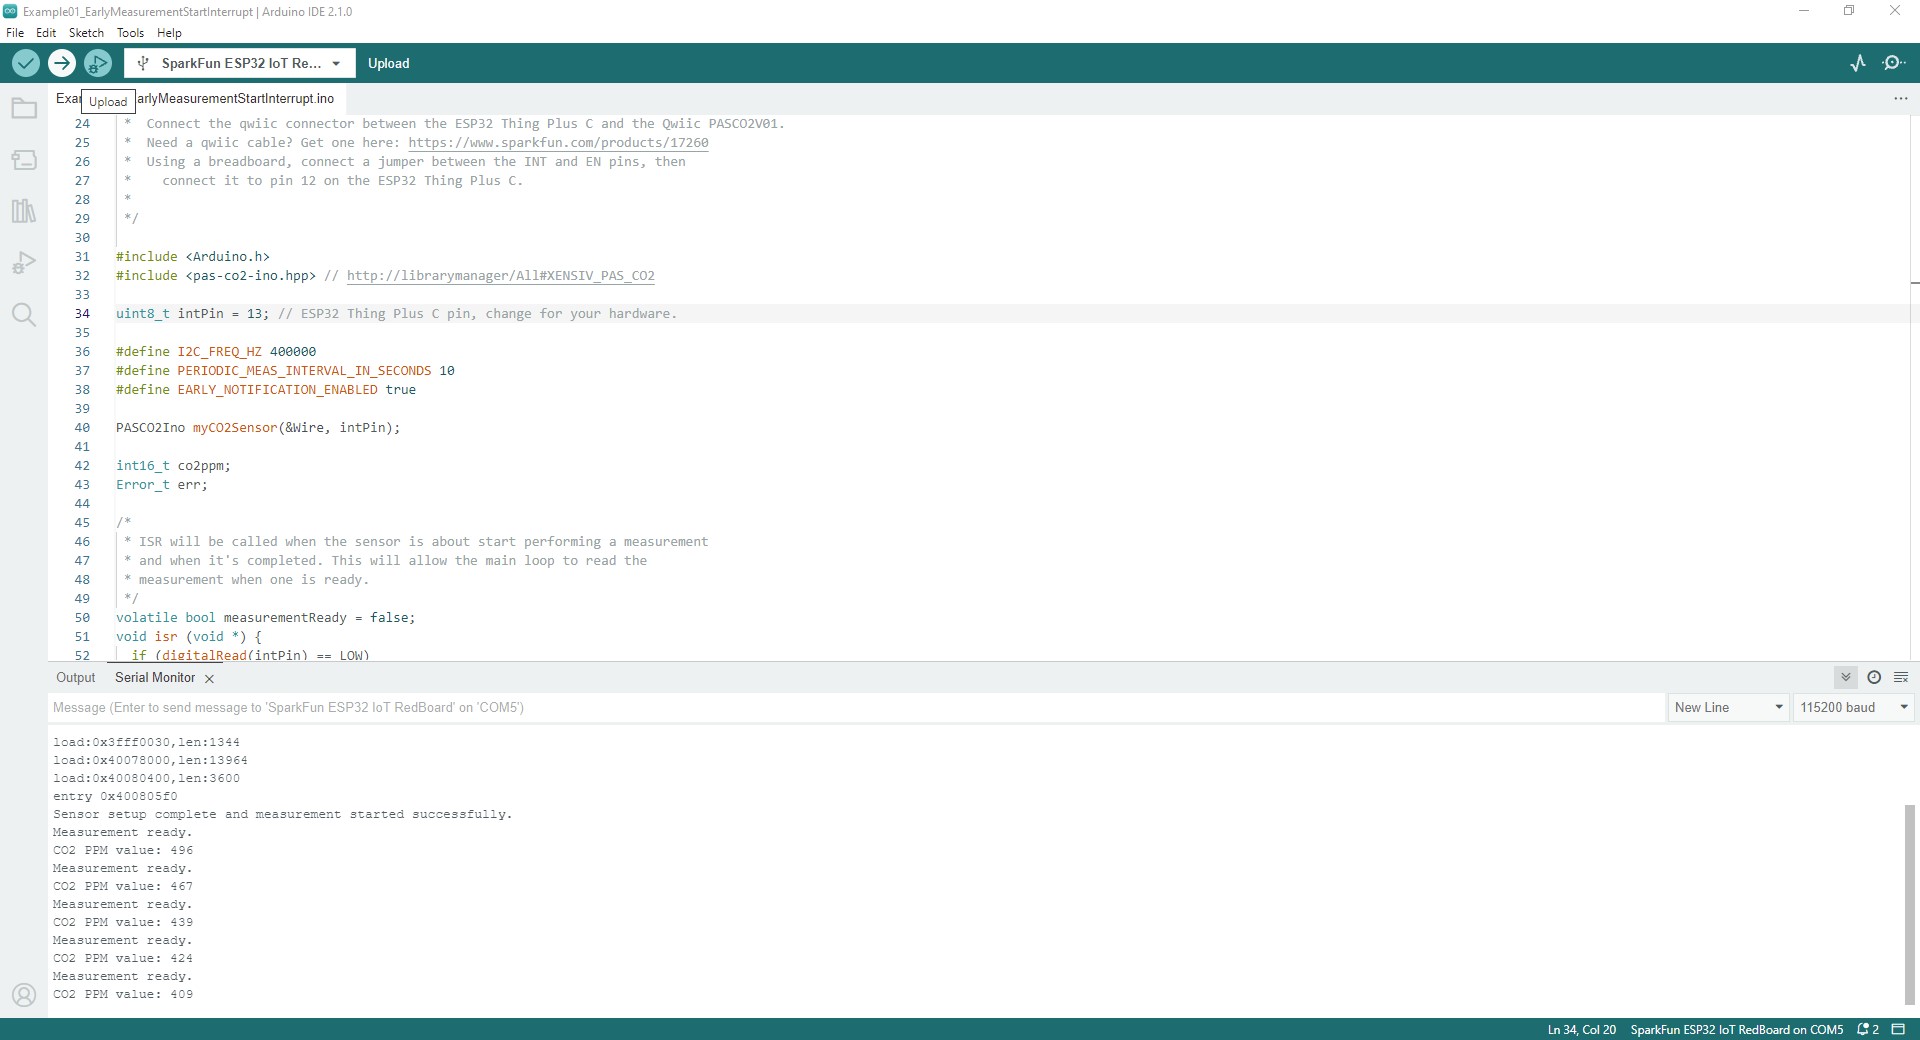
Select your board and port and upload the example. After the uploade completes, open the serial terminal with the baud set to 115200 and you should see a printout similar to the one below with CO2 measurements printing every ten seconds: