Enabling L5 Band and Overriding Health Status
By default, the L5 band is disabled on the NEO-F10N. To take advantage of the L5 band, you will need to:
- enable the L5 band
- override the health status check
- save the settings into memory
- perform a software reset
Configuring with the Arduino Library
Arduino
Make sure that you are using the SparkFun u-blox GNSS Arduino Library v3.1.1+ in order to be able to take advantage of the following functions.
To do this using the Arduino Library, users can add myGNSS.setVal8(UBLOX_CFG_SIGNAL_GPS_L5_ENA, 1), myGNSS.setGPSL5HealthOverride(true), and myGNSS.softwareResetGNSSOnly() in the setup() function after connecting an Arduino to the NEO-F10N's hardware UART. You will notice this at the end of the setup() function under the Example1_NAV_SIG.ino example.
  myGNSS.setUART1Output(COM_TYPE_UBX); //Set the UART1 port to output UBX only (turn off NMEA noise)
  myGNSS.saveConfigSelective(VAL_CFG_SUBSEC_IOPORT); //Save (only) the communications port settings to flash and BBR

  myGNSS.setMeasurementRate(5000); //Produce one solution every five seconds (NAV SIG produces a _lot_ of data!)

  myGNSS.setVal8(UBLOX_CFG_SIGNAL_GPS_L5_ENA, 1); // Make sure the GPS L5 band is enabled (needed on the NEO-F9P)

  myGNSS.setGPSL5HealthOverride(true); // Mark L5 signals as healthy - store in RAM and BBR

  myGNSS.setLNAMode(SFE_UBLOX_LNA_MODE_NORMAL); // Set the LNA gain to normal (full). Other options: LOWGAIN, BYPASS

  myGNSS.softwareResetGNSSOnly(); // Restart the GNSS to apply the L5 health override

  myGNSS.setAutoNAVSIGcallbackPtr(&newSIG); // Enable automatic NAV SIG messages with callback to newSIG
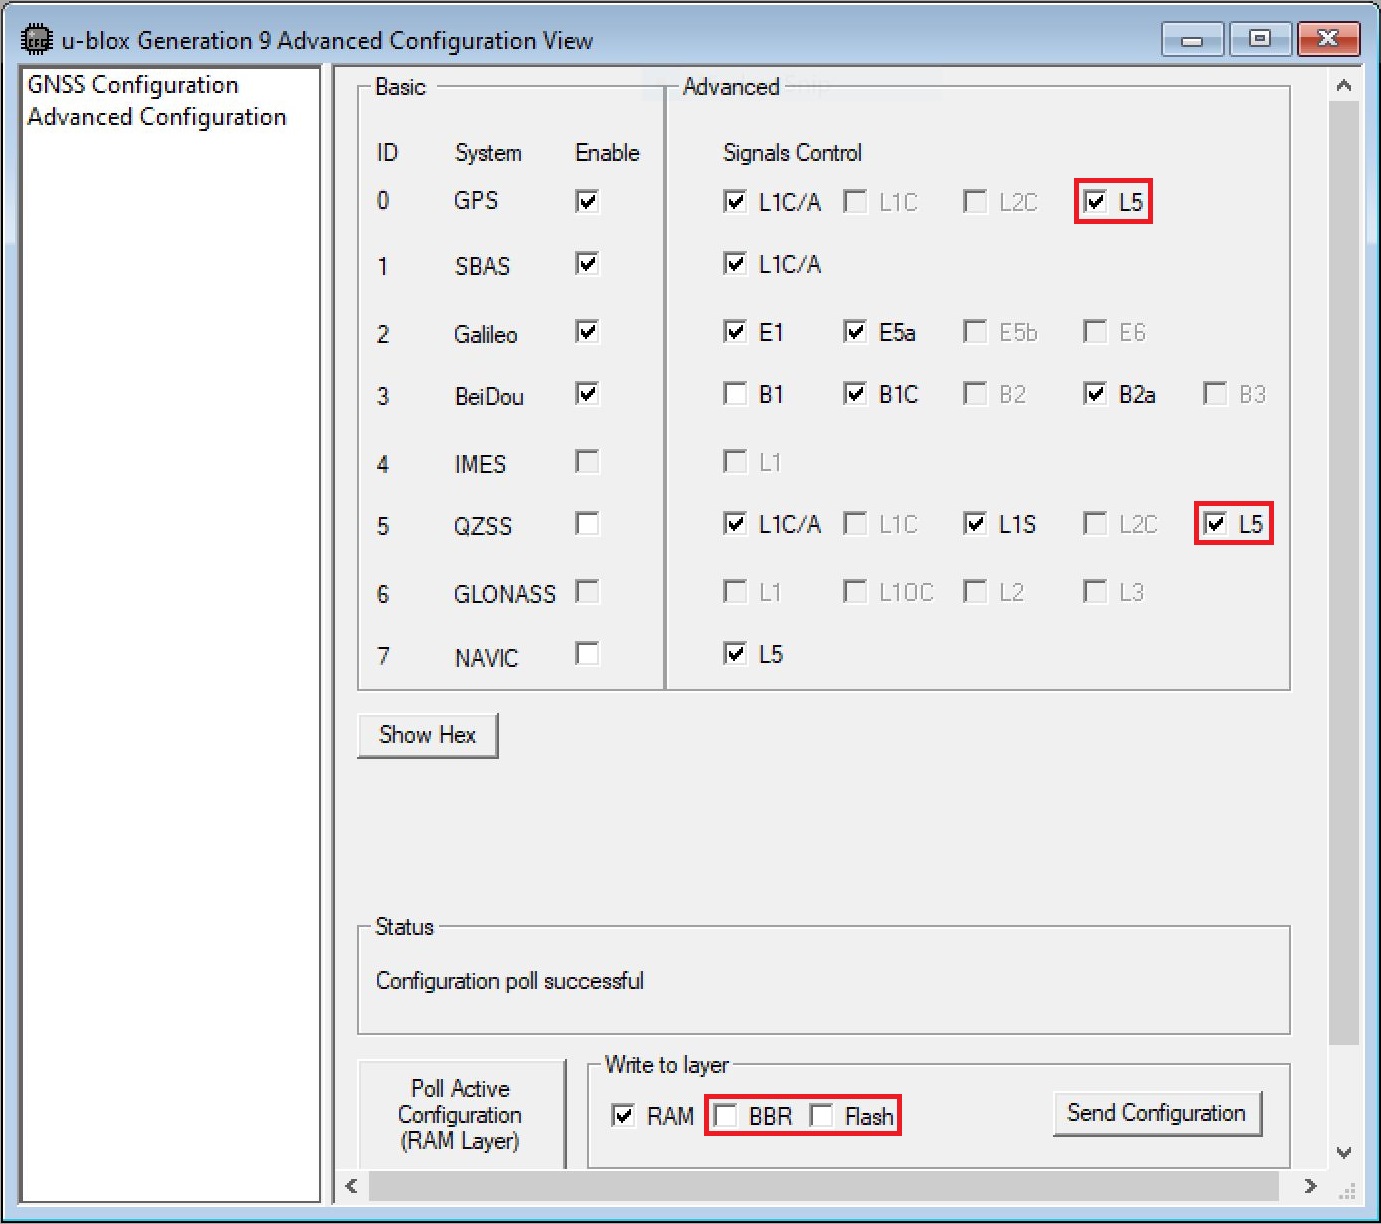
Configuring with U-Center
Users can also enable the L5 band via U-Center v22.07. Connect a USB cable between the NEO-F10N breakout board and your computer. Then open the software, connect to the COM port that the board enumerated to, and head to View > Generation 9 Configuration View. Once open, select the check box for GPS's L5. Select the check box for BBR and Flash. When ready, hit the Send Configuration button.
 |
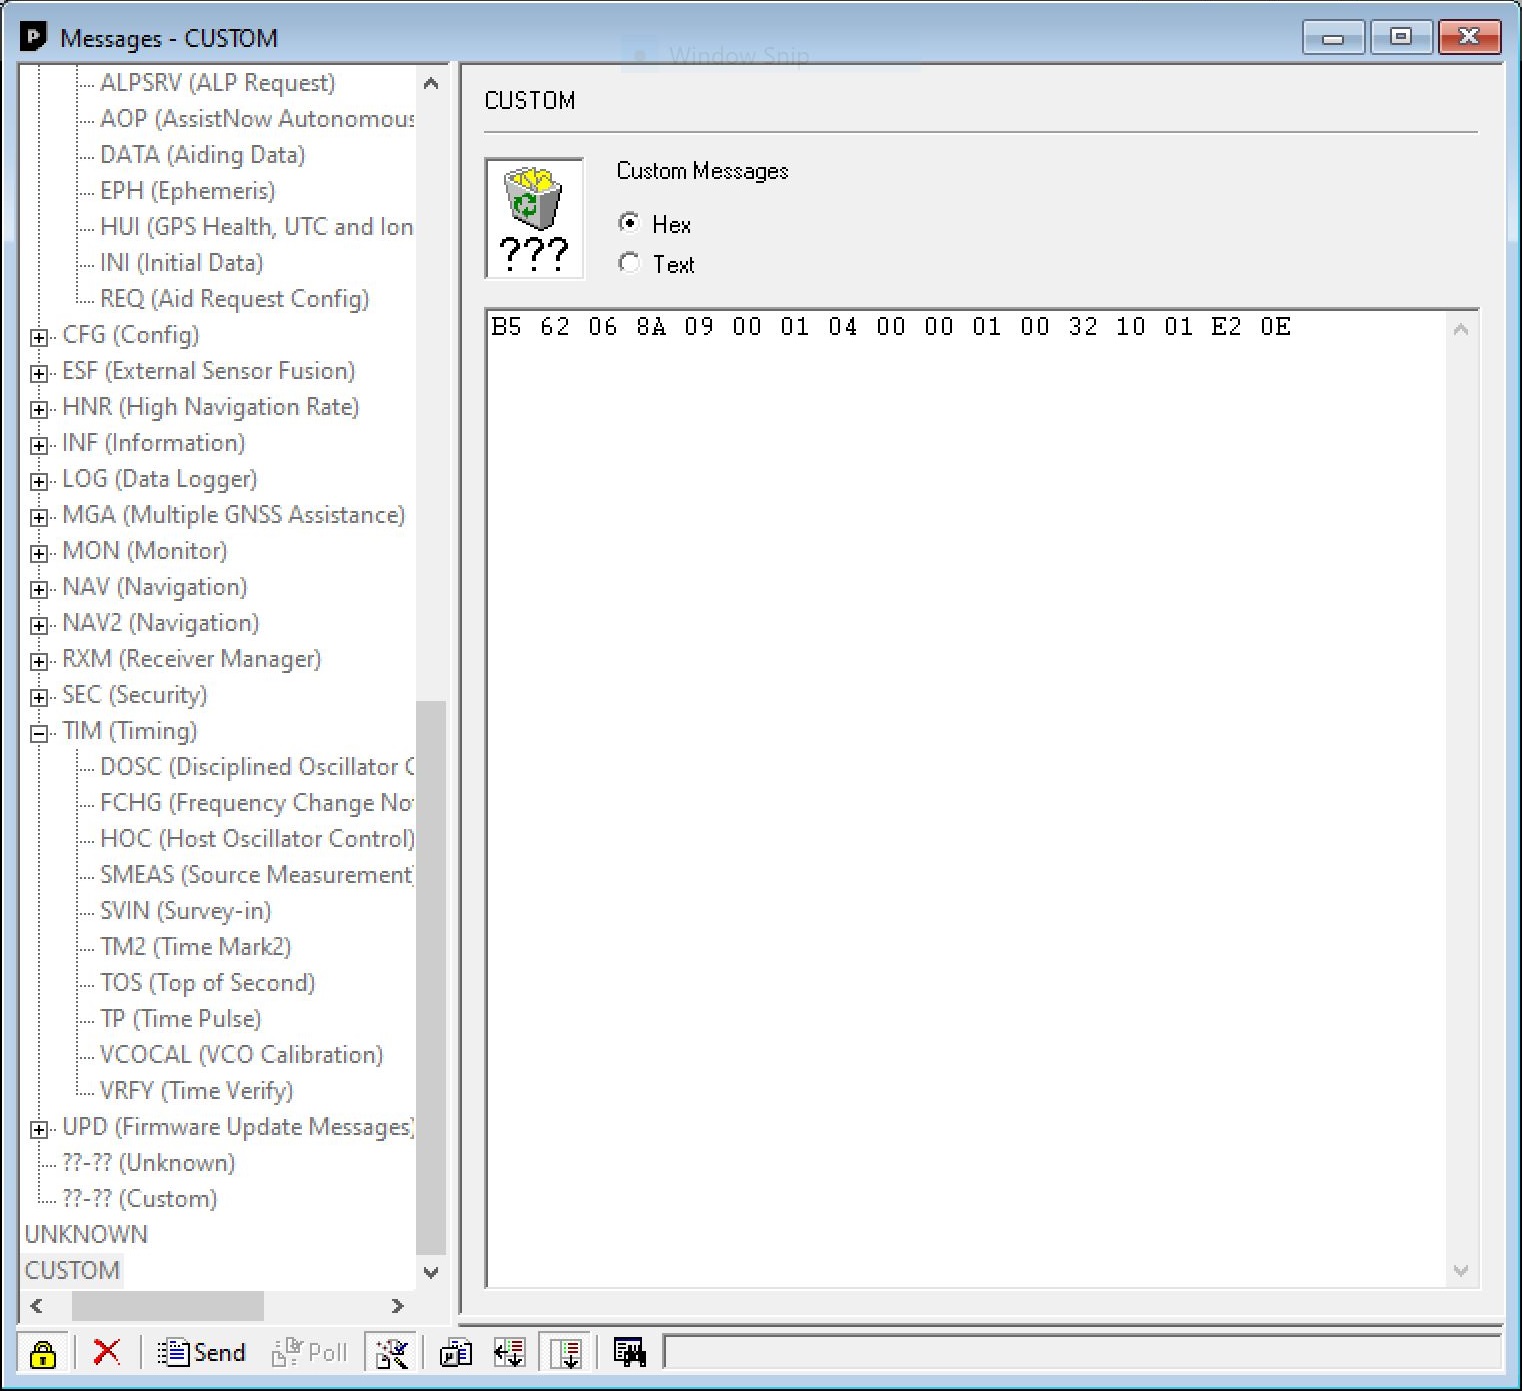
To override the health status by heading to View > Messages View > CUSTOM. With the Custom Messages set for Hex, paste the following to configure the settings in BBR and hit the send button:
 |
Then send the following to configure the settings in FLASH and hit the send button:
 |
Tip
To confirm that the above UBX messages were sent successfully, check the UBX-ACK-ACK messages after sending the message. For users that want to revert to the default behavior, make sure to check the NEO-F10N Integration Manual under "2.1.4 GPS L5 signal health status configuration" section page 10 under Table 5: UBX binary strings to revert the GPS L5 signal health status monitoring to default.
Ensure that the configuration is saved in BBR and Flash using the UBX-CFG-VALSET. Then send a UBX-CFG-RST message with resetMode 0x01 to apply the configuration stored in the BBR and flash layers.
The "Satellite Level History" window should update and include the L5 bands if it is available.
 |