Configure with WiFi
Surveyor: ![]() / Express:
/ Express: ![]() / Express Plus:
/ Express Plus: ![]() / Facet:
/ Facet: ![]() / Facet L-Band:
/ Facet L-Band: ![]() / Reference Station:
/ Reference Station: ![]()
Configuration page via WiFi
Starting with firmware v1.7, WiFi-based configuration is supported. For more information about updating the firmware on your device, please see Updating RTK Firmware.
The RTK device will present a webpage that is viewable from either a desktop/laptop with WiFi or a cell phone. For advanced configurations, a desktop is recommended. For quick in-field changes, a cell phone works great.
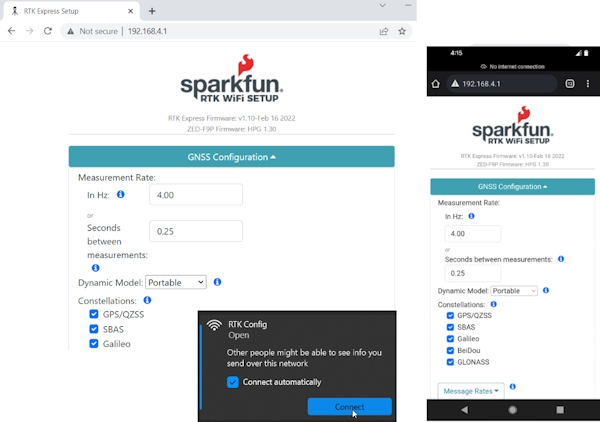
Desktop vs Phone display size configuration
RTK Express / Express Plus / Facet
To get into WiFi configuration follow these steps:
- Power on the RTK Express, Express Plus, or Facet.
- Once the device has started press the Setup button repeatedly until the Config menu is highlighted.
- The display will blink a WiFi icon indicating it is waiting for incoming connections.
- Connect to WiFi network named ‘RTK Config’.
- Open a browser (Chrome is preferred) and type 192.168.4.1 into the address bar.
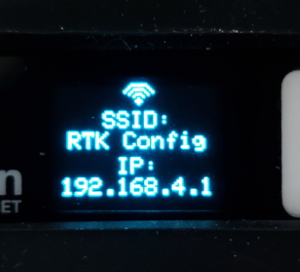
Device ready for cellphone configuration
RTK Surveyor
To get into WiFi configuration follow these steps:
- Power the RTK Surveyor on in Rover mode.
- Once the device has started the Bluetooth status LED should be blinking at 1Hz. Now toggle the SETUP switch from Base and back to Rover within 1 second. If successful, the Bluetooth status LED will begin fading in/out. The device is now broadcasting as a WiFi access point.
- Connect to WiFi network named ‘RTK Config’.
- Open a browser (Chrome is preferred) and type 192.168.4.1 into the address bar.
Connecting to WiFi Network
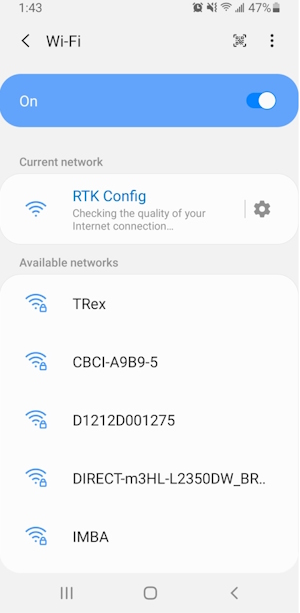
The WiFi network RTK Config as seen from a cellphone
Note: Upon connecting, your phone may warn you that this WiFi network has no internet. That's ok. Stay connected to the network and open a browser. If you still have problems turn off Mobile Data so that the phone does not default to cellular for internet connectivity and instead connects to the RTK Device.
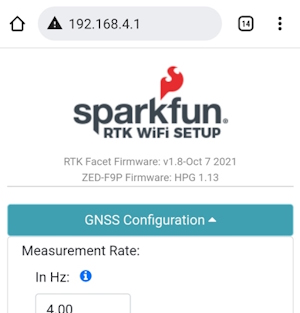
Connected to the RTK WiFi Setup Page
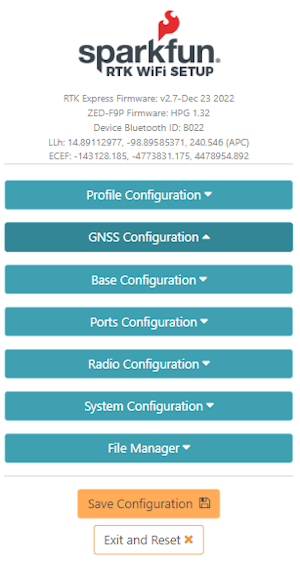
Clicking on the category 'carrot' will open or close that section. Clicking on an ‘i’ will give you a brief description of the options within that section.
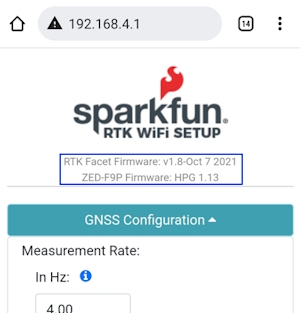
This unit has firmware version 1.8 and a ZED-F9P receiver
Please note that the firmware for the RTK device and the firmware for the ZED receiver is shown at the top of the page. This can be helpful when troubleshooting or requesting new features.
File Manager
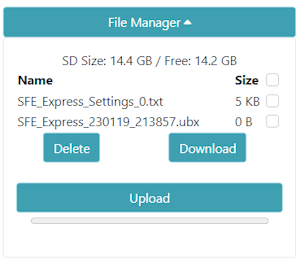
Added in v3.0 firmware, a file manager is shown if an SD card is detected. This is a handy way to download files to a local device (cell phone or laptop) as well as delete any unneeded files. The SD size and free space are shown. And files may be uploaded to the SD card if needed.
Additionally, clicking on the top checkbox will select all files for easy removal of a large number of files.
Saving and Exit
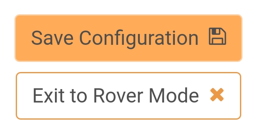
Once settings are input, please press ‘Save Configuration’. This will validate any settings, show any errors that need adjustment, and send the settings to the unit. The page will remain active until the user presses ‘Exit to Rover Mode’ at which point the unit will exit WiFi configuration and return to standard Rover mode.